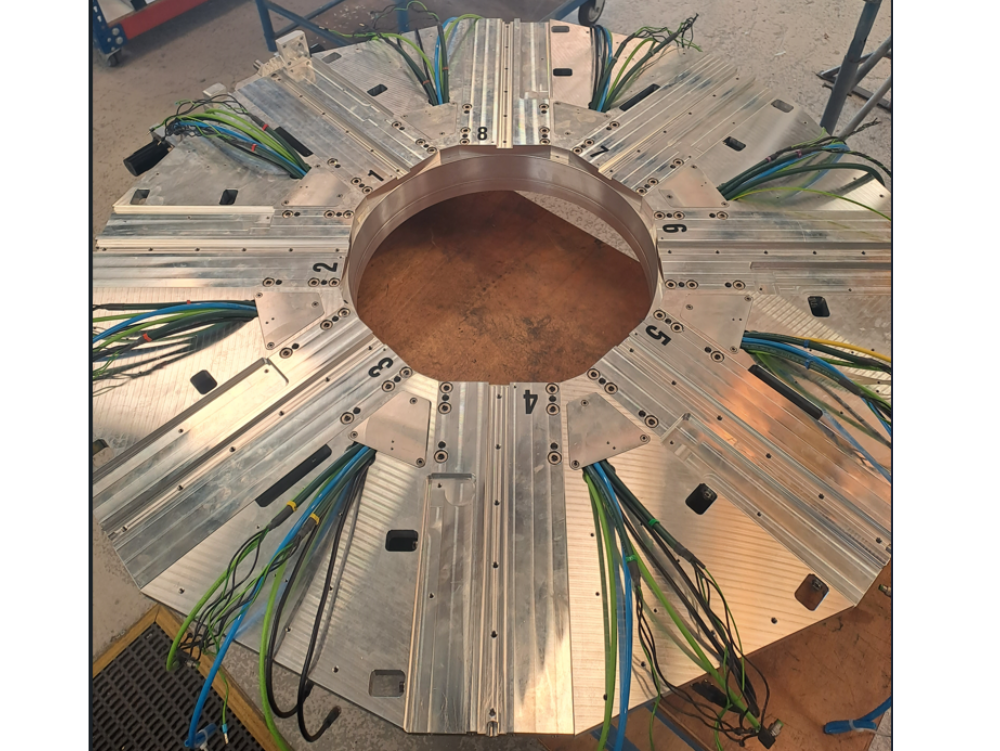
correct routing of cables ready for connection boxes

Difficulté
Moyen
Durée
1 heure(s)
Introduction
Tools required
Étape 1 - Wiring loom positioning Ethercat control
Cables must be adjusted between each spindle to ensure the cable lengths are correct .
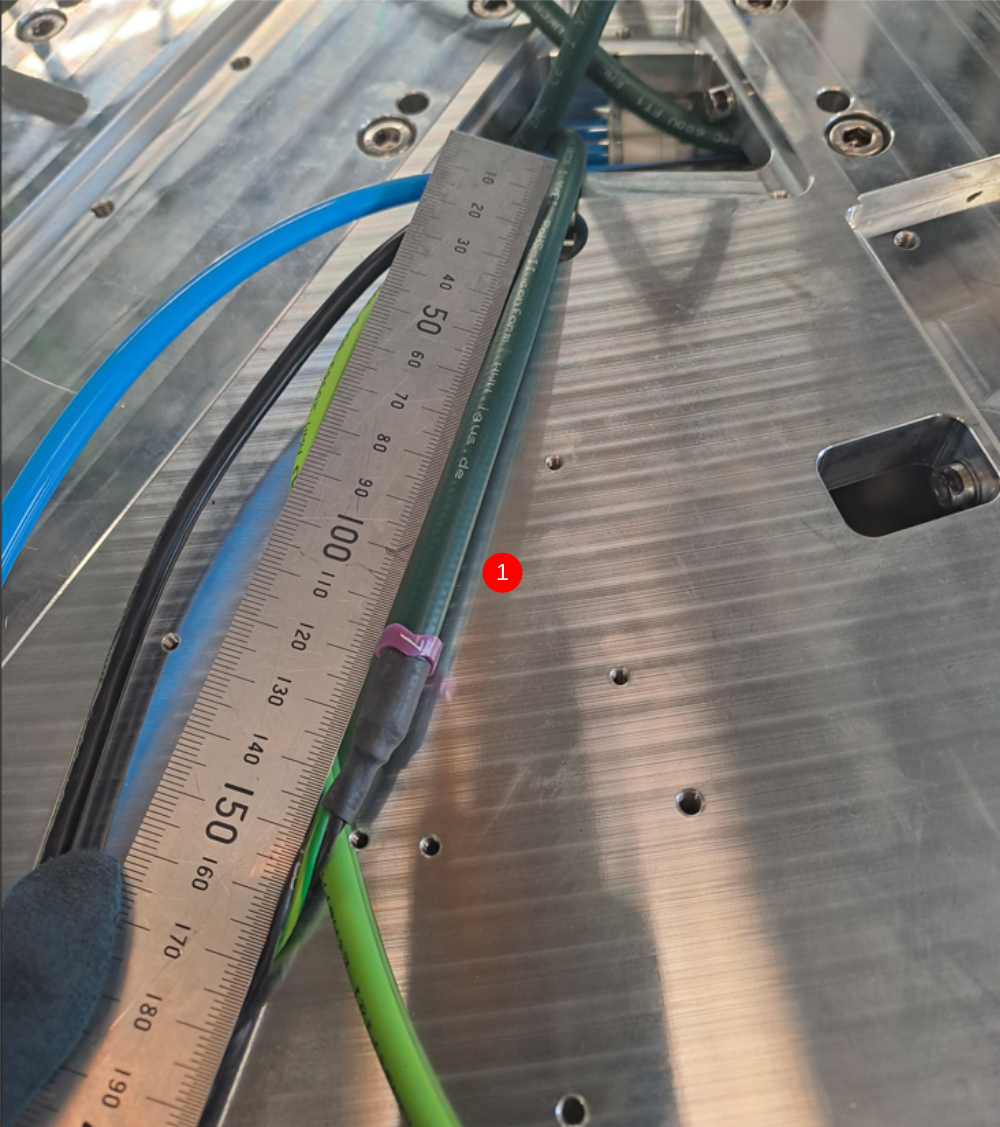
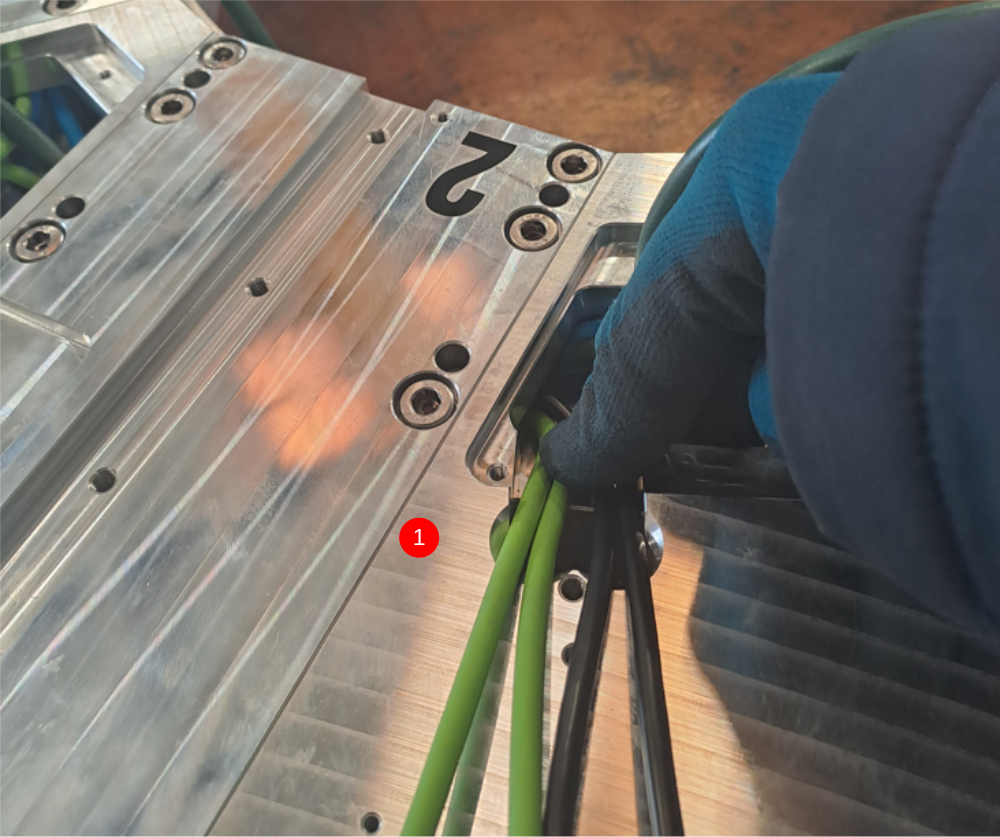
1 Start at cable point between 6 and 5 . Start with the light green ethercat cable with the right angle plug. Adjust so that 200mm is past the end of the spindle plate . See picture for detail.
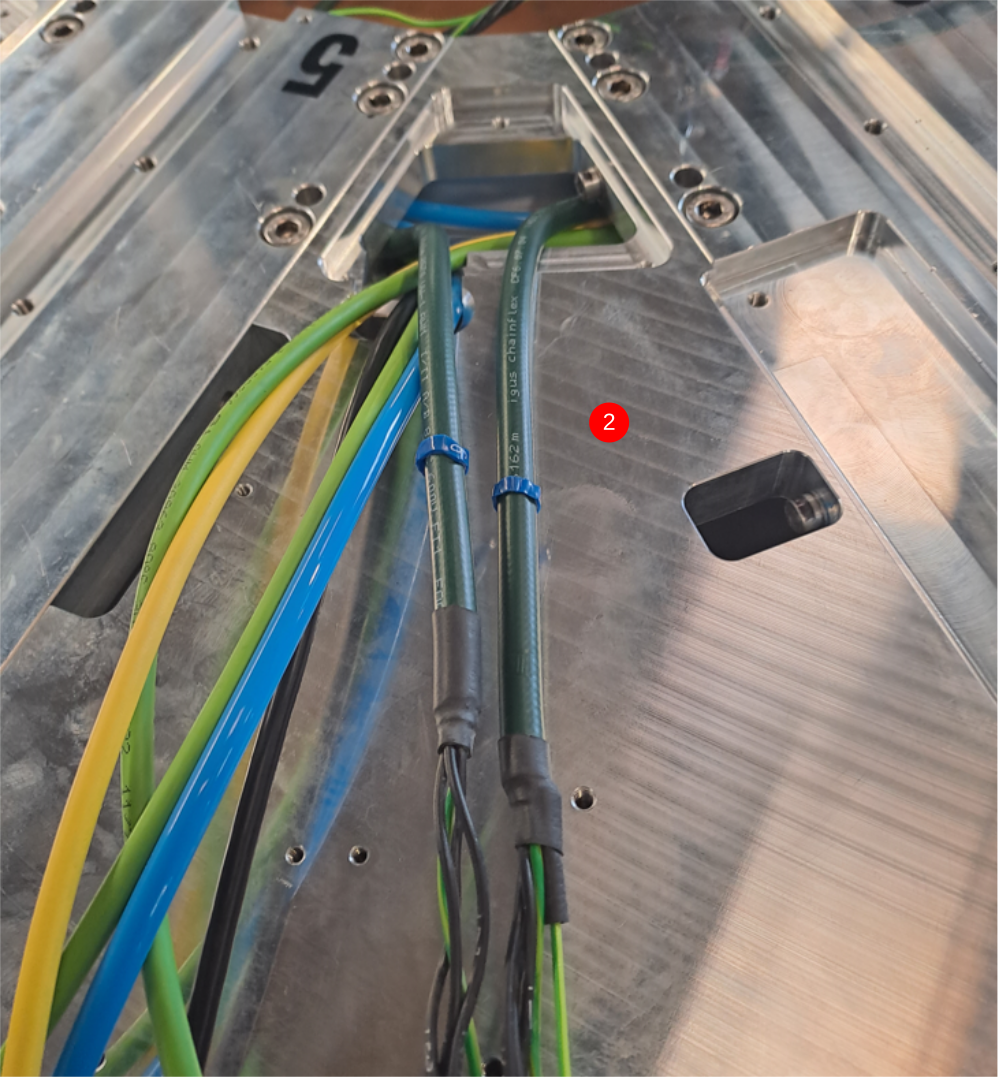
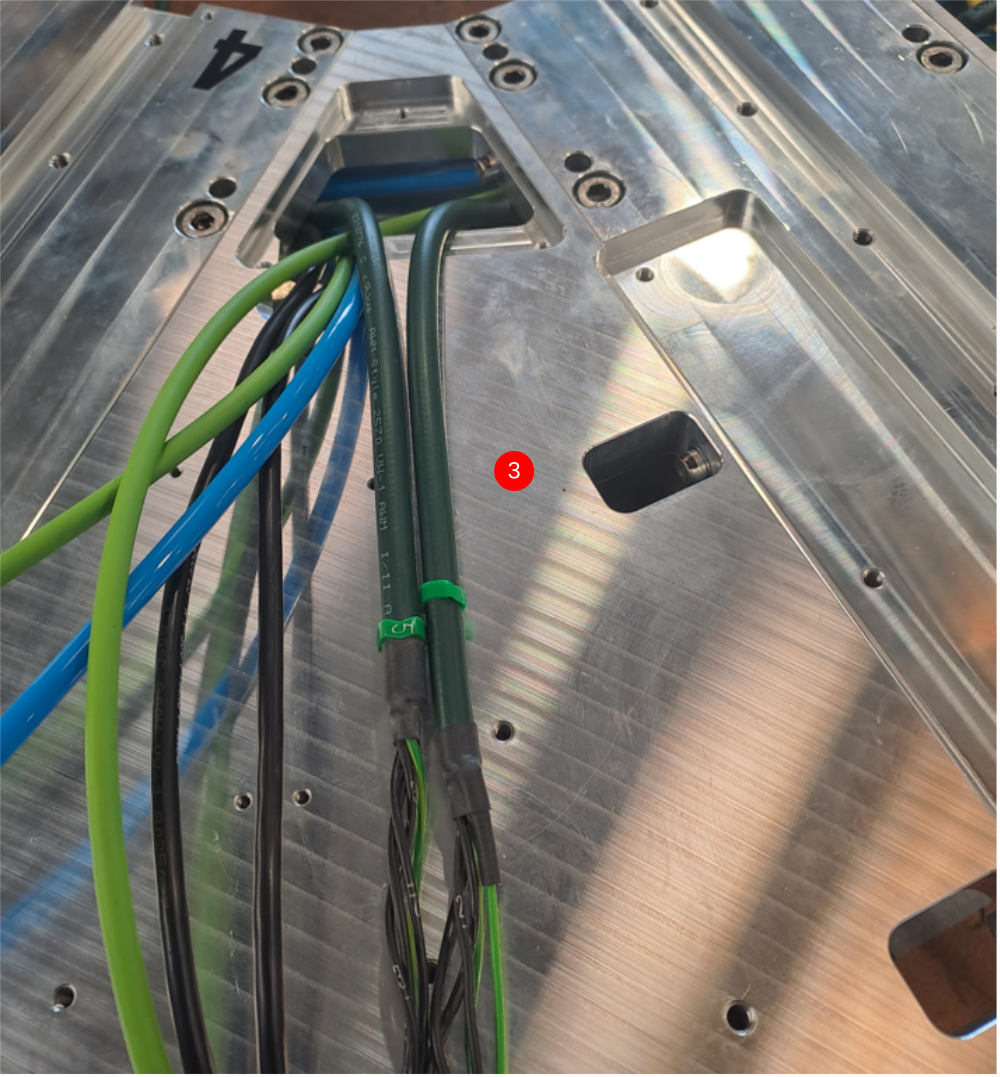
2 Move to the next spindle connection between 5 and 4 and adjust the new right angled ethercat cable to match the length of the previous adjusted cable
3 Repeat this process working your way around the spindles to set all ethercat cables


Étape 2 - Wiring loom positioning Ethercat power
1 Start at cable point between 6 and 5 . Adjust black power cable to 200mm from edge of plate. See picture for details
2 Move to the next spindle connection between 5 and 4 and adjust the new black power cable to match the length of the previous adjusted cable
3 Repeat this process working your way around the spindles to set all power cables


Étape 3 - Wiring loom positioning 300hz power
1 Start at connection point with 3 power cables exiting . Set one cable as shown to 150mm
2 Use the previous set cable to adjust the next connection box cable to the same length
3 Repeat this until all power cables have been adjusted to the correct length
Étape 4 - Fit Inspection covers
D0007788 inspection covers need fitting to captivate cables.
It is vital the cables are laid out in the correct way for spindle box routing later on.
1 Lay the green ethercat cables to the left , and black power cables to the right as shown
2 Next, lay the two 300 hz cables on top with the blue air pipe between
3 Now fit inspection cover using m4 x 12 socket caps
4 Check that inspection cover hasn't trapped cables by checking to see if the loom of cables is able to move forward and back in the direction shown


Draft
 Français
 English
 Deutsch
 Español
 Italiano
 Português