Installation of rotary energy chain and back plates


Difficulté
Moyen
Durée
2 heure(s)
Introduction
Tools Required
Étape 1 - Adhesive
All bolts must have Loctite 243 adhesive applied unless otherwise stated.
All bolts must be marked with pen once completed to indicate adhesive and correct tension has been applied

Étape 2 - Prepare 1st guide Section
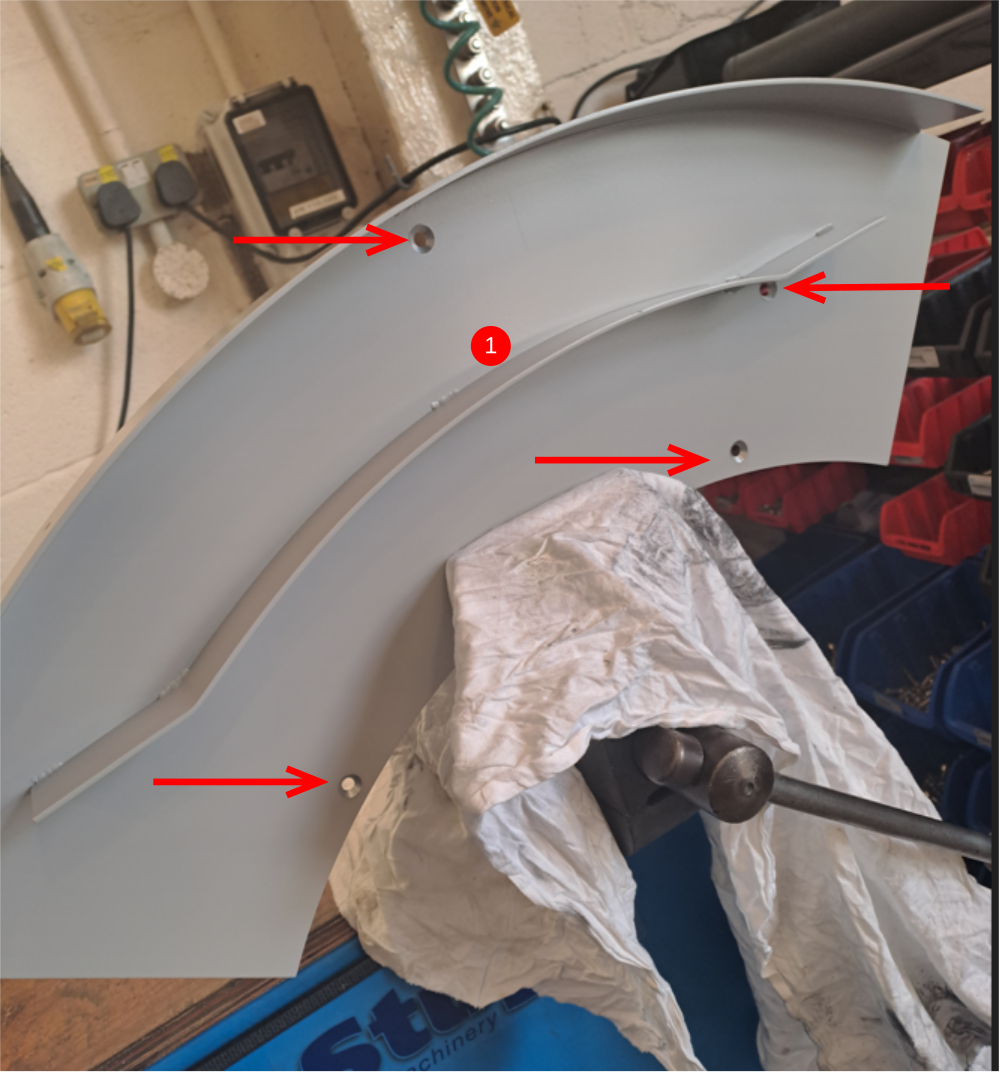
D0003985 needs preparing before fitting
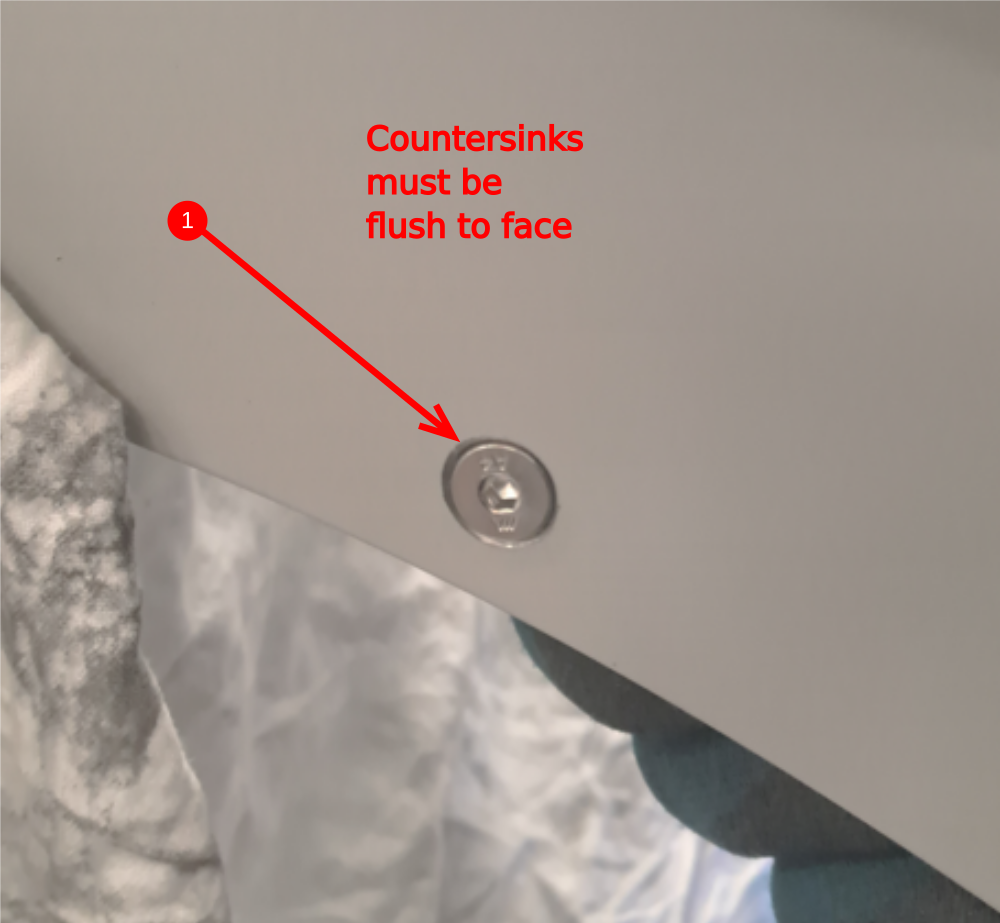
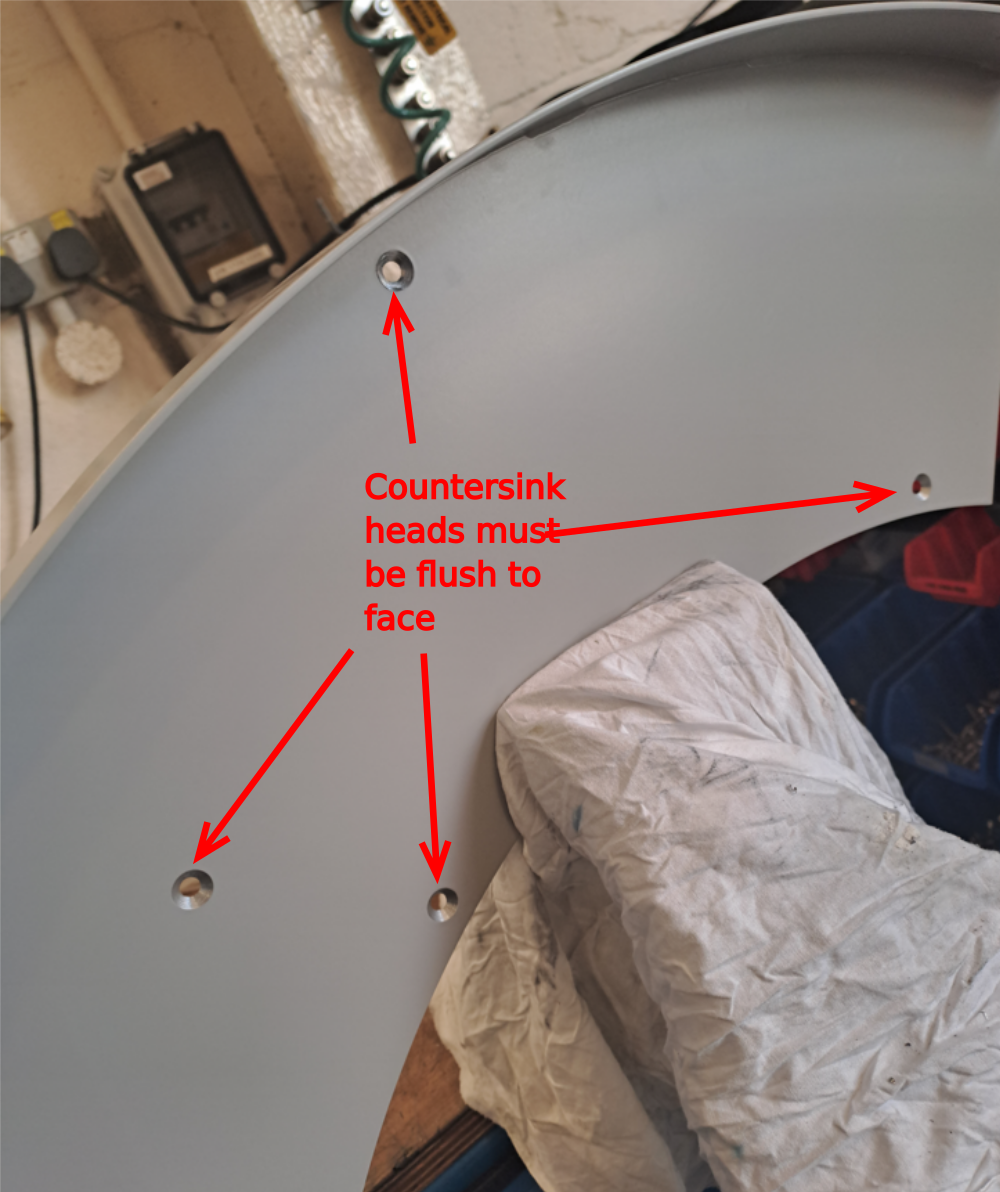
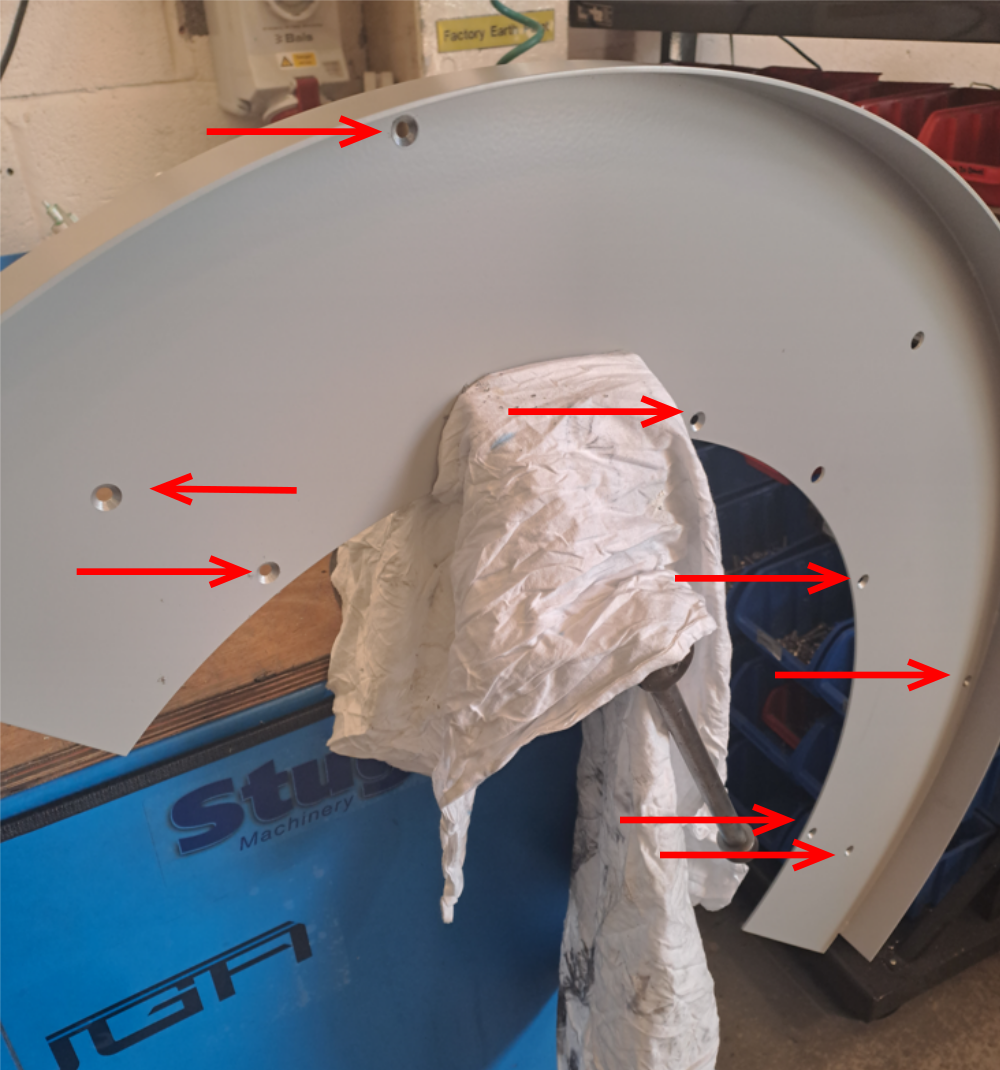
1 All back plates for the rotary trunking need to be checked for correct countersink depth. Any protrusion from main face will case energy chain failure
Check and if proud, use a countersink to increase depth
Étape 3 - Fit Energy chain mounting bracket
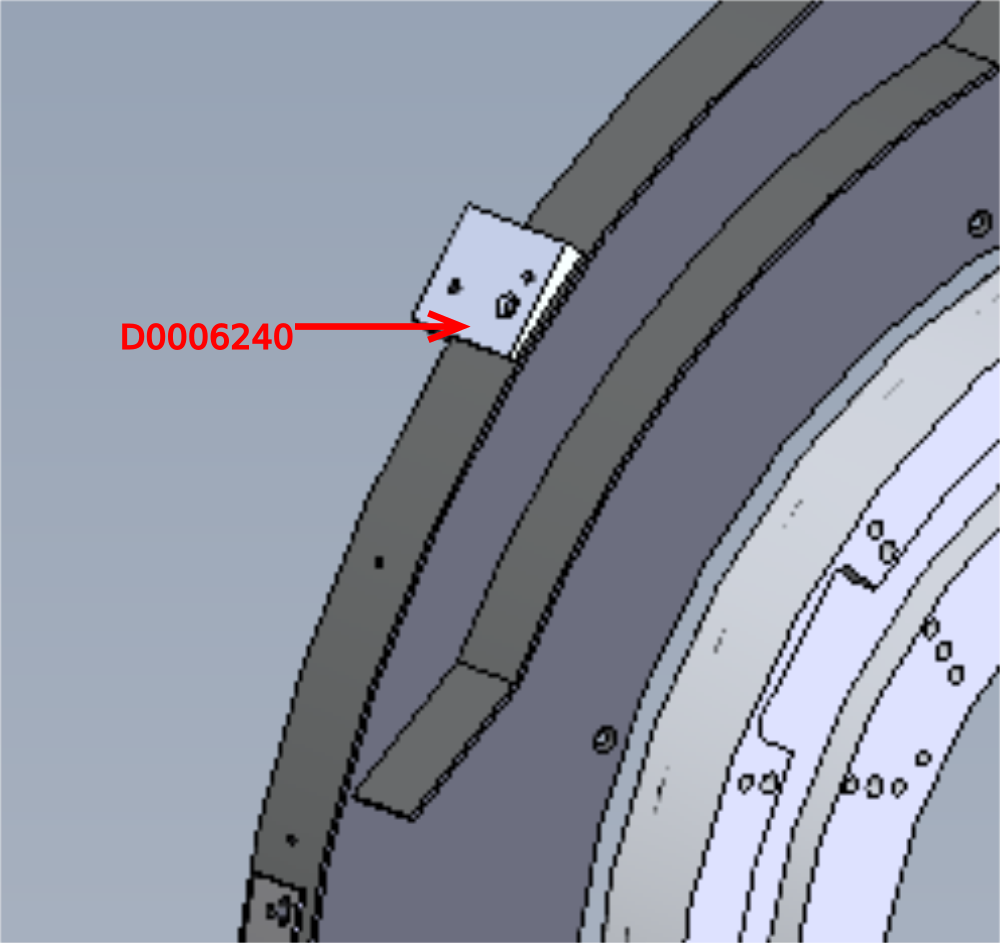
Mounting bracket D0006240 needs fitting to D0003985
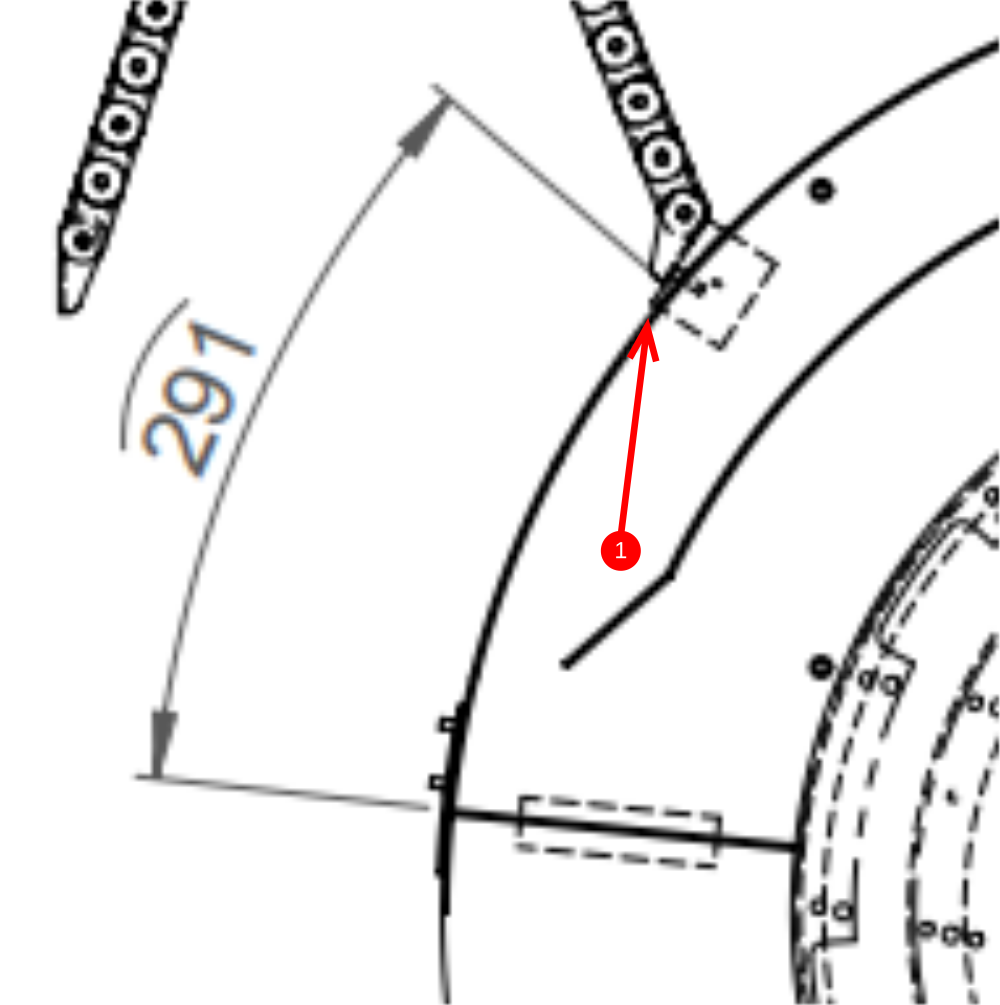
1 Measure position of bracket onto circular guard (291mm)
2 Use a pointed m5 grubscrew screwed into bracket hole indicated, hold in position on guard, and use hide hammer to transfer position mark
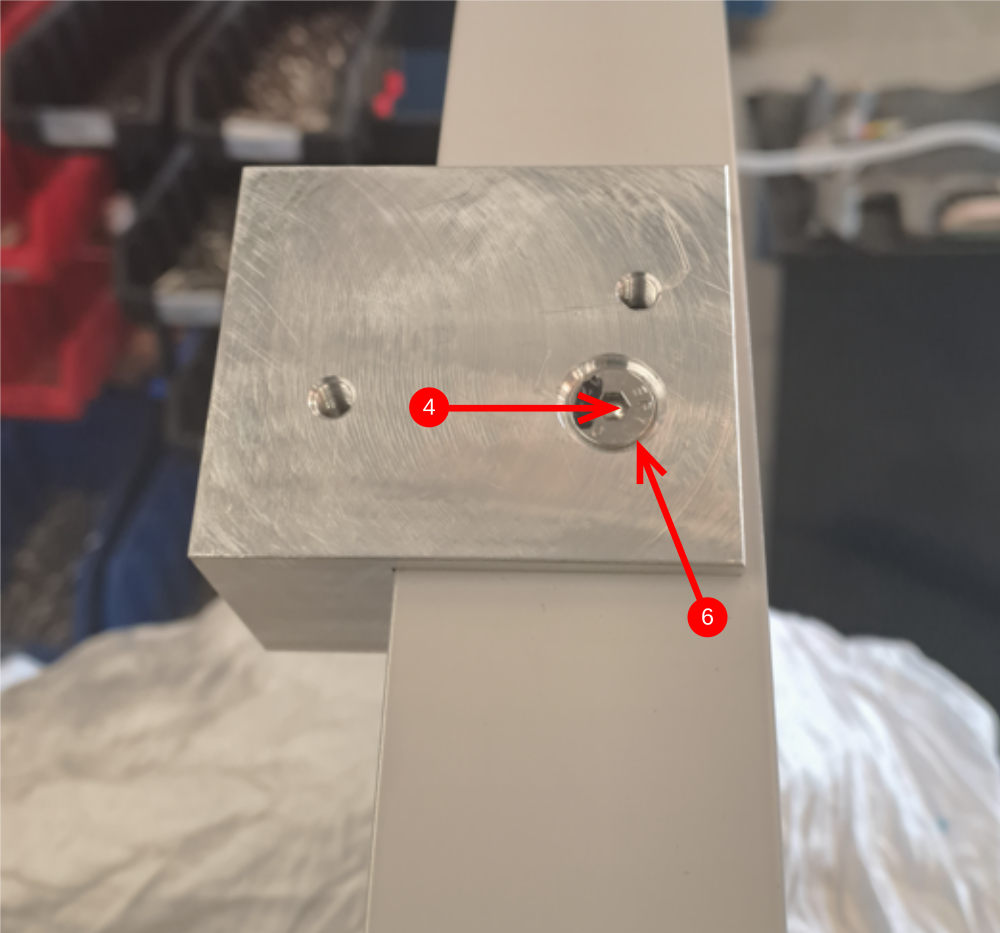
3 Drill to 6mm and fix bracket with m5x 16 cap head and large m5 washer
4 Drill 6mm through indicated hole
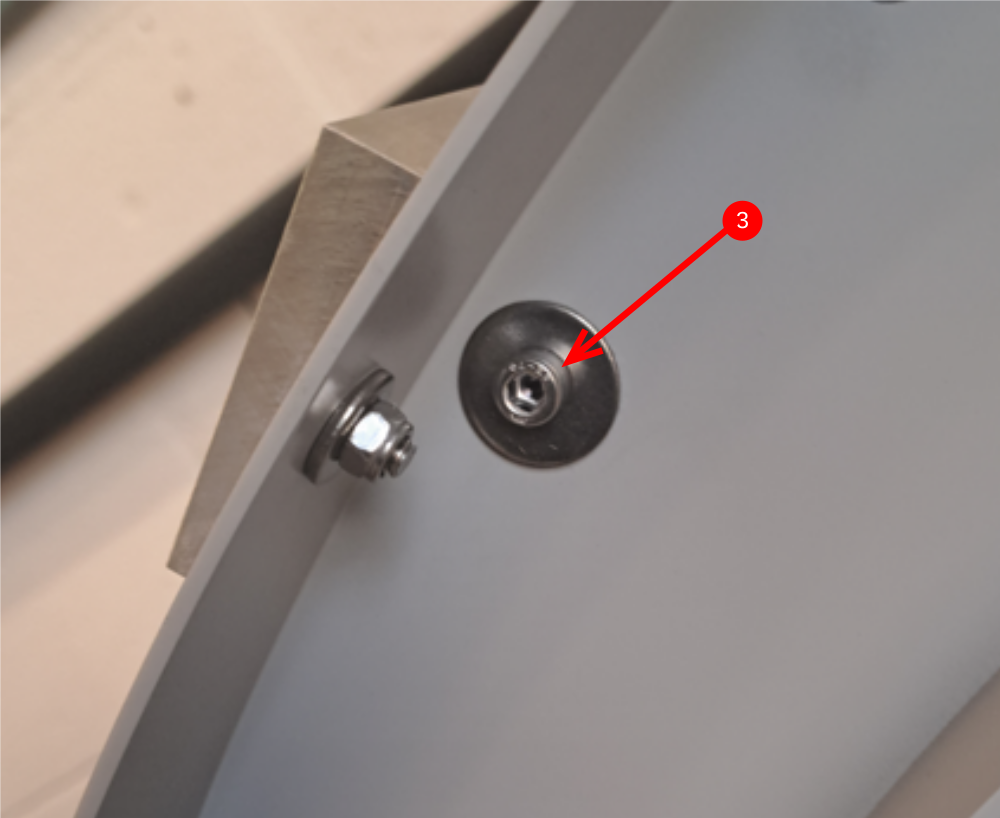
5 Fix with M5 x 16 countersink, large m5 washer and nyloc nut
6 This countersink bolt head must be flush to block. If proud, use a countersink bit to increase depth


Étape 4 - Prepare second section
Check countersink holes in D0003930 are to the correct depth . Rework with countersink if fasteners sit proud.
Étape 5 - Prepare 3rd section
Check countersink holes in D0007817 are to the correct depth . Rework with countersink if fasteners sit proud.
Étape 6 - Fit D0007817
Mount D0007817 to main rotary base and fix with m5 x 10 countersink bolts

Étape 7 - Fit D0003930
Mount D0003930 to main rotary base and fix with m5 x 10 countersink bolts

Étape 8 - Fit D0003985
Mount D0003985 to main rotary base and fix with m5 x 10 countersink bolts

Étape 9 -
Draft
 Français
 English
 Deutsch
 Español
 Italiano
 Português