Assembly instructions for installation of main rotary drive ring
Sommaire
- 1 Introduction
- 2 Étape 1 - Quality Check Drive ring D0006423-2mod
- 3 Étape 2 - Prepare Faceplate For assembly
- 4 Étape 3 - Inspect Journal washers D0006503
- 5 Étape 4 - Inspect Journals
- 6 Étape 5 - Check drive ring wipers
- 7 Étape 6 - Position face plate
- 8 Étape 7 - Mount Journals
- 9 Étape 8 - Adjust Eccentric Journals to widest Position and position ring
- 10 Étape 9 - WARNING
- 11 It is very easy to deform the journals and hepco ring with to much tension being applied to the journals. It is vital this doesn't happen as it can render parts useless for application.
- 12 Tension should be applied in small increments, and a D.T.I should be used on tension setting to monitor journal movement when adjusting and tightening.
Introduction
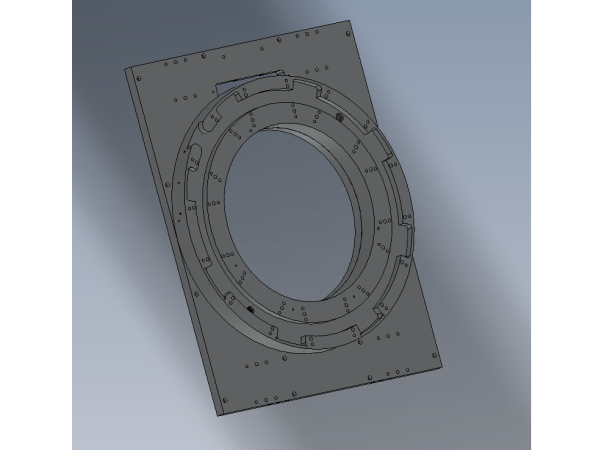
Detailed steps to correctly install rotary gear and journals
Checks for correct installation of oil feed system
Tolerance limits and requirements
Tools Required
Standard hex key set
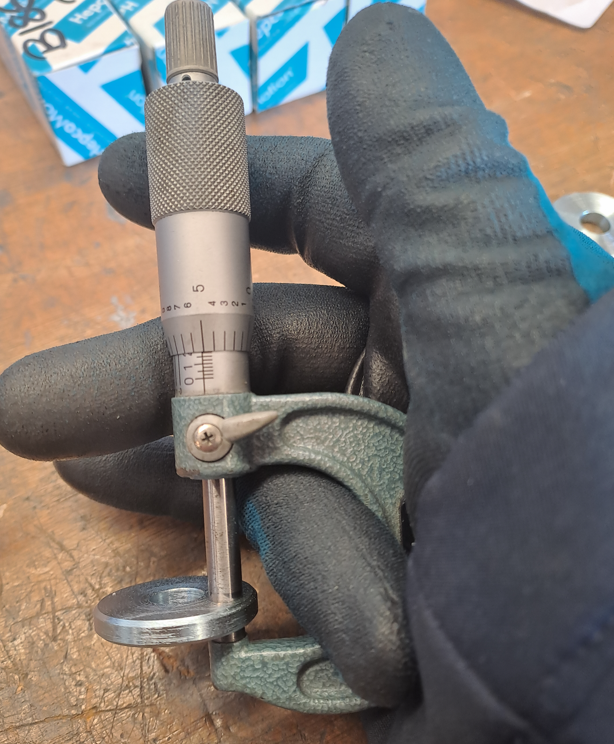
0-25mm micrometer
Ring support blocks for assembly
Work Table
Mag Base and D.T.I
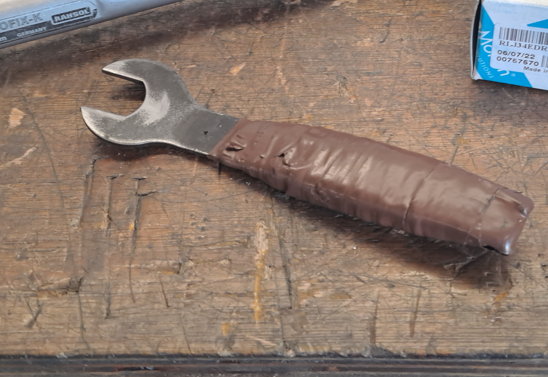
Hepco flat spanner
17mm socket
Torque Wrench
Parts required
D0006423-2mod Drive ring x 1
Étape 1 - Quality Check Drive ring D0006423-2mod
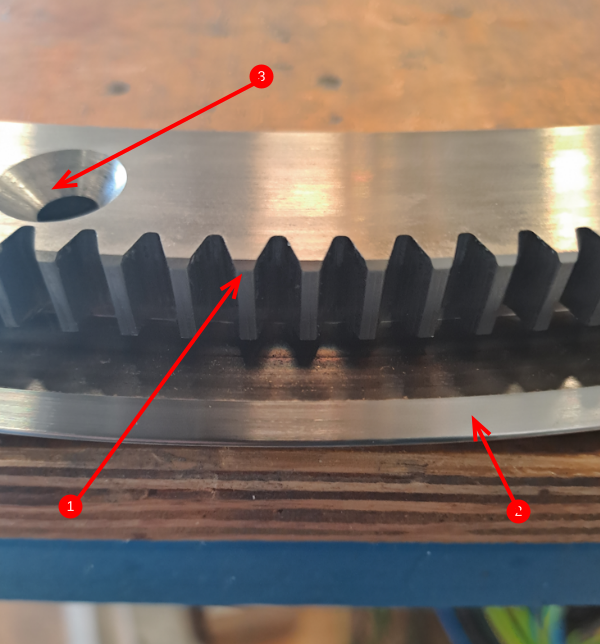
Rotary drive ring needs checking before fitment.
- Check teeth for burrs, damage and debris. Use compressed air to clean all areas
- V edge should be checked for damage. Check entire circumference with fingers to identify any damage, lumps or high low spots
- Check drive ring has been countersunk in the shown area
Étape 2 - Prepare Faceplate For assembly
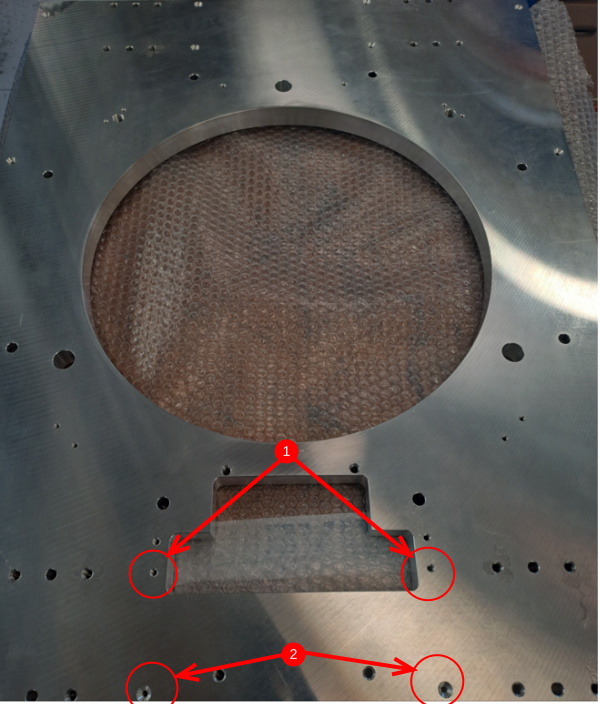
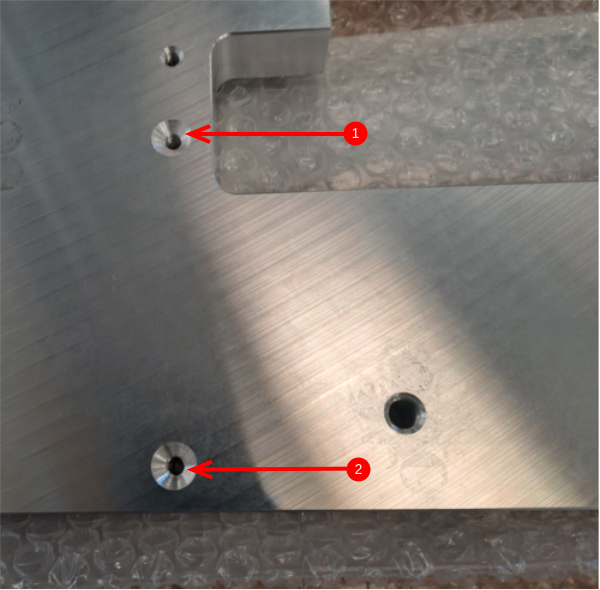
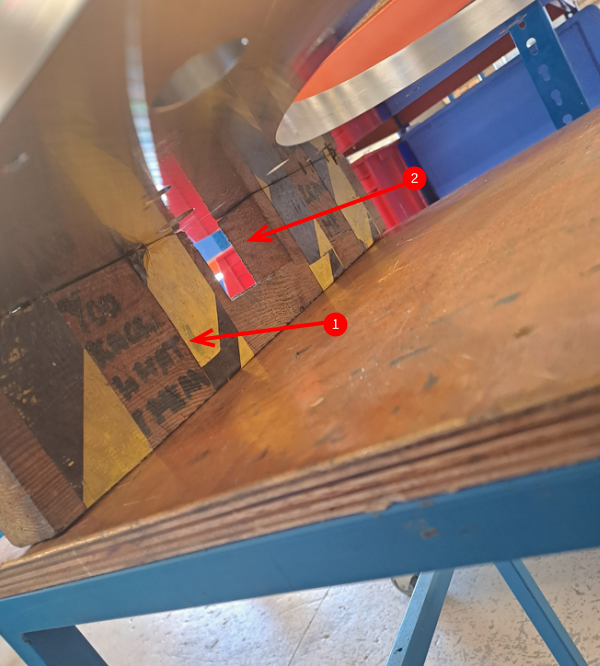
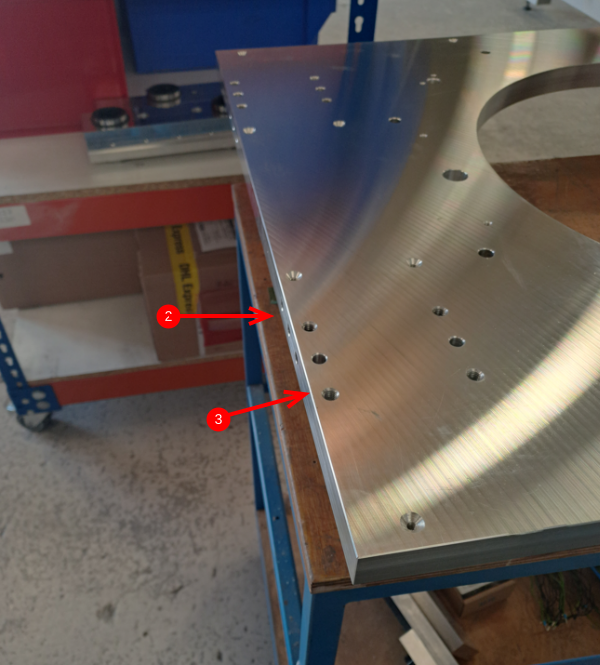
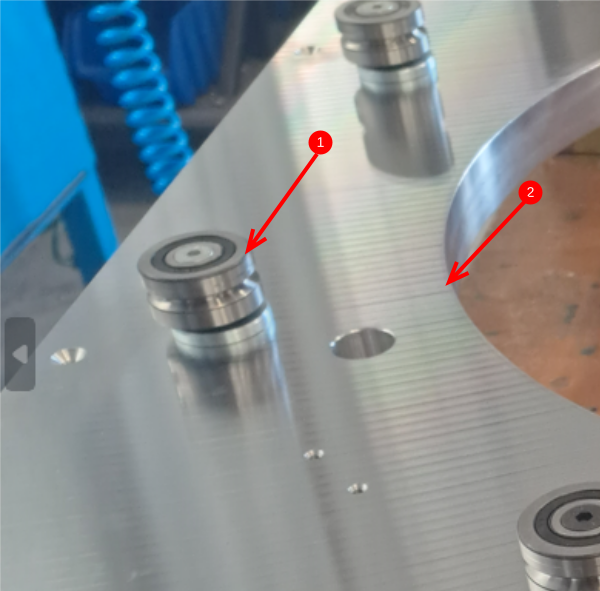
Check that D0007651faceplate holes indicated (1) are countersunk the same as holes indicated (2 ). If not , countersink to correct
3. Clean all holes with compressed air
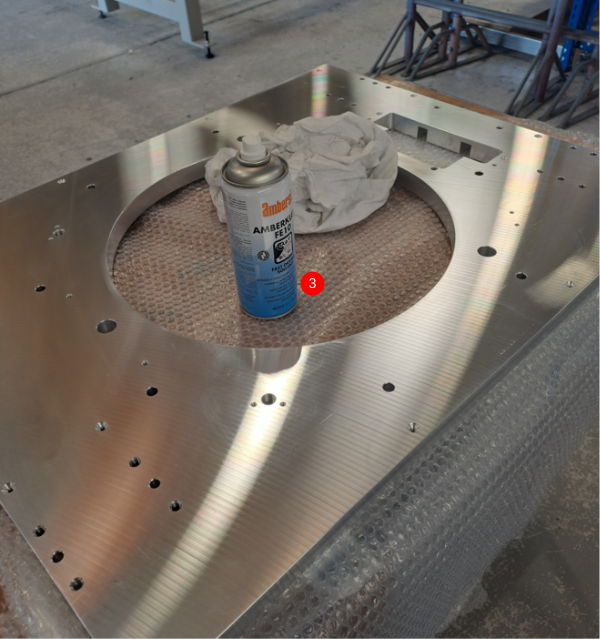
Thoroughly clean faceplate with solvent
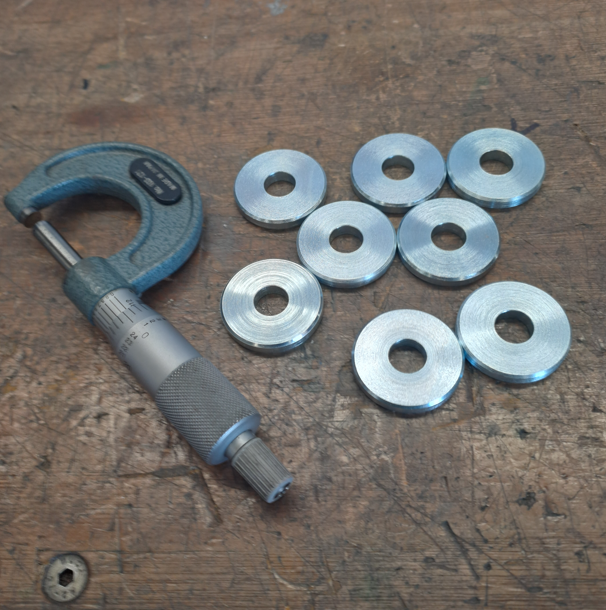
Étape 3 - Inspect Journal washers D0006503
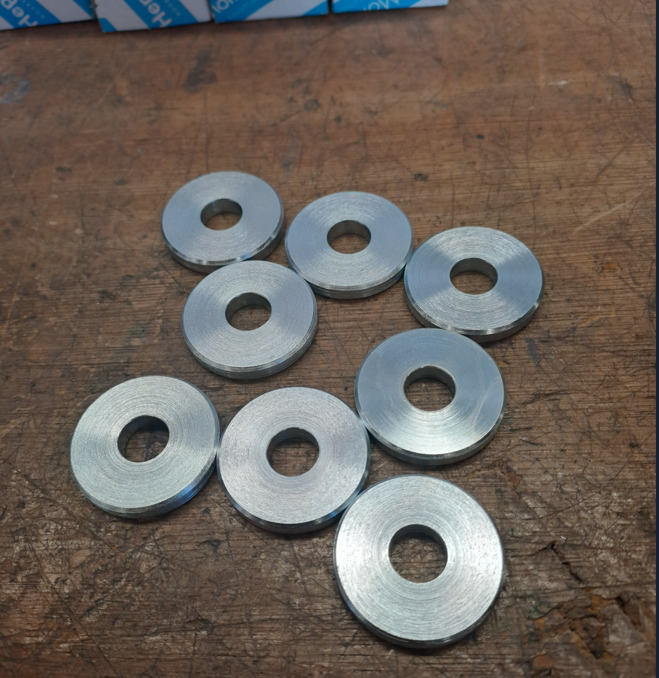
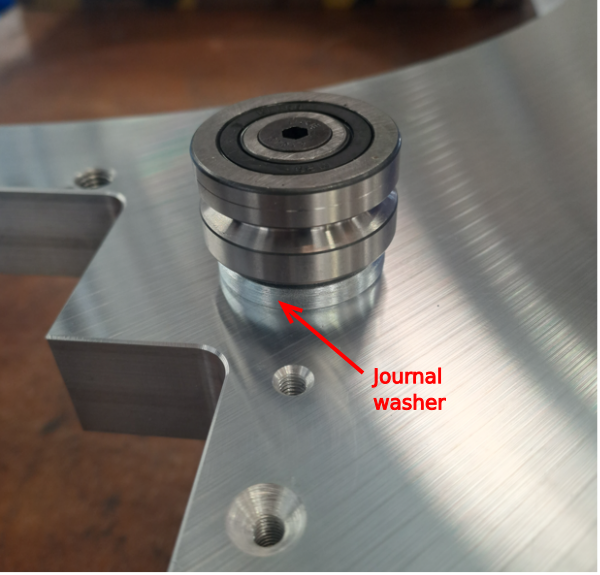
Journal washers should be inspected to ensure all washers supplied are within tolerance .
Thickness of washer should not exceed 0.05mm difference between all washers supplied. Report any that are incorrect via NCR system
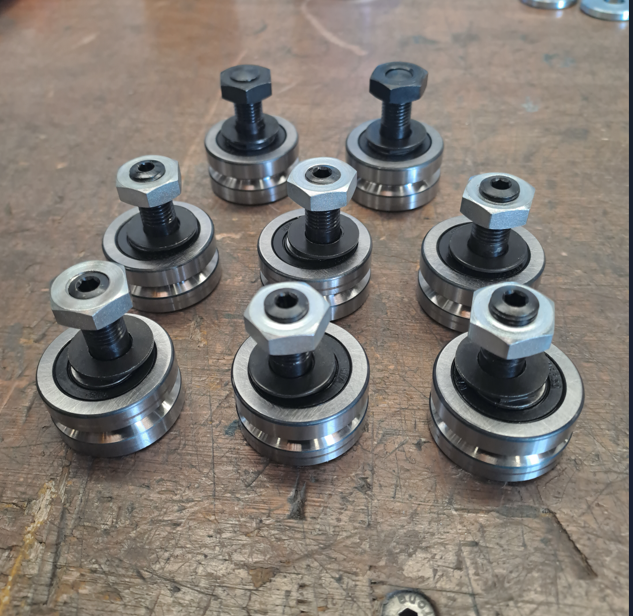
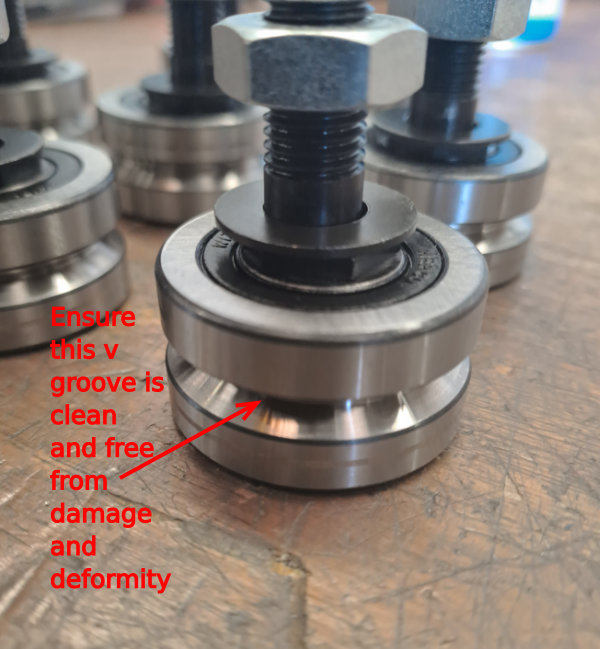
Étape 4 - Inspect Journals
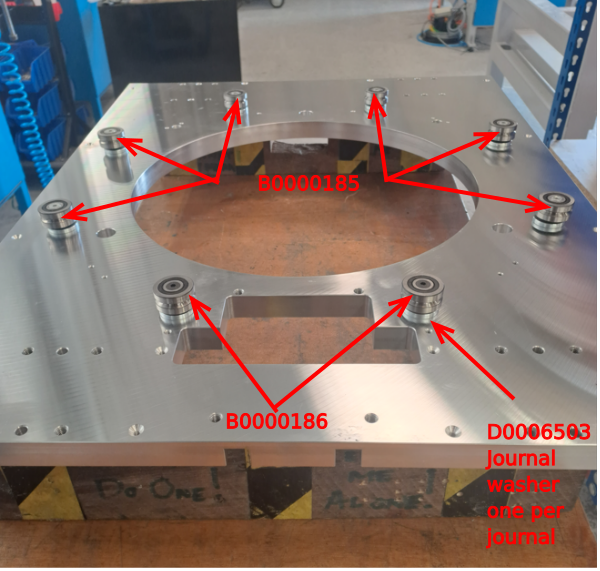
B0000185 and B0000186 journals should be cleaned with compressed air and checked for quality. Visually inspect v grooves of journals for and damage or irregularities
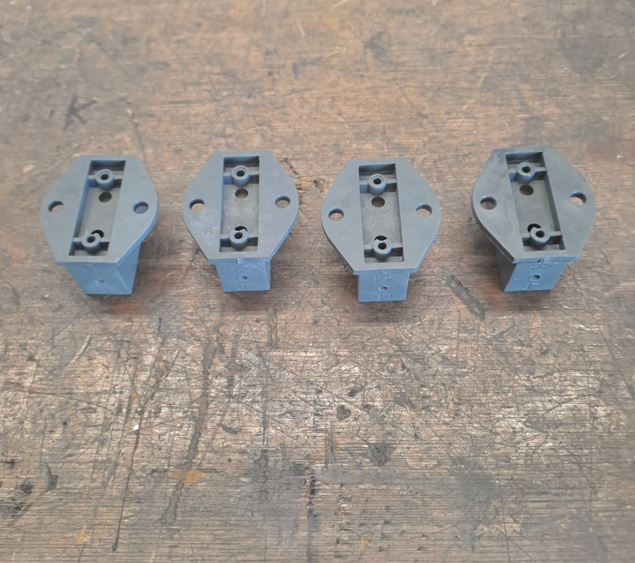
Étape 5 - Check drive ring wipers
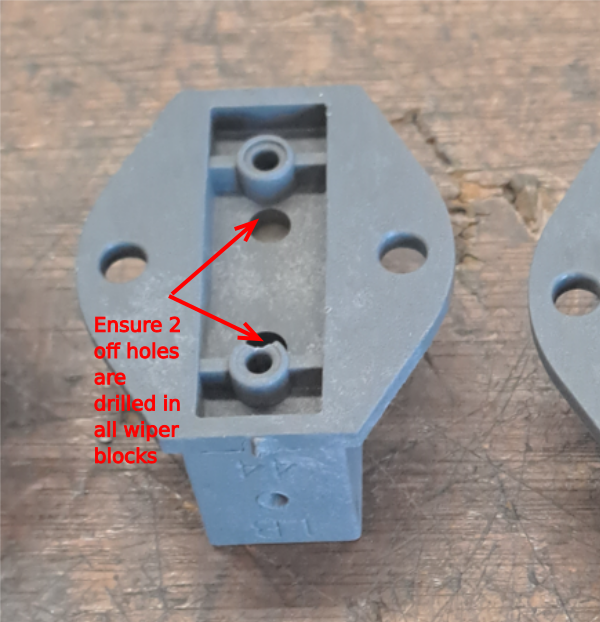
D0007692 should be checked for correct machining. Holes indicated are vital to allow oil flow to ring system once assembled.
Étape 6 - Position face plate
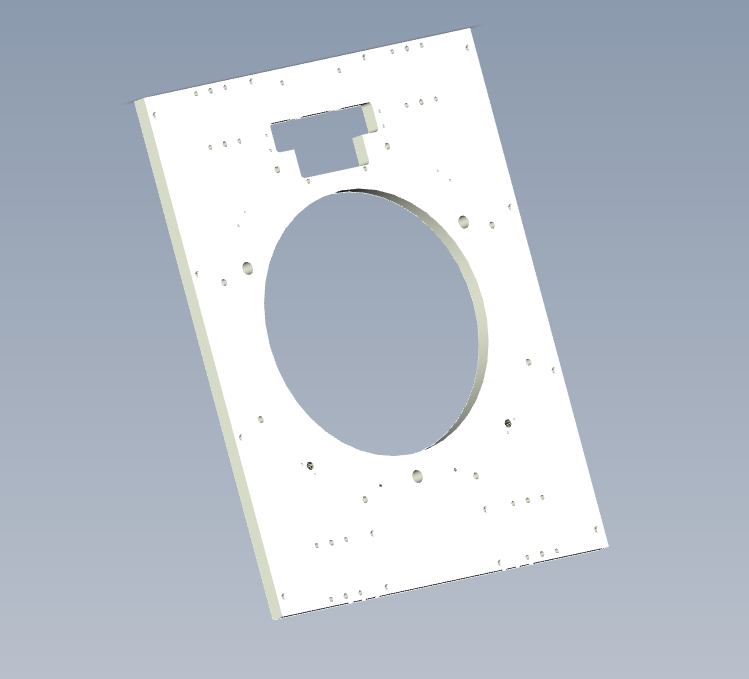
Face plate should be positioned ready for assembly
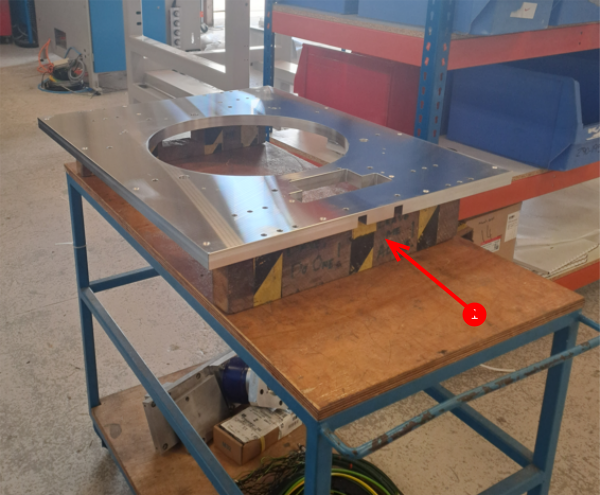
1 Support blocks should be placed either end of faceplate
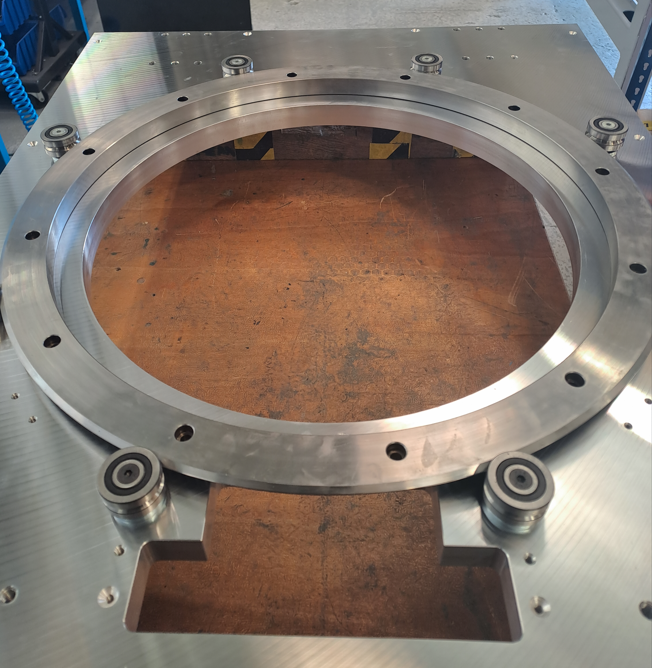
2 Ensure cut out is orientated correctly as per picture. This is the lifting access point.
3 Ensure correct end of faceplate is located at edge of workstation (end with 6 off M8 tapped holes on indicated face)
Étape 7 - Mount Journals
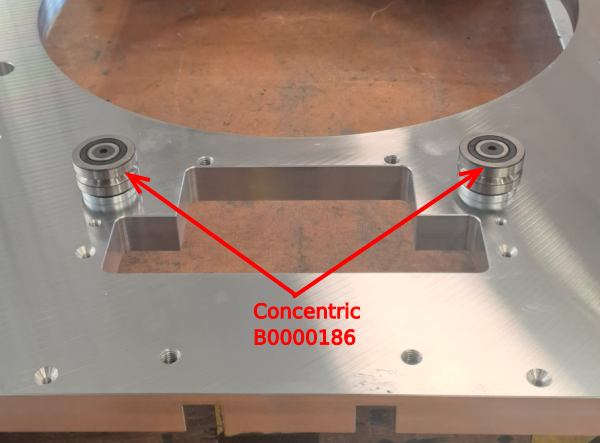
Mount journals as shown
Eccentric B0000185 journal 6 off
Concentric B0000186 journal 2 off
Space each journal with D0006503 journal washer
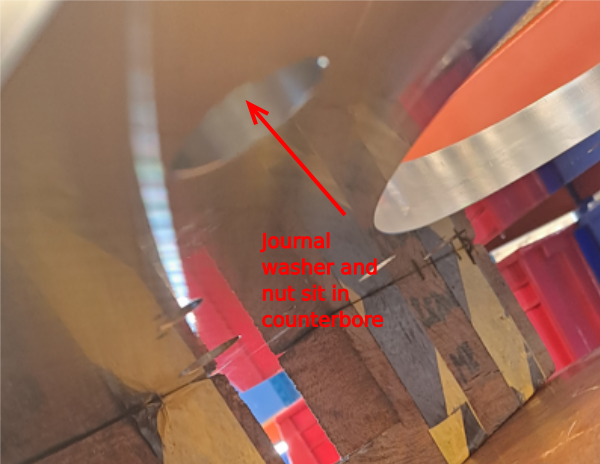
Fit Journal washer and nut to opposite side of mounted journal .
Add light tension to nut, as adjustment will be required
Étape 8 - Adjust Eccentric Journals to widest Position and position ring
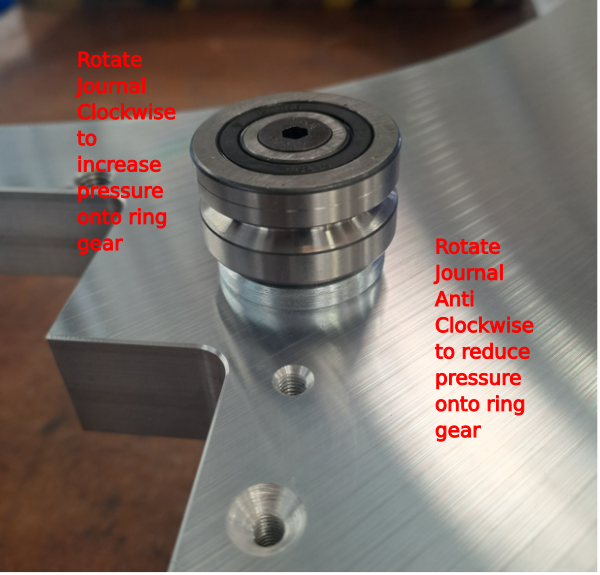
Adjust eccentric journals to their widest point to allow ring gear to be fitted . See point 1 and 2 , these two points need to be as far apart as possible by rotating the eccentric journal with the flat hepco adjustment spanner .
Place hepco drive gear as shown inside journals
Étape 9 - WARNING
It is very easy to deform the journals and hepco ring with to much tension being applied to the journals. It is vital this doesn't happen as it can render parts useless for application.
Tension should be applied in small increments, and a D.T.I should be used on tension setting to monitor journal movement when adjusting and tightening.
Étape 10 - First stage journal positioning
The set the initial position of the drive ring the following steps are required
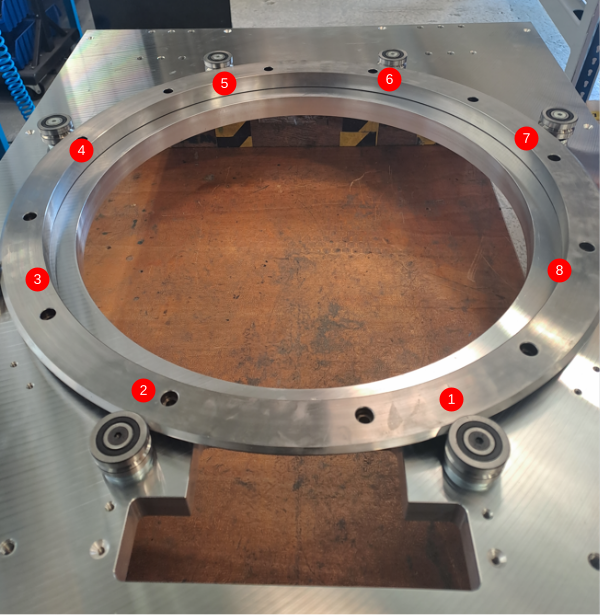
- Pull by hand hepco ring at indicated point (5) towards journals 3 and 4
- Whilst held in this position adjust journals 1 and 2 to engage onto the drive ring
- now the ring is held by the journals , adjust journals 1 and 2 to achieve contact on journals 1,2,3 and 4.
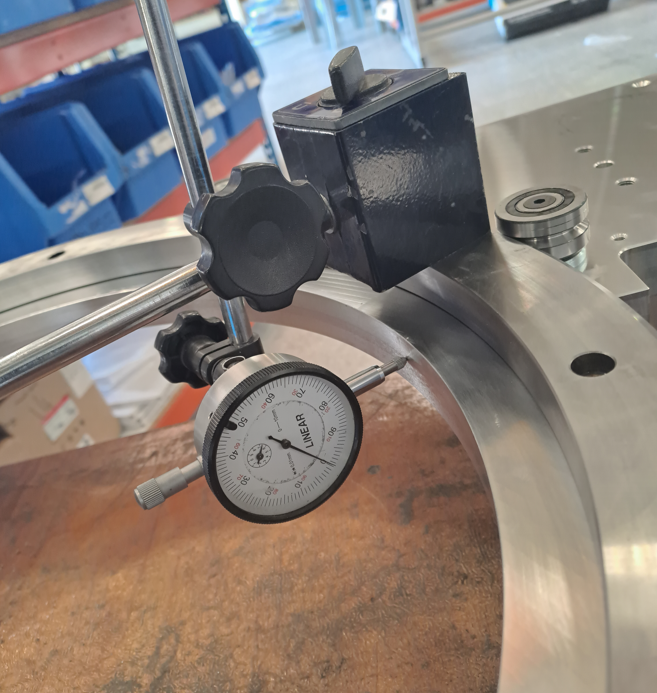
Étape 11 - Mount D.T.I and set position 1,5 and 6
D.T.I and mag base and stand should be mounted to rotary ring as shown
- move the D.T.I to the position in front of a concentric journal (1) and zero D.T.I.
- move to position 5 and adjust journal to read 0 .00mm on D.T.I
- repeat at position 6
- Check that all journals can still be skidded when held whilst ring is rotated
Étape 12 - Adjust position 4 and 7
- Move to position 4 and adjust journal to read 0.00mm on D.T.I
- Move to position 7 and repeat
Now it is vital to check the following .
Rotate ring and check all journals can be skidded when held by hand
If yes, Set position 3 and 8 by adjusting journal to read 0.00mm on D.T.I
If no, release pressure on journals 4,5,6 and 7 using D.T.I to gauge movement and reduce 0.00mm reading by 0.01mm
Repeat rotation and skid test, if journals now skid, adjust journals 3 and 8 to new D.T.I setting (-0.01mm)
If no, repeat and reduce pressure by an additional 0.01mm
Repeat these steps until all journals are adjusted to main rotary ring and all can be skidded when held tight on ring rotation.
Maximum tolerance for eccentricity is 0.05mm , so if journals have to be adjusted out of this tolerance, contact supervisor
Draft




 Français
 English
 Deutsch
 Español
 Italiano
 Português