Guidance for creating part pictures correctly
Introduction
The sage system and other databases use images of the parts on the report generation - eg Picking Lists, Spare parts lists customer returns forms, etc. A large number of images have already been added to this set, but there are still 1000s missing. The photos are stored as jpg files in the folder g:\Photos
This is a quick guide to how to create these pictures correctly
Technical Requirements
- The file size should be less than 50Kb - if they are bigger, it will slow the report generation down considerably when there are a lot of pictures on a report
- They need to be jpg images (not png, gif, jfif, etc...)
- The file name should match the part number exactly (with.jpg on the end)
- They should be square in format as landscape or portrait format will get squashed and look unsightly
- A resolution of 96 dpi with a size of 300x300 pixels will give a file size of around 30-50Kb. The dpi and pixel size are not critical, these are just a guide. The important issue is the file size
Parts Drawings (D numbers)
The D numbers need to be created from the 3d models of the parts. Contact the design department for missing images, as currently they need to be produced using the 3d software. A photo could also be used.
Bought In Parts (Not D numbers)
Images for bought in parts can normally be extracted from the internet.
Using the following process normally gets you an image that is about the right size because it is an thumbnail that google has resized for you
- Do a google search in images using the manufacturer's part number (you need Sage access to get this information)
- Select a good view of the part (these will normally be from other distributor's websites)
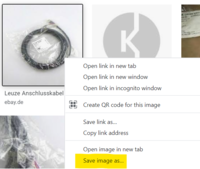
- Right click and Save Image as
- Navigate to g:\photos and save as [Part No].jpg. It is important that you save it as a jpg. If it wont let you do this, you need to select another image
If the image cannot be found, a photo of the part can be taken, but it will need resizing
Photos - Making Pictures Smaller
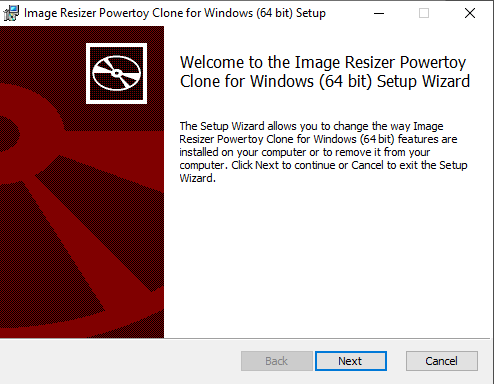
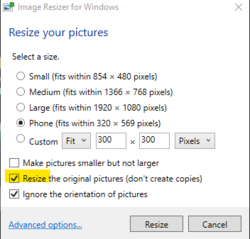
If the photo file size is bigger than 50kB, there is a windows tool called ImageResizer-2.1 that is really useful for reducing the size. The install file for this tool is on the g:\ root drive - ImageResizer-2.1_x64.msi , double click to install
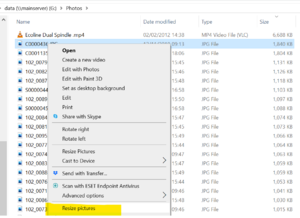
Installing this tool gives you the ability to right click on any file and a menu item is added to "Resize Pictures"
Tips:
- Copy the big file into g:\photos first, with the correct name, then resize it
- The setting for "phone" gives ideal results.
- Make sure you tick "Resize the original pictures (don't create copies)", otherwise it will create a copy and you will have to fiddle around renaming the new one and deleting the original
Draft
 Français
 English
 Deutsch
 Español
 Italiano
 Português