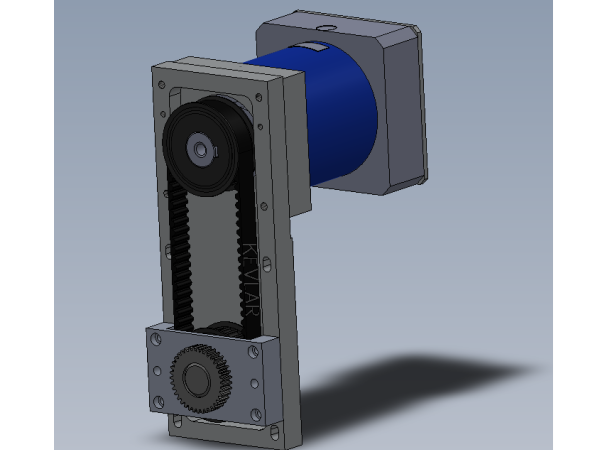
Assembly instructions for R axis gearbox
Sommaire
- 1 Introduction
- 2 Étape 1 - Unless otherwise stated
- 3 Étape 2 - Quality Check
- 4 Étape 3 - Assemble drive spigot
- 5 Étape 4 - fit key and pulley
- 6 Étape 5 - Attach to gearbox plate
- 7 Étape 6 - Gear box bung supplied with gearbox C0001211
- 8 Étape 7 - Check pulley fitment
- 9 Étape 8 - Fit Servo gearbox cap
- 10 Étape 9 - Couple and align gearbox and pinion assembly
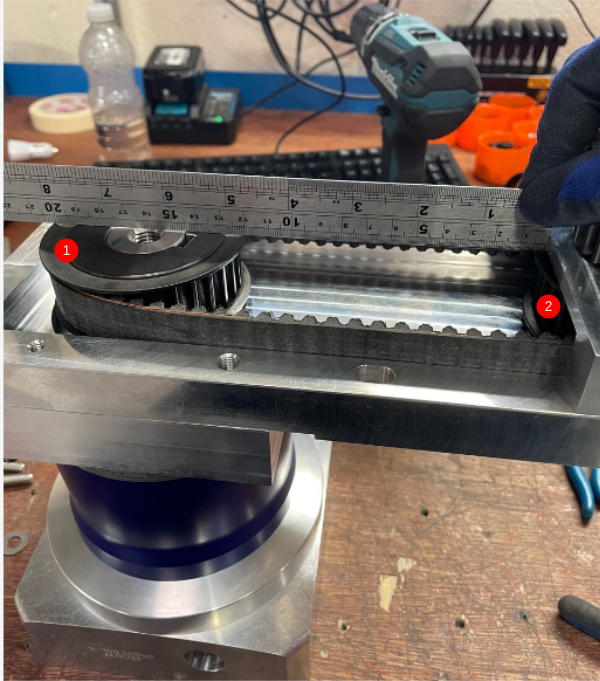
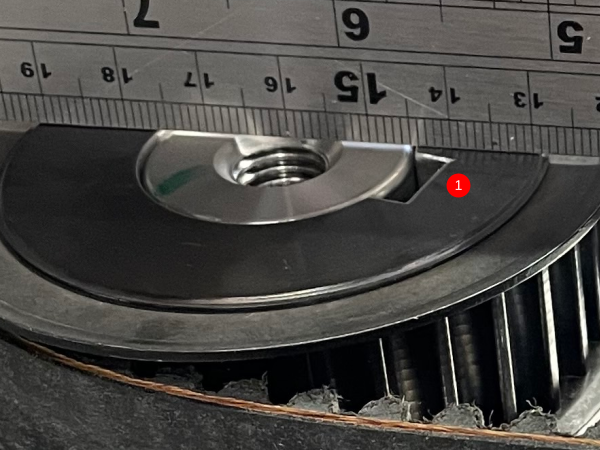
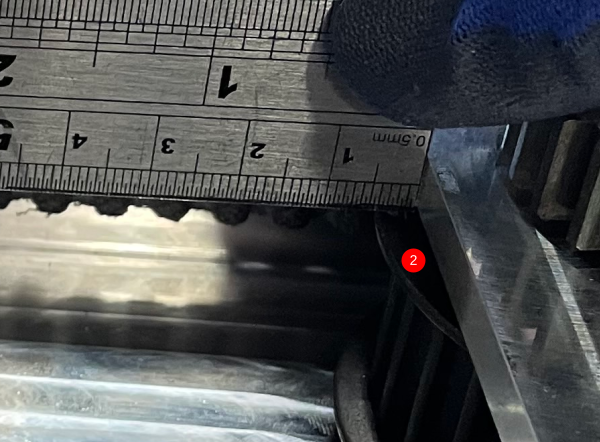
- 11 Étape 10 - Align pulleys
- 12 Étape 11 - Remove pulley assembly
- 13 Étape 12 - Tension belt
- 14 Étape 13 - finalise position
- 15 Étape 14 - Quality check
- 16 Commentaires
Introduction
Tools Required
Standard hex key set
Standard spanner set
Tensioning jig
Standard HSS drill set
300mm rule
Parts Required
B0000062 Circlip 20mm External x 2
B0000092 Belt: Toothed 640-8MGT 20 (R Axis) (KEVLAR) x 1
B0000095 Bearing NR6004 2RS with snap ring (NSK) x 2
C0001211 Gearbox NP035s 5:1 x 1
D0000268 Rotary Drive Tooth Pulley x 1
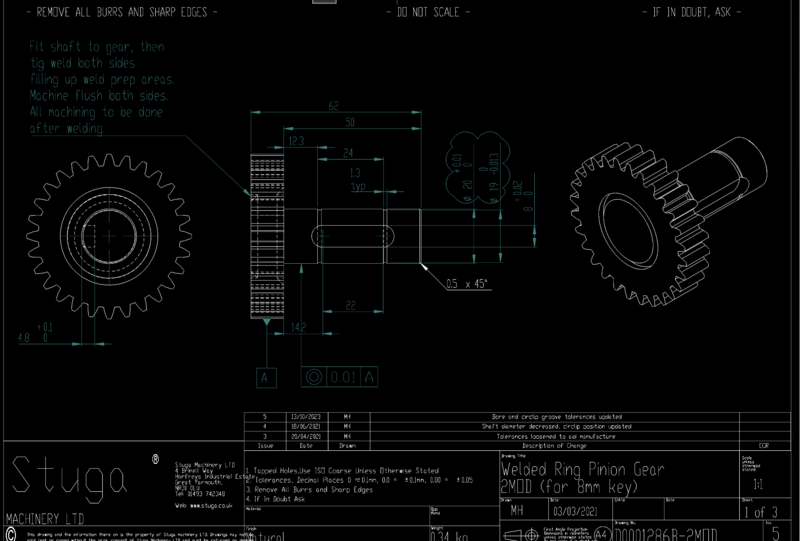
D0001286B-2MOD Welded Ring Pinion Gear 2MOD (for 8mm key) x 1
D0006058 Gearbox Plate x 1
D0006060 Spigot Cap x 1
D0007849 Servo gearbox cap x 1
D0008585B Rotary Ring Drive Pulley (for 8mm key) x 1
D0015801 Feather Key 8mm x 8mm x 22mm x 1
Étape 1 - Unless otherwise stated
Use Loctite 243 on all fasteners
Use Loctite 572 on all threaded pneumatic connection
Pen mark all fasteners to show finalised
Étape 2 - Quality Check
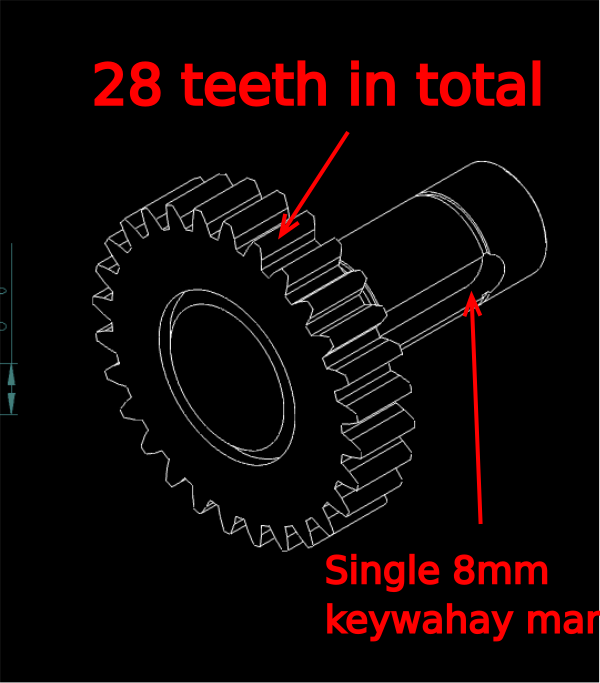
It is vital to check the correct pinion gear has been issued to build
D0001286B-2Mod should be issued
To check this is correct , perform a tooth count on the gear. If correct the gear will have 28 teeth it total
8mm keyway should be present
Report any dicrepancy through he correct reporting method
Étape 3 - Assemble drive spigot
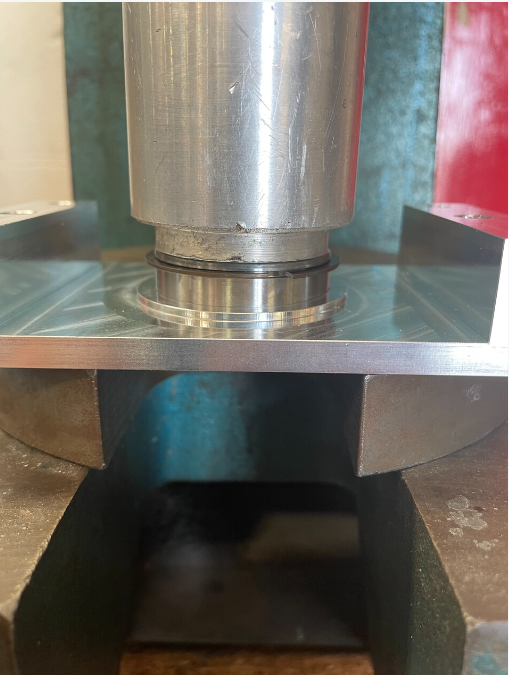
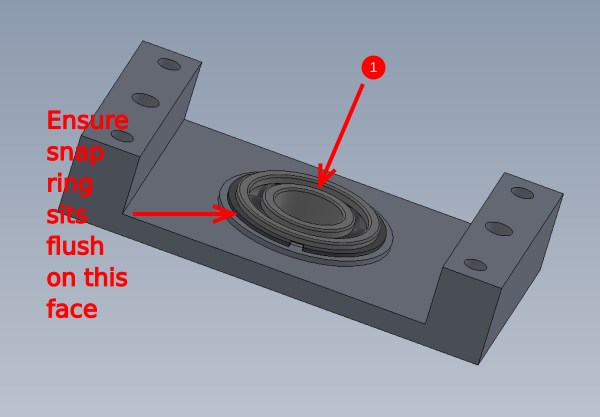
1 Press B0000095 Bearing into D0006060 Spigot Cap so snap ring sits flush
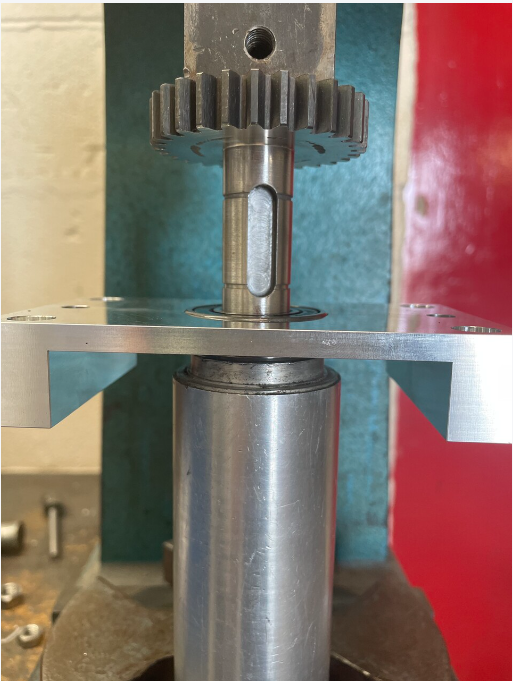
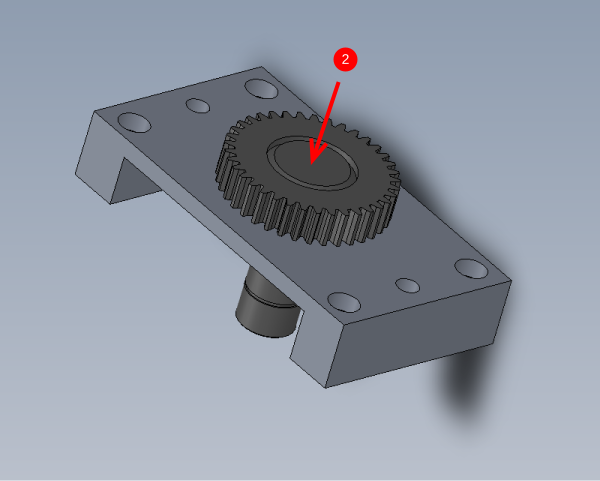
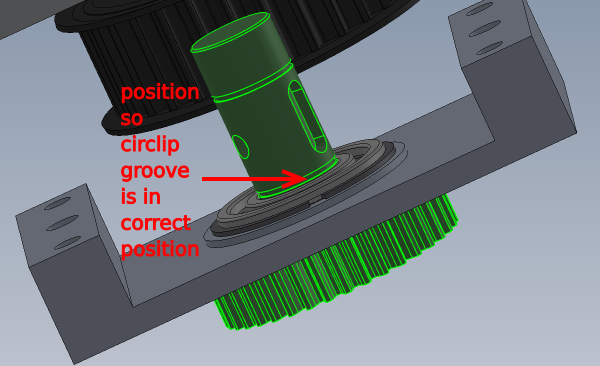
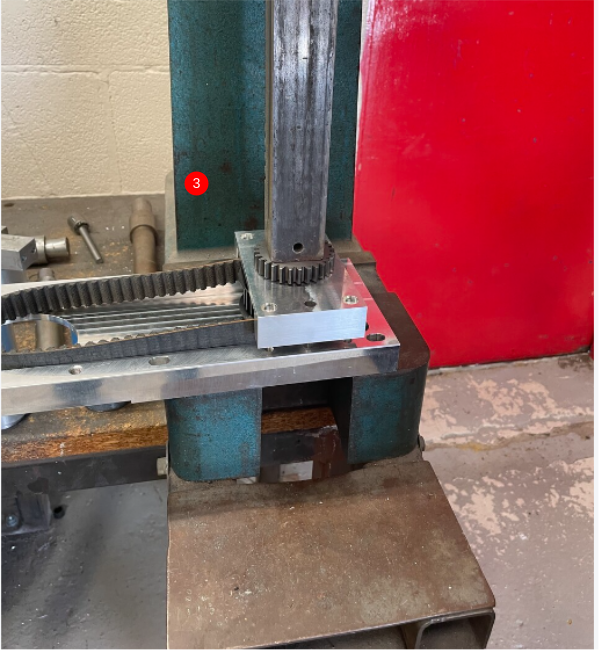
2 Fit D0001286B-2MOD Welded Ring Pinion Gear 2MOD as shown Use jig to ensure bearing is not moved from location. Push through until circlip groove is in correct place
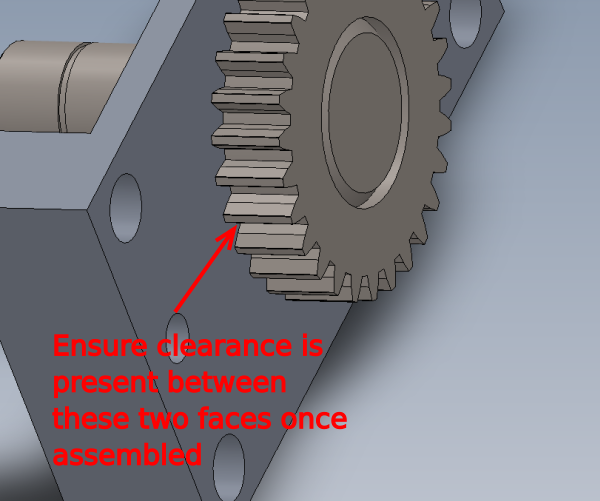
Check to ensure drive pinion does not contact bearing face as shown
Étape 4 - fit key and pulley
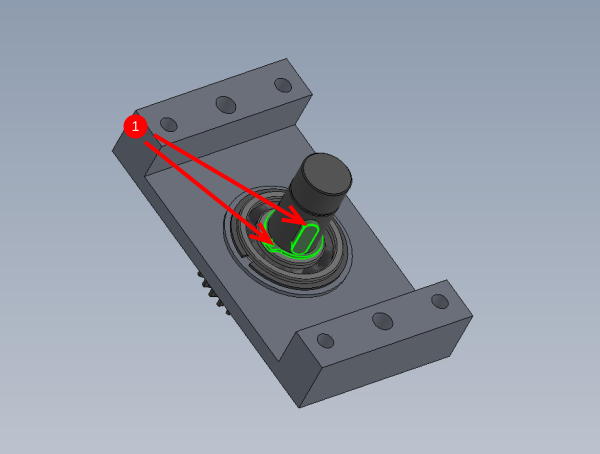
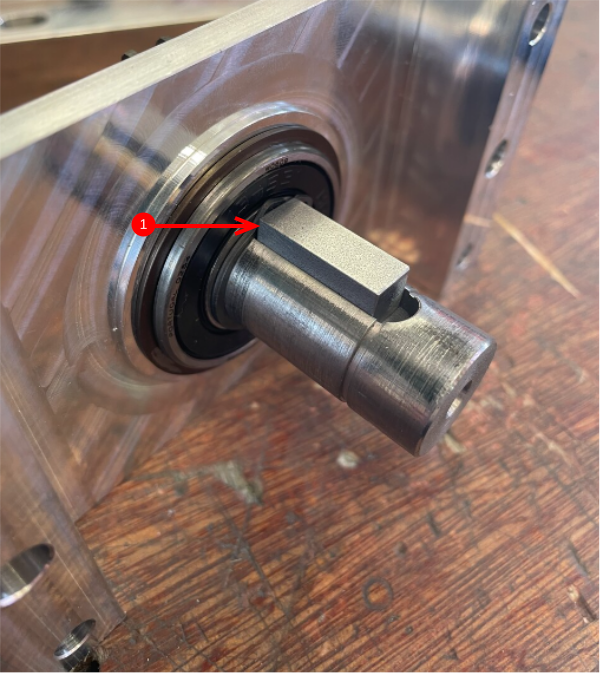
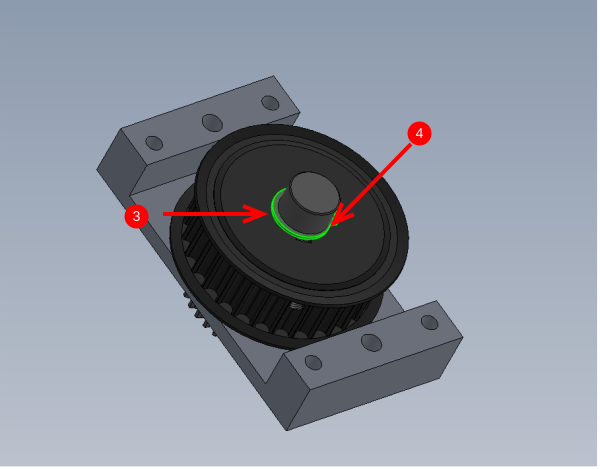
1 Fit Circlip 20mm and D0015801 Feather Key 8mm x 8mm x 22mm as shown
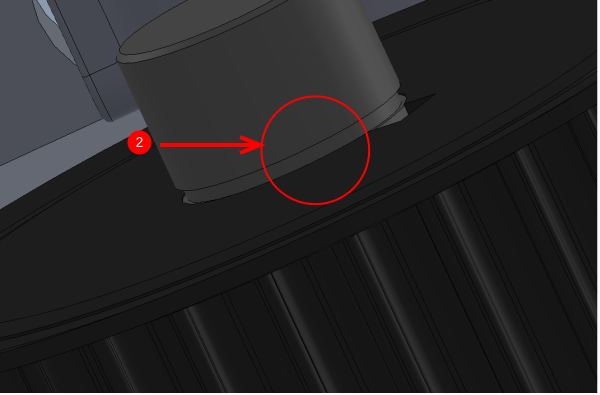
2 Fit D0008585B Rotary Ring Drive Pulley as shown . Only press down until circlip groove is present
3 Fit 20mm external circlip
4 Tighten Grubscrew with pulley pulled against circlip
Étape 5 - Attach to gearbox plate
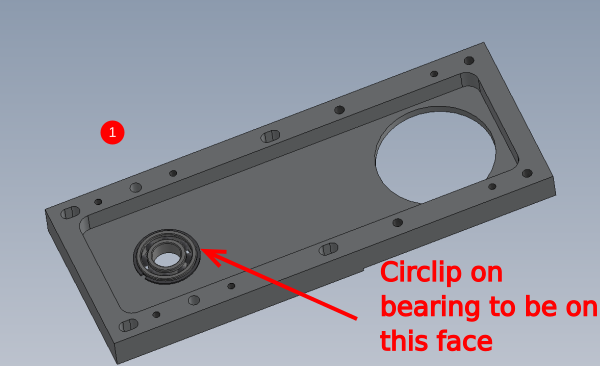
1 Fit B0000095 bearing to D0006058 plate as shown . Note circlip on bearing to be on indicated face
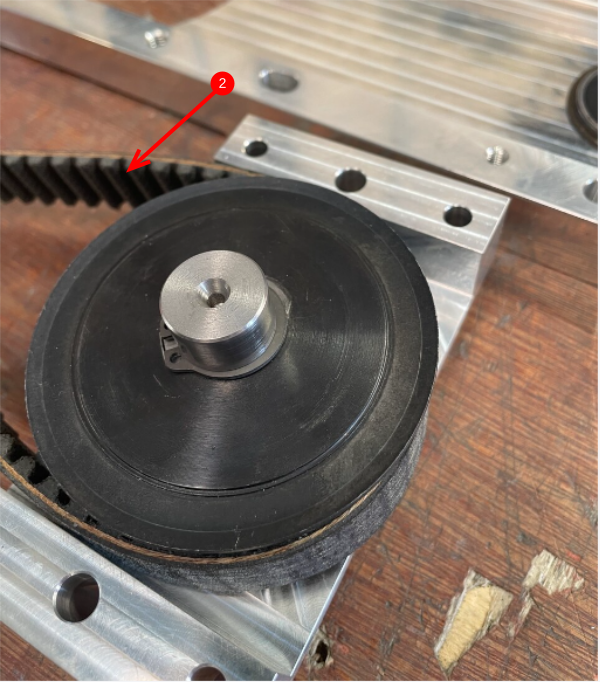
2 Attach B0000092 Belt: Toothed 640-8MGT 20 as shown
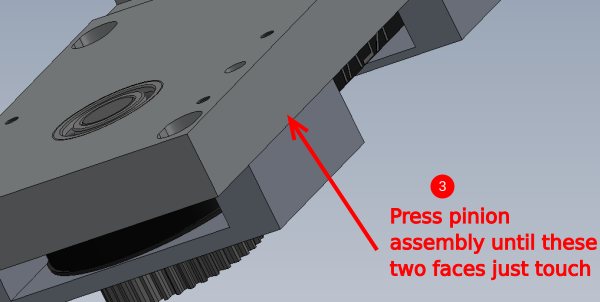
3 Press pinion assembly onto gearbox plate
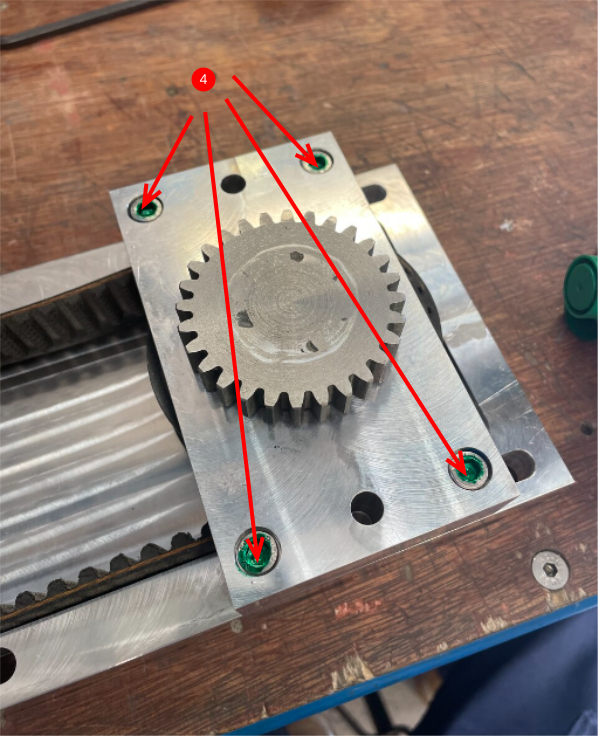
4 Secure lightly with 4 off M6 x 35 socket caps
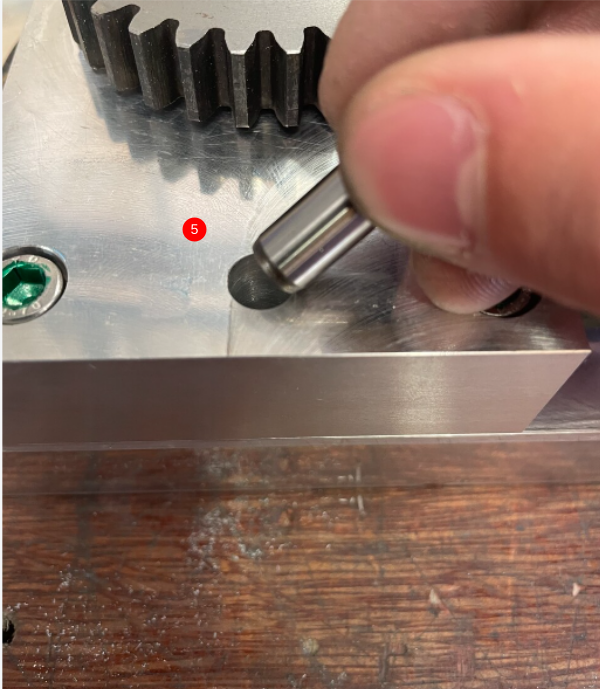
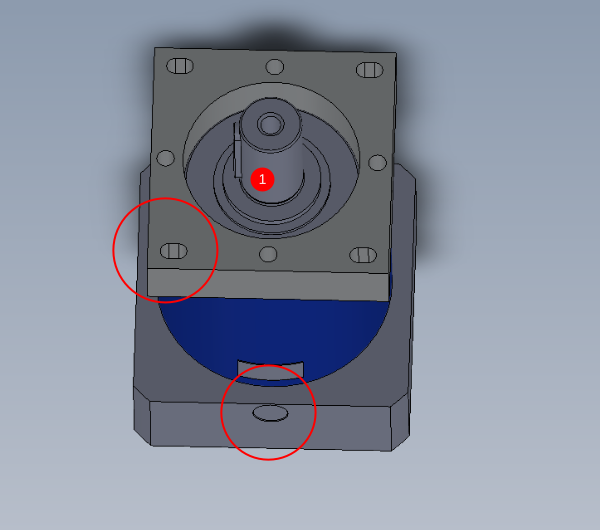
5 Add 2 off 8mm x 50mm dowels into indicated holes . Ream if holes are tight
6 Finalise 4 off M6 socket caps
Étape 6 - Gear box bung supplied with gearbox C0001211
Étape 7 - Check pulley fitment
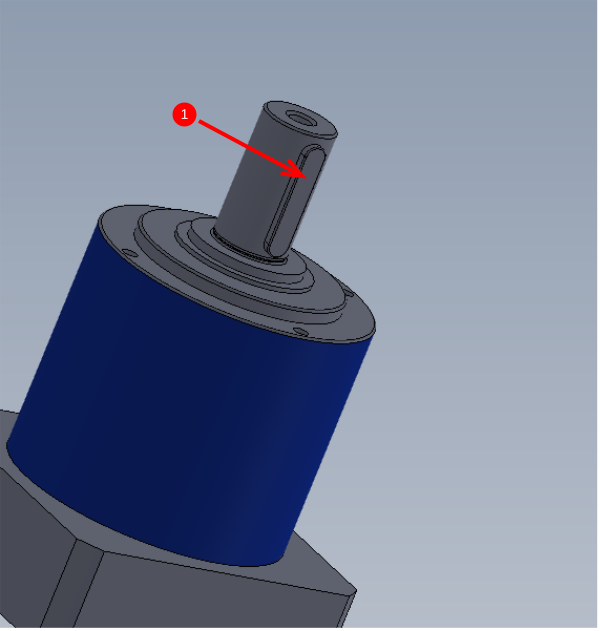
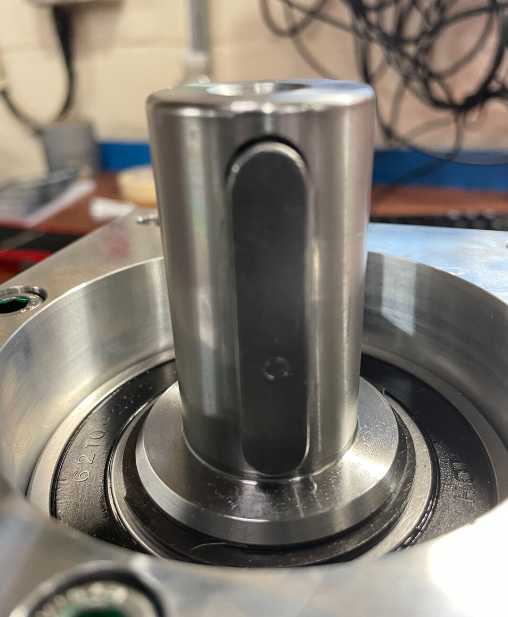
Check D0000268 Rotary Drive Tooth Pulley fits onto C0001211 Gearbox
If pulley fits move to step 6, if it does not fit follow these steps
1 Remove key from gearbox shaft
2 Test pulley again for fitment.
- If the pulley still does not fit, polish inner face of pulley until fitment is achieved
- if the pulley does fit when the key is removed , move to next step
3 Refit key
4 Test pulley , if the pulley still doesn't fit correctly dress keyway slot gently until fit is achieved
Étape 8 - Fit Servo gearbox cap
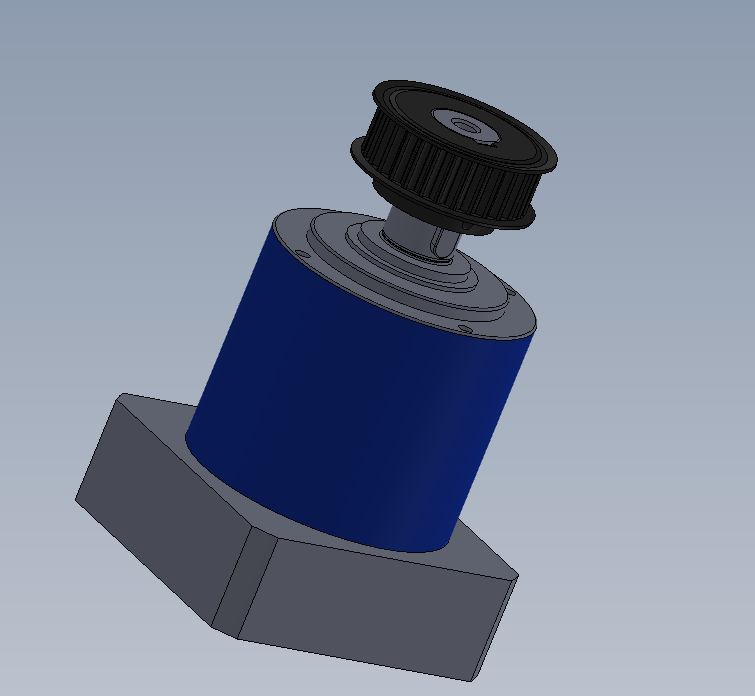
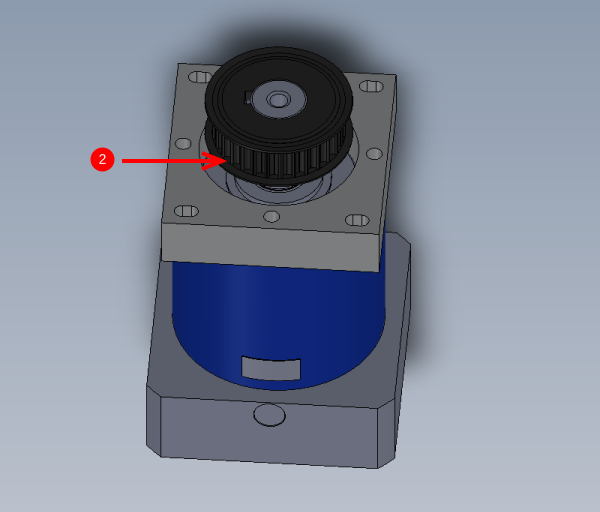
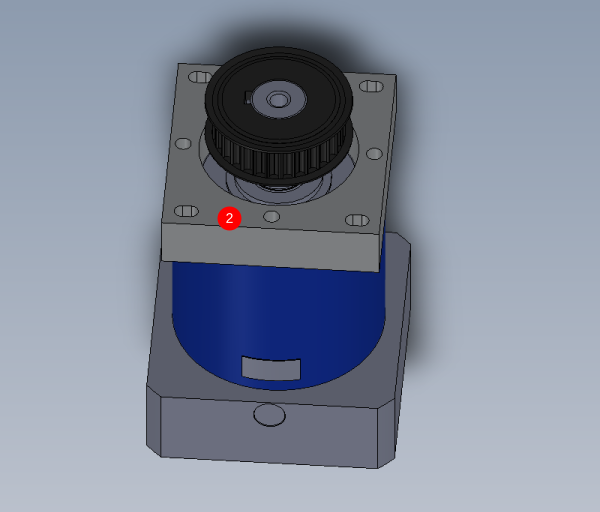
1 Fit D0007849 Servo gearbox cap as shown. No adhesive on the 4 off M8 x 35 socket caps
Orientate as shown
2 Fit D0000268 pulley
Étape 9 - Couple and align gearbox and pinion assembly
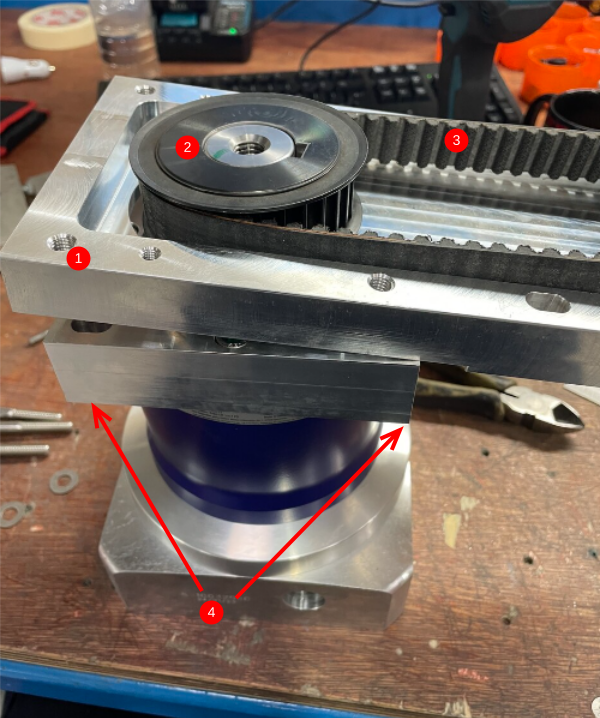
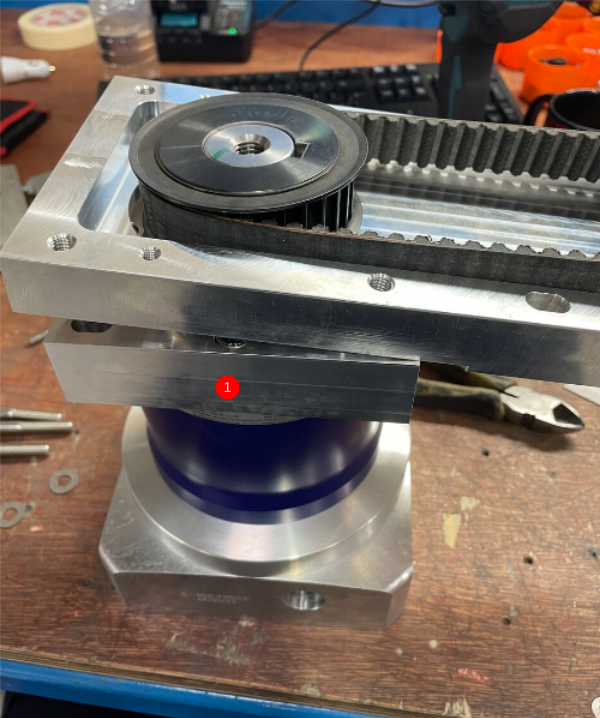
Insert part1 through part 2
Hook over belt (3)
insert 4 off m8 x 50 with a form washers a pull to face lightly
Étape 11 - Remove pulley assembly
Reverse steps to remove assembly 1
Remove part 2
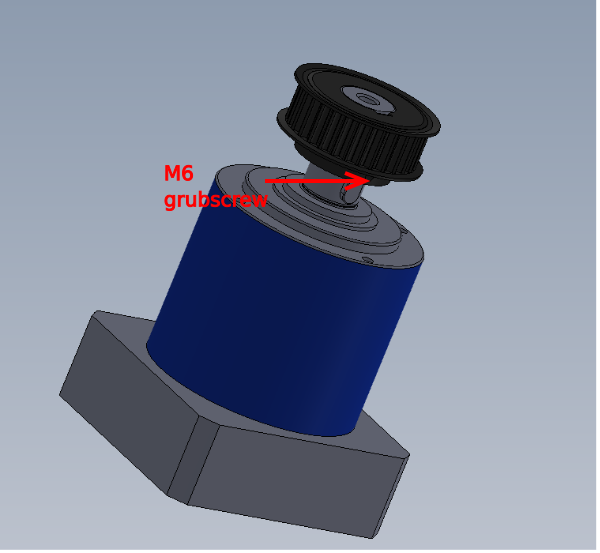
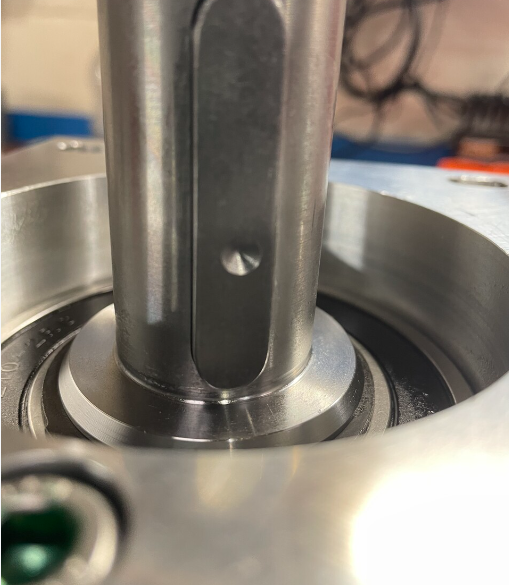
Tighten grubscrew to leave witness mark , Remove pulley and drill 5mm dimple at indicated point
Use M6 x 10 kcp grubscrew to lock pulley in final position
Rebuild parts to get to 3
Étape 12 - Tension belt
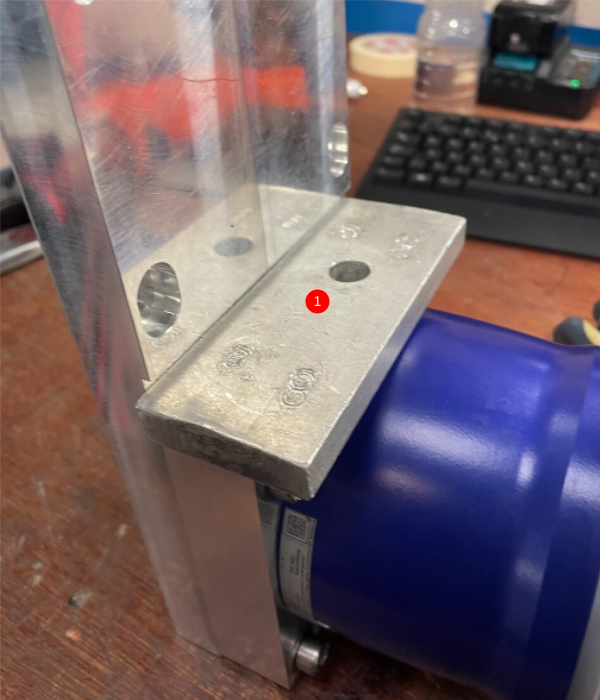
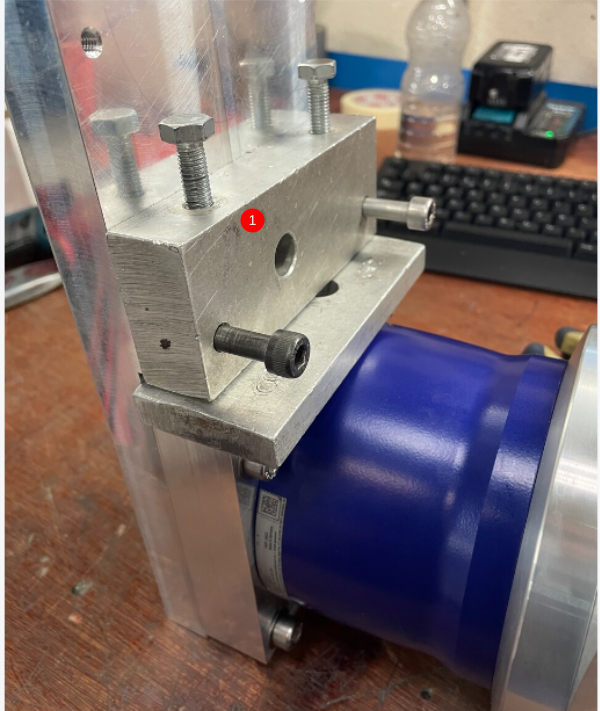
1 Attach tensioning jig as shown
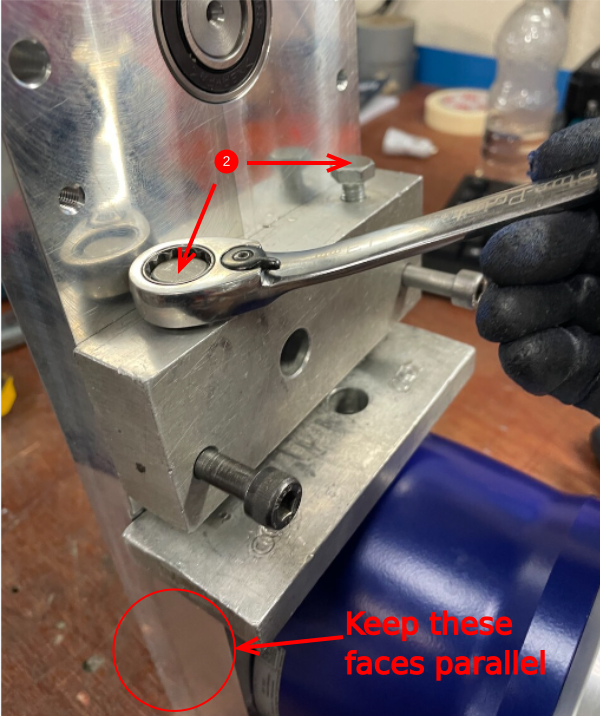
2 Apply tension to belt , spreading tension over two bolts indicated . Maintain parallel on these faces as adjusting
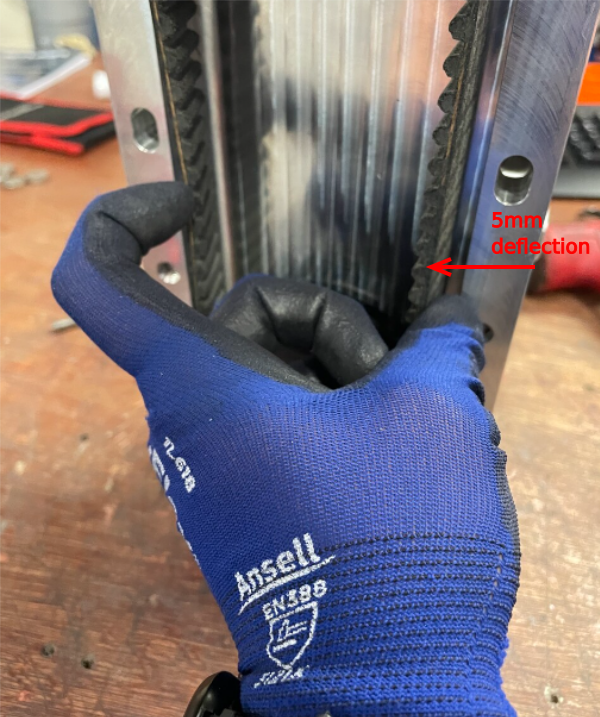
Set belt tension to 5mm deflection (Drum Tight )
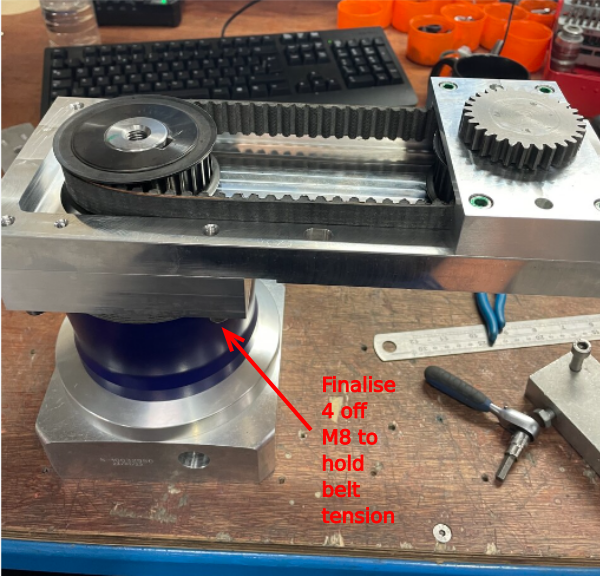
Étape 13 - finalise position
finalise 4 off m8 socket caps to hold tension
Remove setting jig plates
Draft



 Français
 English
 Deutsch
 Español
 Italiano
 Português