Installation steps for Electrical looms installation into Module B
Introduction
Parts Required
Pre labelled Wiring loom assembly R0015034B from electrical team
Tools required
Flush cutters
Tie wraps small
Tie Wraps Large
Étape 1 - Unless otherwise stated
All bolts to have Loctite 243 adhesive applied unless otherwise stated
All Threaded Pneumatic connections to have Loctite 570 applied
All bolts to be pen marked once adhesive applied and correct tension added
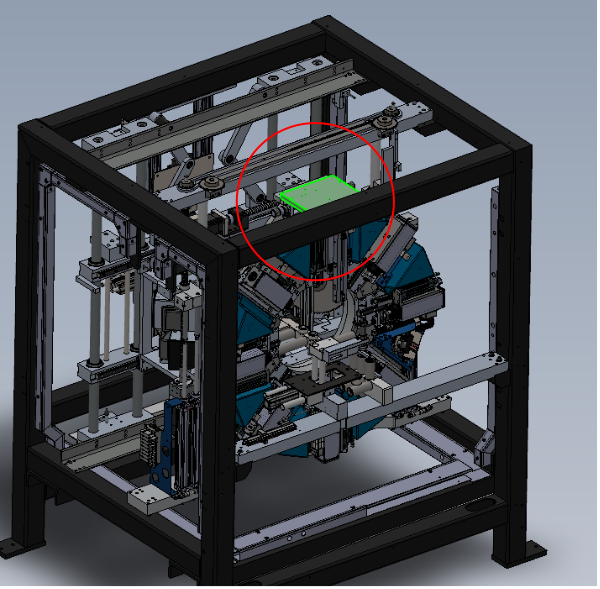
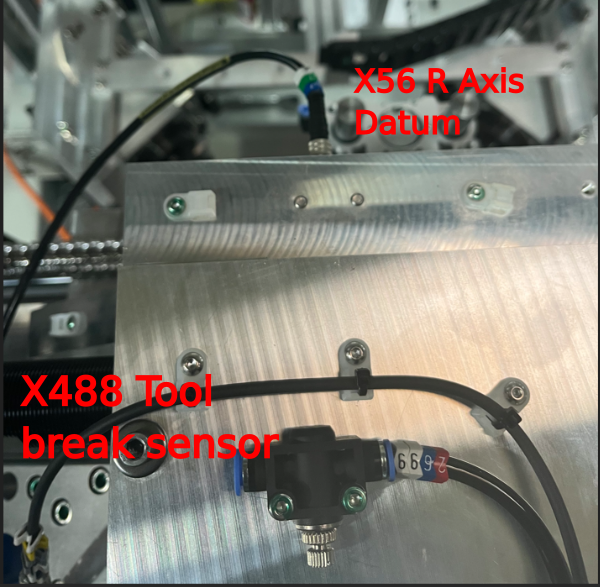
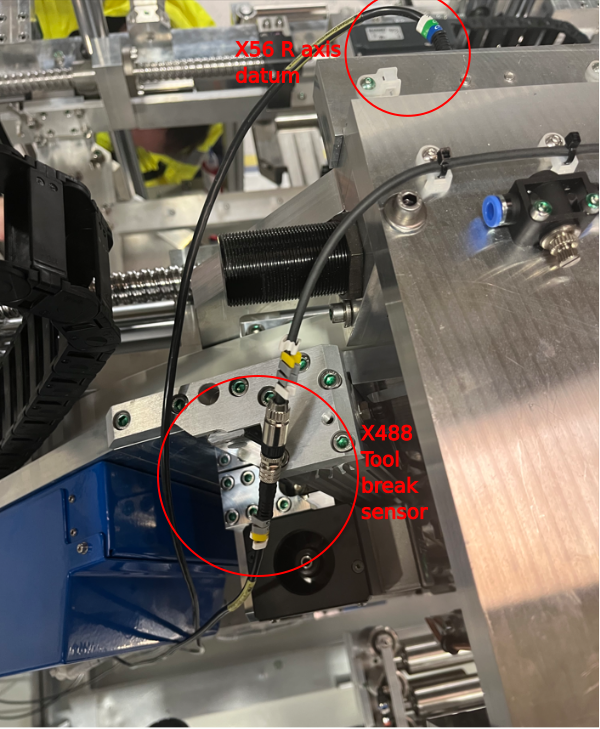
Étape 2 - Ring Toolbreak connections
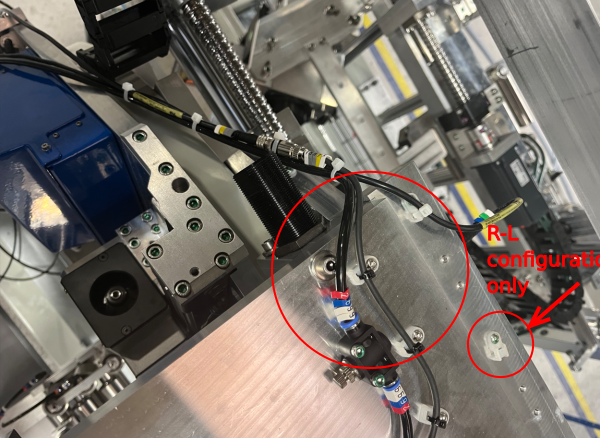
{Pictures show L-R configuration. For R-L use additional tie base shown
1 Use cables X56 and X488 from loom box.
2 Connect as shown to sensor and flying lead X488
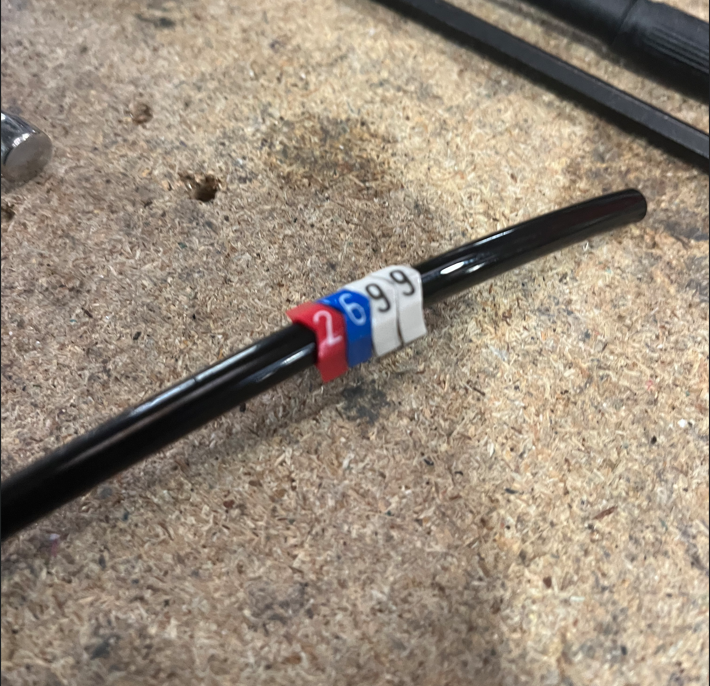
3 Cut and label 1 off 6mm black air pipe 2699 @ 5 mtrs
4 Loom as shown utilising tie bases as indicated
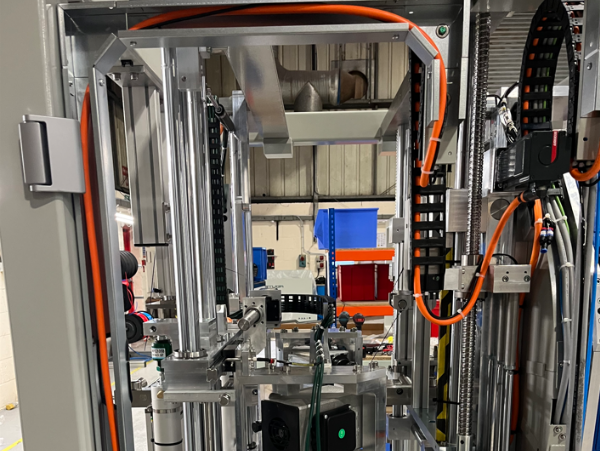
Étape 3 - R axis motor connection
Use cable marked as R axis from loom box
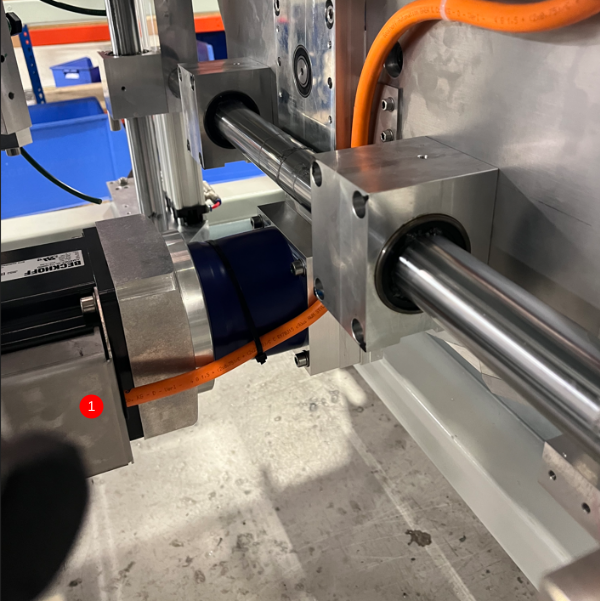
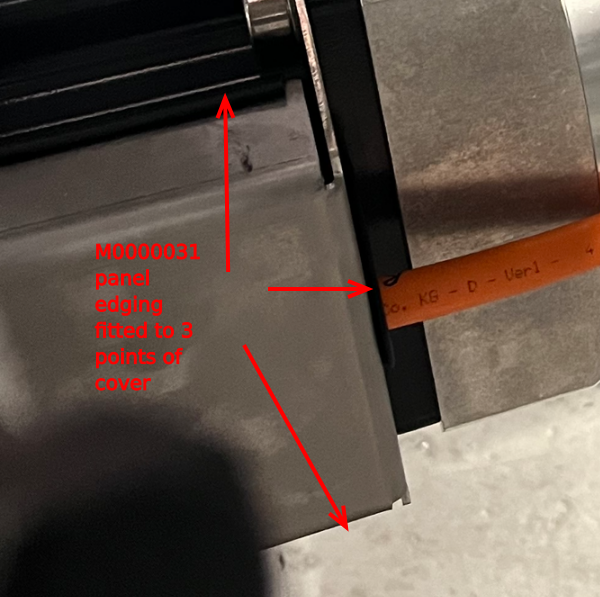
1 Connect to servo motor, and fit protective cover to finalise .Ensure panel edging strip is fitted to indicated faces shown
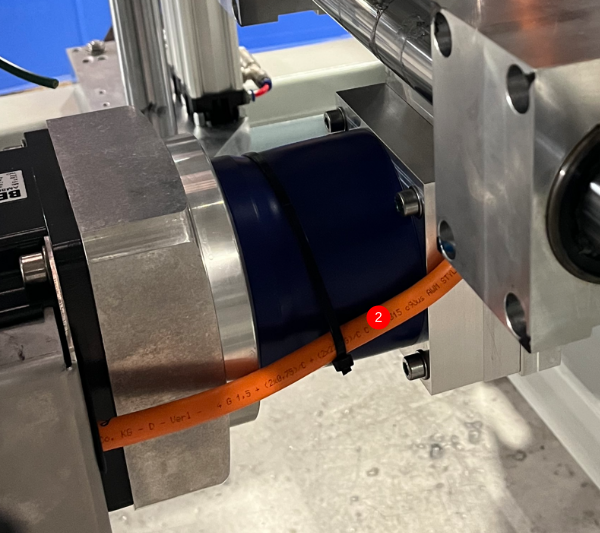
2 Captivate cable onto gearbox as shown with large tie wraps
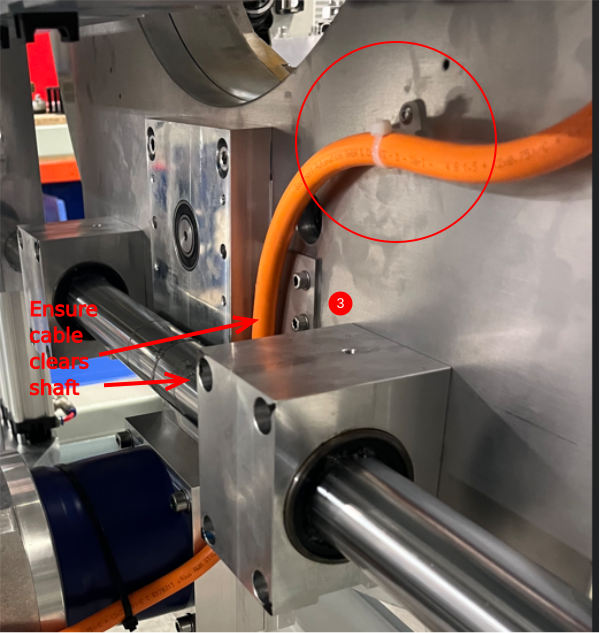
3 Fix to rear faceplate using M4 tie base. Ensure cable sits free of main shaft
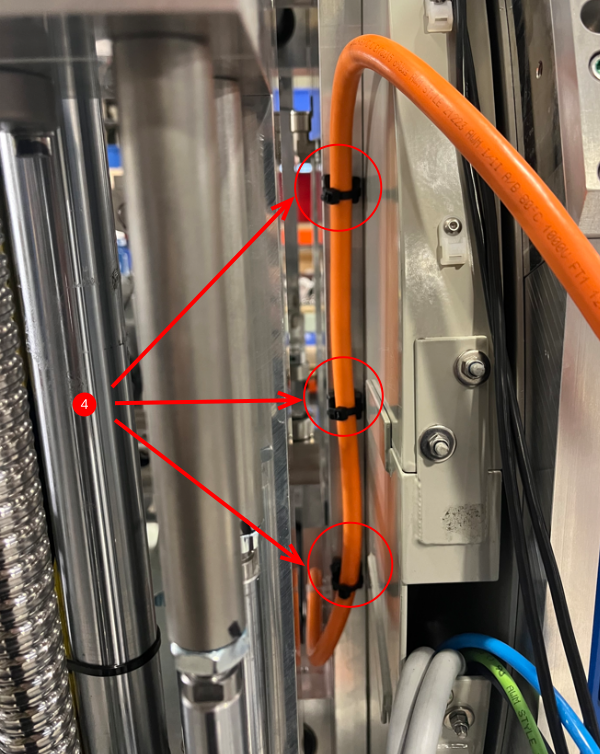
4 Fix cable as shown using large tie bases
Draft

 Français
 English
 Deutsch
 Español
 Italiano
 Português