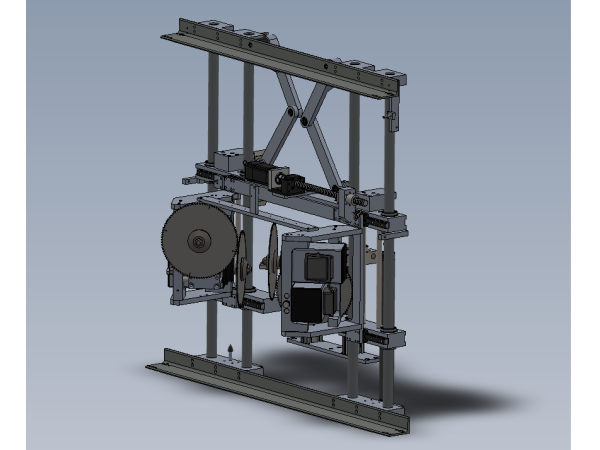
Final assembly details
Introduction
Tools Required
Standard Hex key set
Standard Spanner set
ZX5 Blade tightening tool
Compressed air connection with regulation (for axis support)
Parts required
A0001069 Energy Chain Series B15.050 (48mm radius) Openable x 2
A0001070 Igus Mounting Br Set for A0001069 Non-Pivot x 2
B0000046 Slide Base Bearing Block (Straight Grease Nipple) x 4
B0000173 Blanking plug foc x 28
B0000426 Linear Rail MSB25 400mm Long (AMT) x 4
D0015156 Saw Bearing Plate x 2
D0015161 Saw Plate x 4
D0015162 Saw Mid Spacer Bar x 1
D0015163 Saw Bearing Spacer Bar x 1
D0015168B Balance Cylinder Bracket x 2
D0015169B Cylinder Rod Bracket x 2
D0015179 Energy Chain Bracket x 2
D0015180 Datum Switch Bracket (VZ) x 1
D0015183 VY Stop x 2
D0015235 VY Datum Switch Bracket x 1
D0015236 VY Energy Chain Bracket - Fixed x 1
D0015237 VY Energy Chain Bracket - Moving x 1
D0015250 Safe Sensor Block x 1
D0015251 Safe Sensor Finger x 1
D0015440 Spacer: Ø12.7 x 36, M6 tap thru x 2
D0015452 Scissor Cable Retainer x 1
D0015541 Energy Chain Deflector x 1
D0015704 Energy Chain Support Plate x 1
E0000336 Sensor: M8; 2mm, PNP N/O, M8 conn x 2
E0001185 Elte Saw motor x 4
M0001087 Rubber Bump Stop M6 Ø20x24 x2
P0000022 Fitting: Brass Reducing Bush 1/4 - 1/8 BSP x 1
P0000023 Fitting: Hex Nipple 1/8 BSP x 1
P0000026 Silencer 1/4 BSP x 1
P0000050 Fitting: Silencer 1/8'' BSP x 1
P0000077 Straight Adaptor 8mm - 1/8BSP x 1
P0000140 Fitting: Quick Exhaust Valve 1/8" x 1
P0001040 Fitting: 1/8BSP Hex Head Silencer x 2
P0001041 SMC Reed Switch Mounting Bracket BJ3-1 x 2
P0001133 Cylinder: Ø50 x 500 x 2
P0001134 Floating Joint M18x1.5 x 2
P0001140 Pilot Check Valve: 8mm to 1/4" BSP x 2
P0001141 Fitting: SMC Flow Controller Elbow Ø8-1/4BSP x 1
P0001142 Adjustable Damper 150mm stroke (3000N) x 1
P0001144 Reed Switch Mounting Band for Ø50 cyl x 2
R0015084 Bench assemble and Drill Off Swarf chutes
V0000028B-ZX5 Notching Blade: Ø300 x 96 teeth x 2.8mm pl x 3.3mm kf x24mm x 4Étape 1 - Unless otherwise stated
Use locktite 243 on all fasteners
Use loctite 572 on all threaded pneumatic connection
Pen mark all fasteners to show finalised
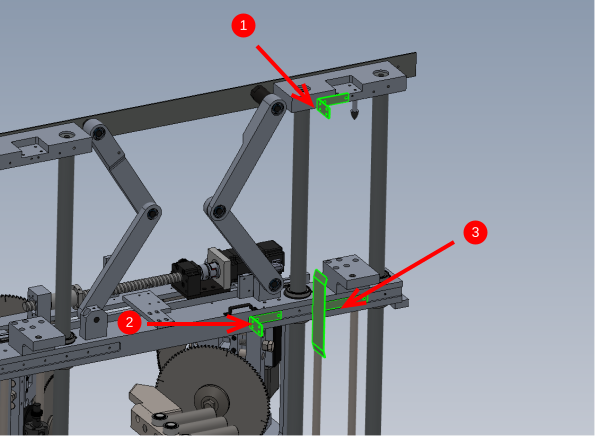
Étape 2 - Fit VZ energy chain
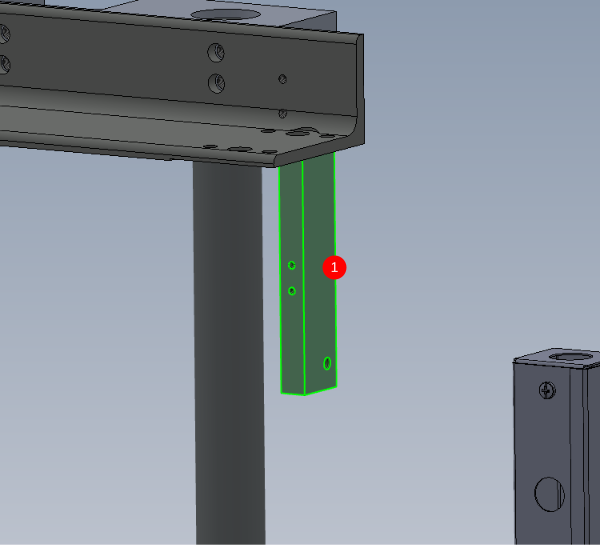
1 Fit D0015179 Energy Chain Bracket as shown using 2 off M6 x 16 socket caps and A form washers
2 Fit D0015179 Energy Chain Bracket as shown using 2 off M6 x 16 socket caps and A form washers
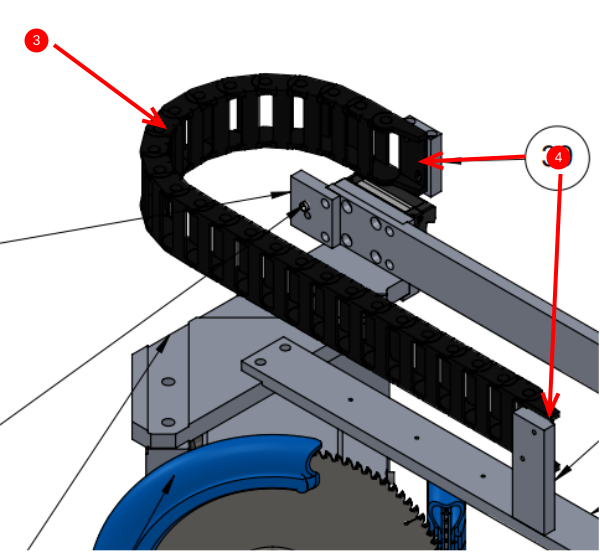
3 Fit D0015541 Energy Chain Deflector as shown using 2 off M6 x 16 socket caps and A form washers
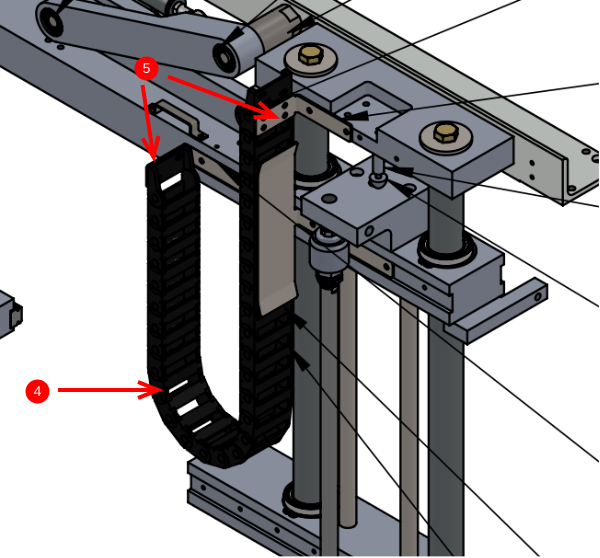
4 Assemble A0001069 Energy Chain @ 31 Links with A0001070 Igus Mounting Br Set
5 Attach as shown using M6 x 16 button heads, M6 A form washers and M6 nyloc nuts
Étape 3 - Fit VY energy chain
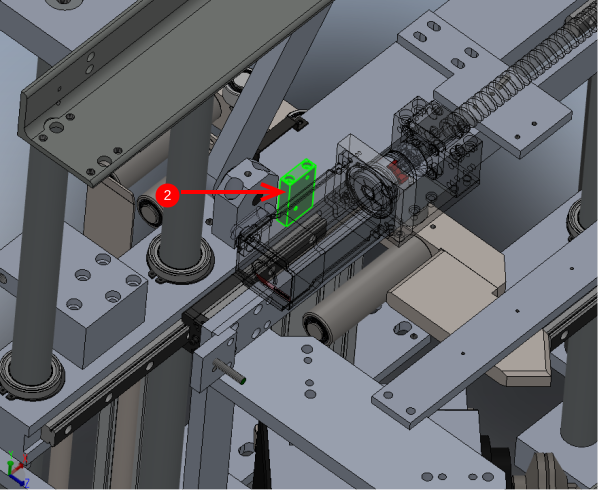
1 Attach D0015237 VY Energy Chain Bracket as shown. Use 2 off M5 x 20 socket caps and A form washers to fix . Ensure correct orientation
2 Attach D0015236 VY Energy Chain Bracket as shown. Use 2 off M5 x 65 socket caps , ensure correct orientation
3 Assemble A0001069 Energy Chain Series @21 links with A0001070 Igus Mounting Br Set as shown
4 Fit energy chain as shown using 4 off M5 x 16 button sockets and 4 off M5 12mm od washers
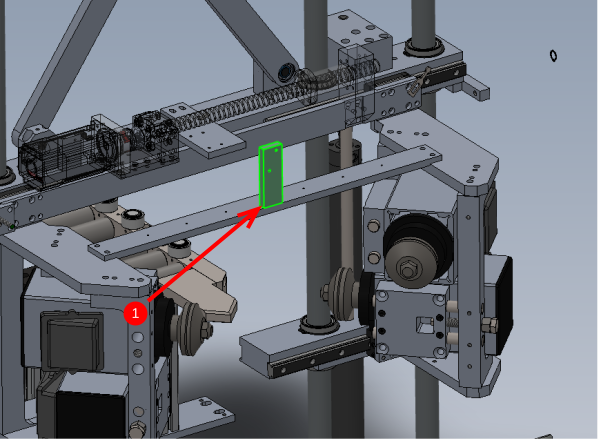
Étape 4 - Attach cable retainer
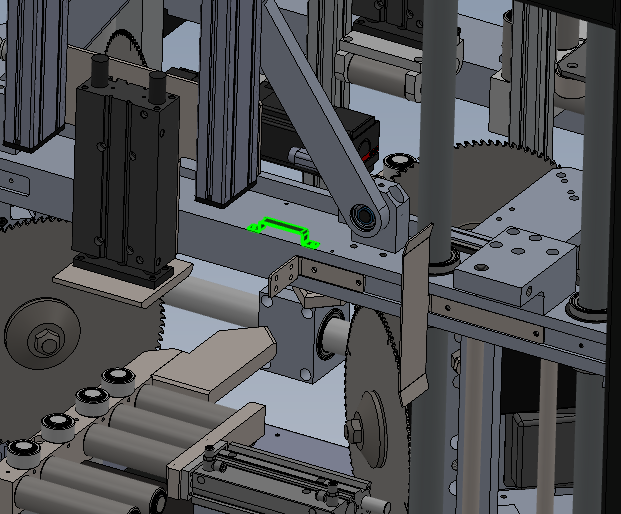
Attach D0015452 Scissor Cable Retainer as shown , Using 2 off M5 x 12 socket caps and A form washers
Étape 5 - Attach Datum sensor
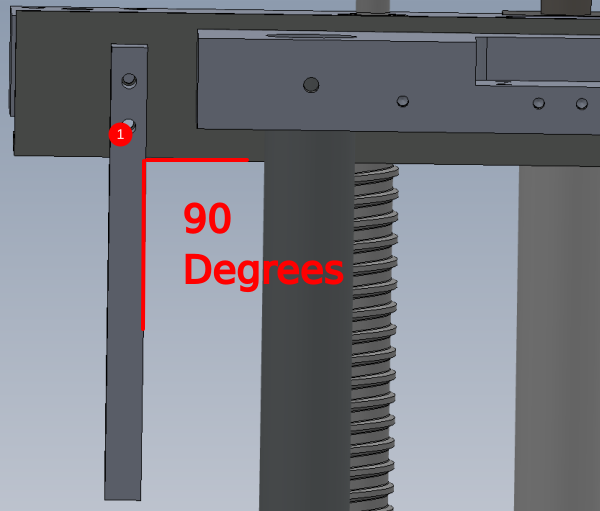
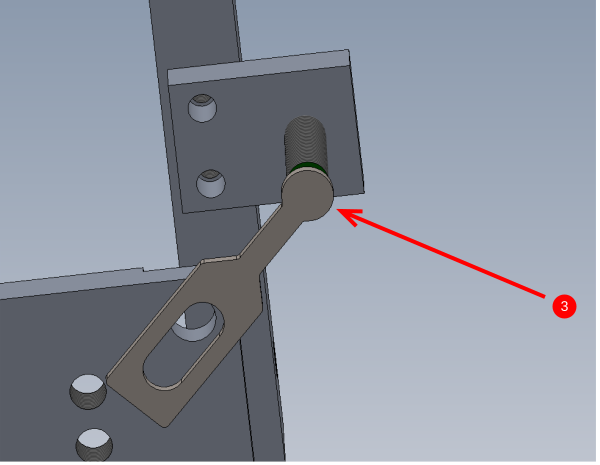
1 Attach D0015180 Datum Switch Bracket as shown . This is always at the rear of the machine. Use 2 off M6 x 50 socket caps and A form washers to fix. Ensure bracket is mounted square
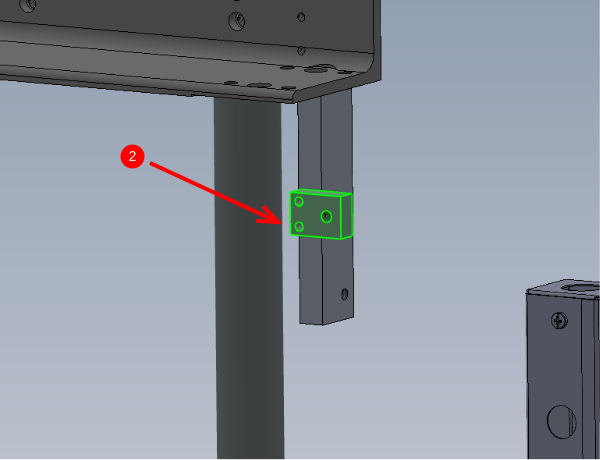
2 Attach D0015250 Safe Sensor Block as shown. Use 2 off M5 x 25 socket caps and A form washers
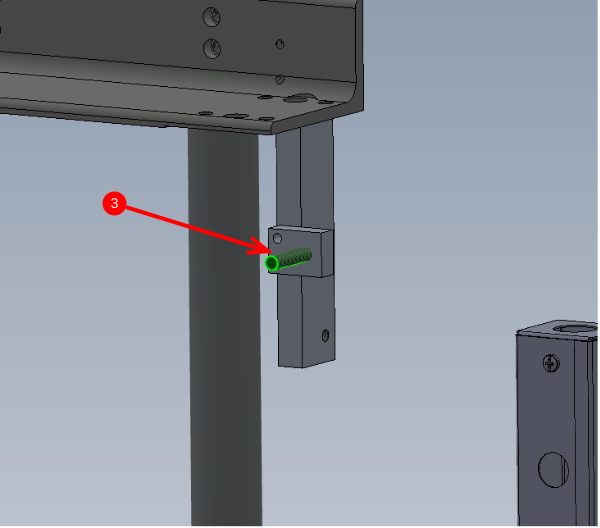
3 Fit E0000336 Sensor: M8; 2mm, as shown ensuring shakeproof washer is fitted along with locking nut. Do not over tension sensor lock nut!
Étape 6 - Set V safe position
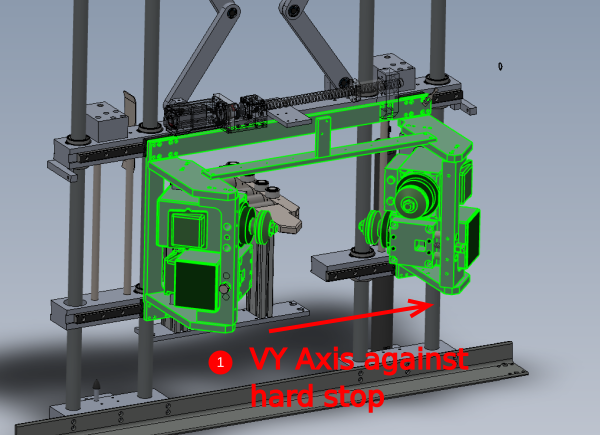
1 Ensure VY axis is at full travel in the direction shown
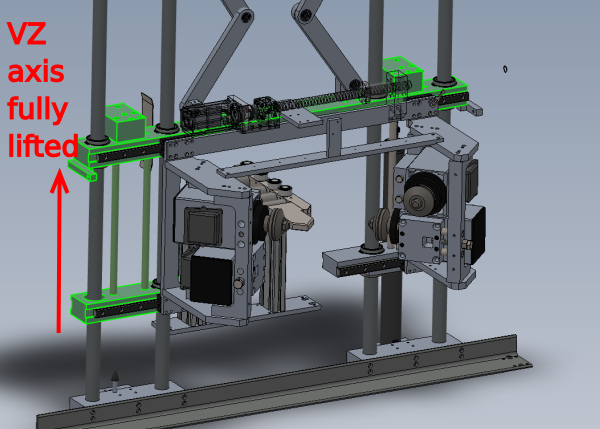
2 Ensure VZ axis is fully lifted with pneumatic support
3 Set sensor paddle to align with sensor and finalise. Ensure sensor is set to the correct position. Sensor must be set to -1mm , but MUST not contact sensor paddle
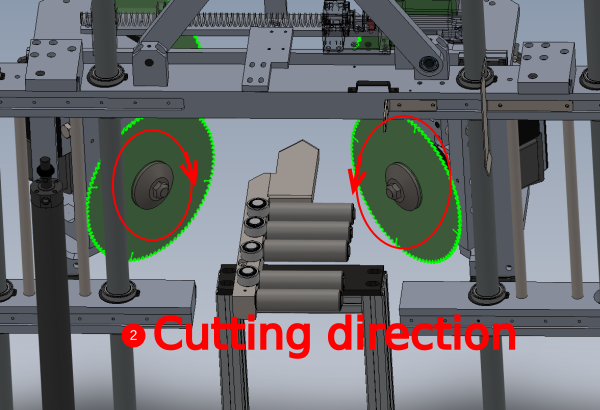
Étape 7 - Fit Saw blades
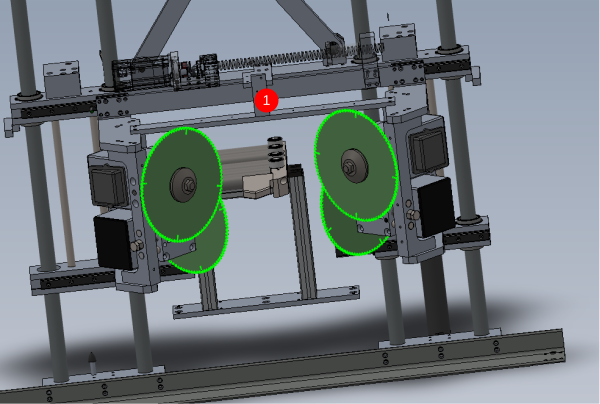
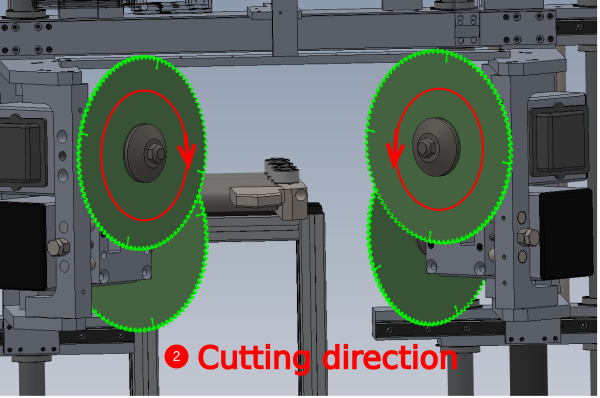
1 Fit 4 off V0000028B-ZX5 Notching Blade: as shown
2 Ensure blades are orientated correctly for rotation
Draft

 Français
 English
 Deutsch
 Español
 Italiano
 Português