Instructions for mounting and aligning hepco x axis beam
Sommaire
- 1 Introduction
- 2 Étape 1 - Unless otherwise stated
- 3 Étape 2 - Fit linear rails
- 4 Étape 3 - Level linear rails
- 5 Étape 4 - Attach mounting brackets
- 6 Étape 5 - Fit bearings and finalise mounts
- 7 Étape 6 - Quality check
- 8 Étape 7 - Dowel in position
- 9 Étape 8 - Hepco dowels
- 10 Étape 9 - Remove setting jigs . grease bearings and fit blanking plugs
- 11 Commentaires
Introduction
Tools Required
Engineers level
Hepco flat spanner T0000491
Hepco Box spanner T0000492
Standard hex key set
Incremental shim pack
Parts Required
B0000046 Slide Base Bearing Block (Straight Grease Nipple) x 6
B0000184 Journal Cap Seal 34 x 4
B0000185 Double Row Long Stud Journal Eccentric x 2
B0000186 Double Row Long Stud Journal Concentric x 2
B0000234 Straight Grease Nipple M6 ST/ST x 6
B0001006 Linear rail 25mm x 820mm x 6
B0001102 Double edge spacer slide and beam 7600mm x 1
D0015072 Carriage Plate x 1
D0015492 Vertical Beam Adjustment Plate x 5
D0015493 Lateral Beam Adjustment Plate x 5
P0000200 Elbow Adaptor 6mm - M5 x 1
B0000173 blanking cap x 90
F0000331 M6 threaded plate x 120Étape 1 - Unless otherwise stated
Use Loctite 243 on all fasteners
Use Loctite 570 on all threaded pneumatic connections
Pen mark all bolts once finalised
Étape 2 - Fit linear rails
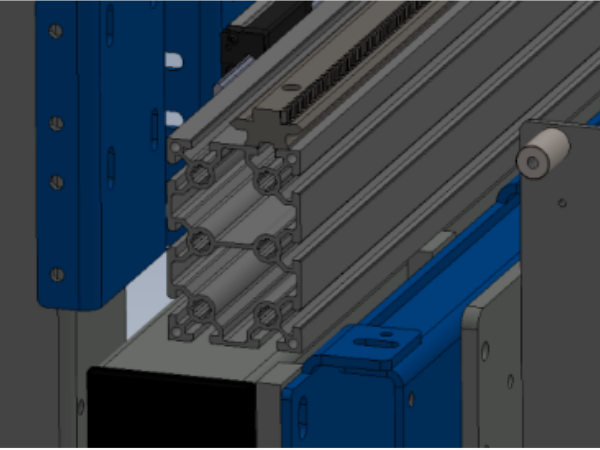
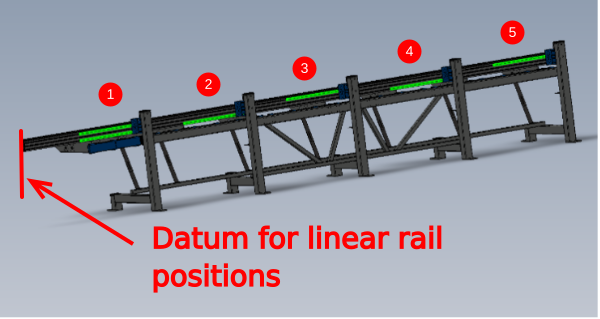
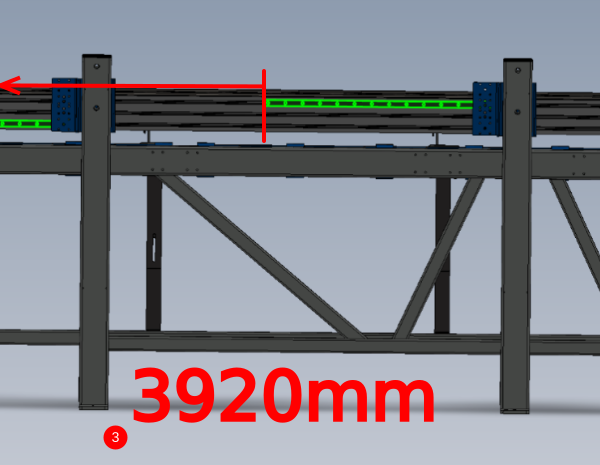
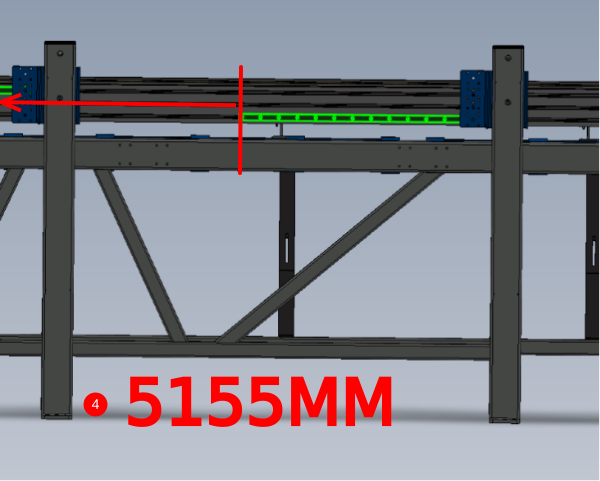
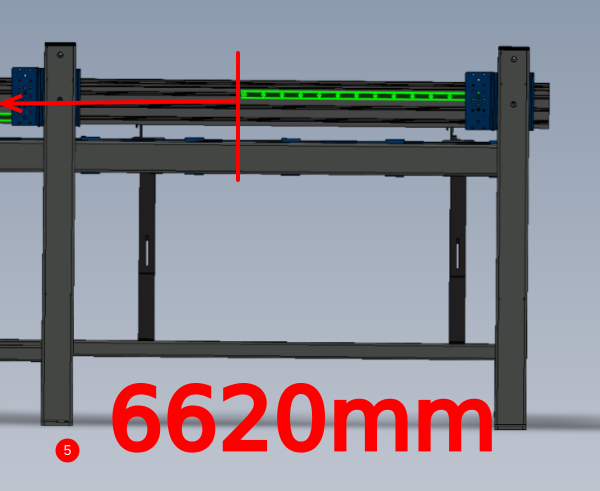
Fit 6 off B0001006 linear rails to hepco beam as shown
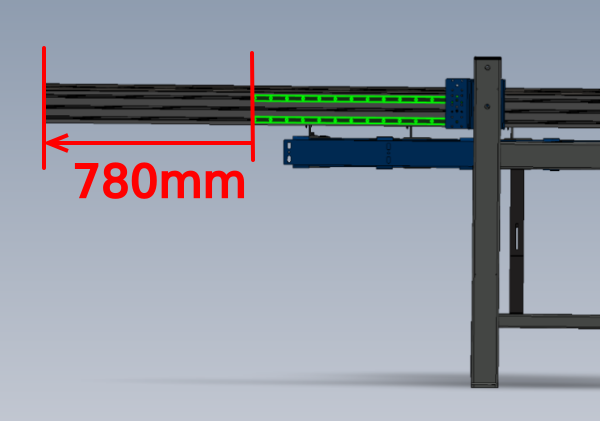
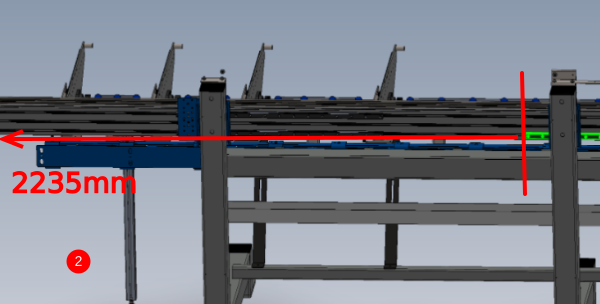
Use data for position of each rail
Fix with F0000331 m6 threaded plates and m6 x 20 socket caps with no adhesive ( holding stock of F0000331 plates is available from stores via request )
only apply light pressure to 2 off fixings per rail
Étape 3 - Level linear rails
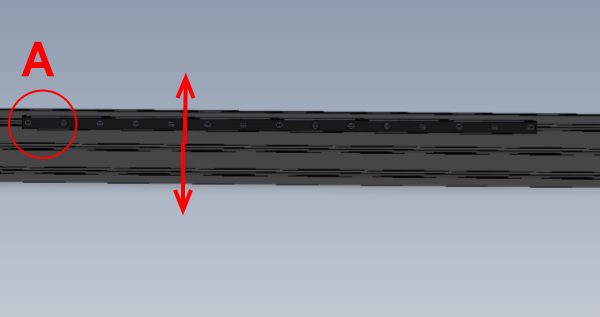
1 Set hole position A to middle of movement in direction shown
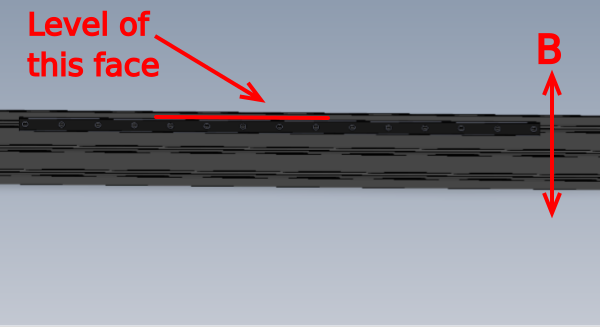
2 Use engineers level on indicated face and adjust position B up or down to set rail level
3 Remove central fasteners one by one, applying adhesive and adding final tension. Then remove both end fasteners ,apply adhesive and apply final tension
Repeat for all remaining 5 linear rails
Étape 4 - Attach mounting brackets
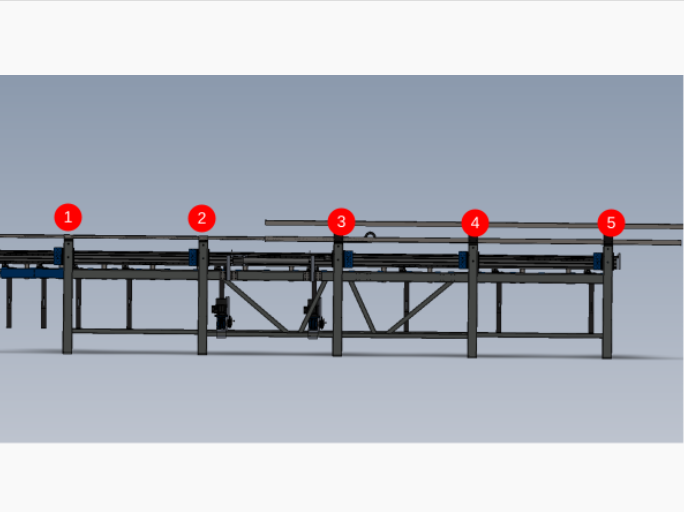
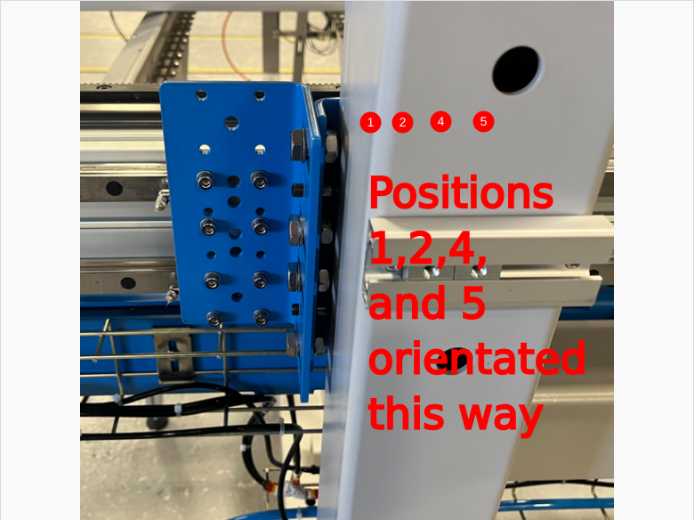
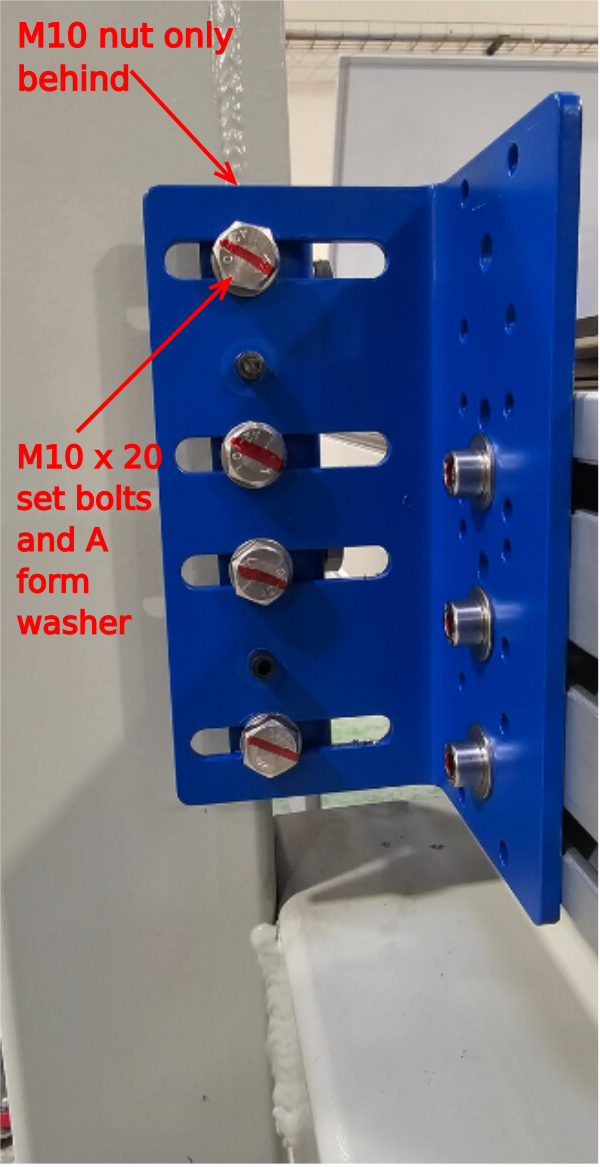
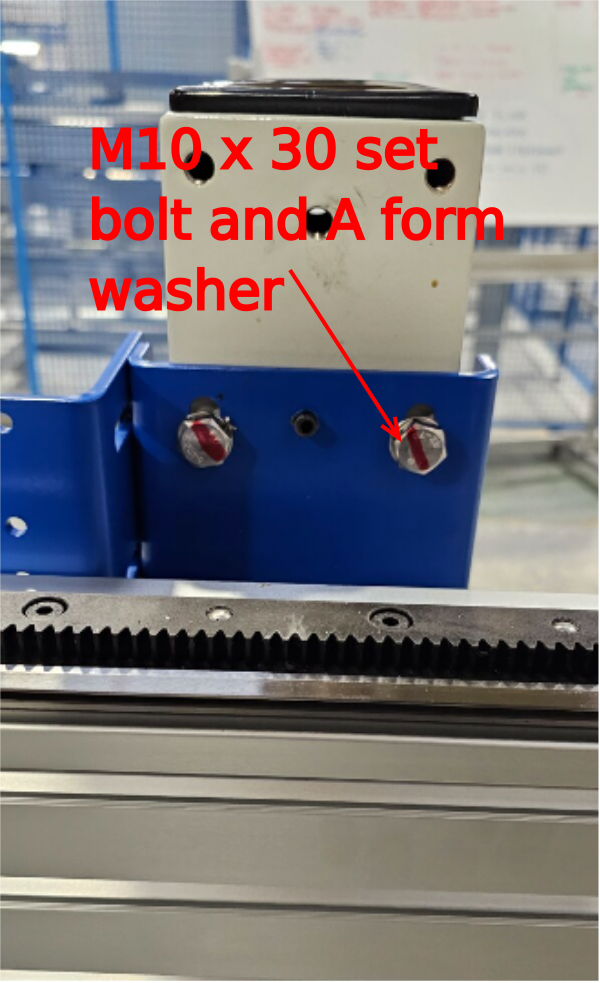
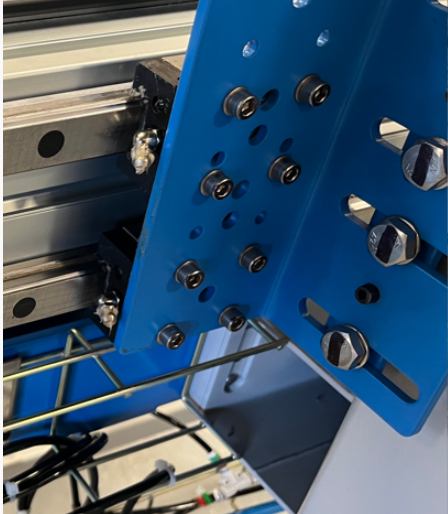
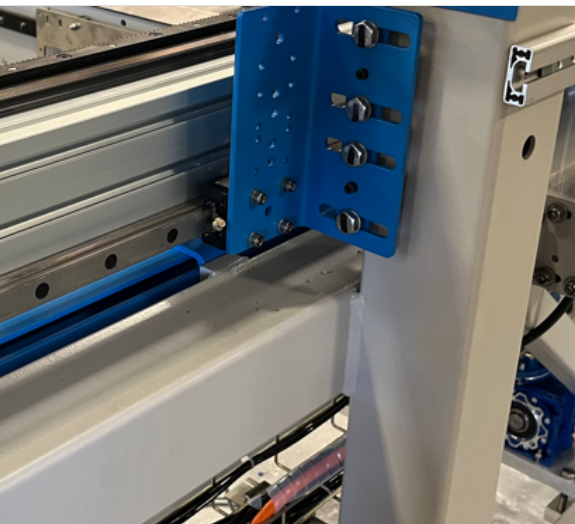
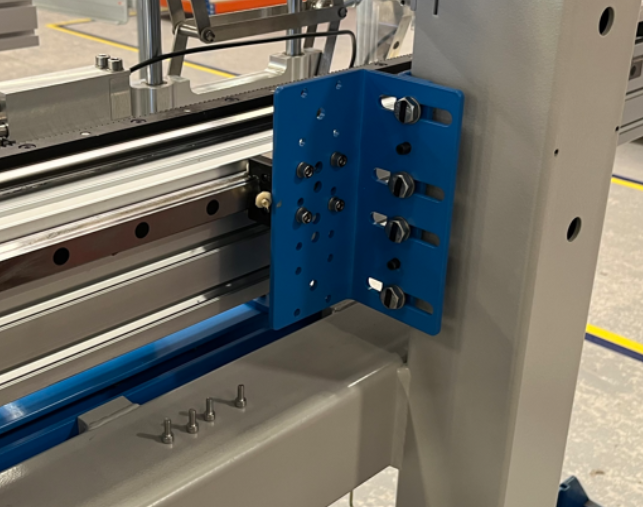
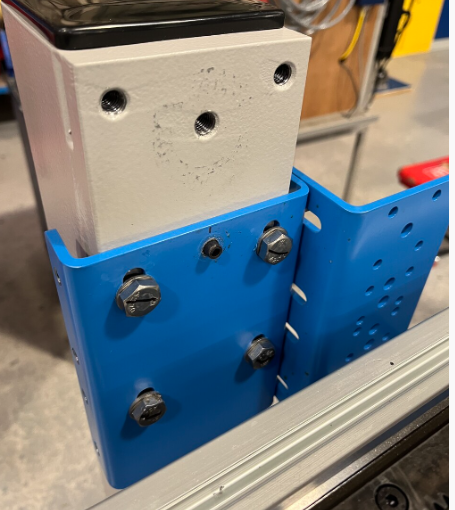
Attach D0015492 Vertical Beam Adjustment Plate x 5 and
D0015493 Lateral Beam Adjustment Plate x 5 to positions shown
Use M10 x 20 and M10 x 30 set bolts, M10 A form washers And nuts on joining plates
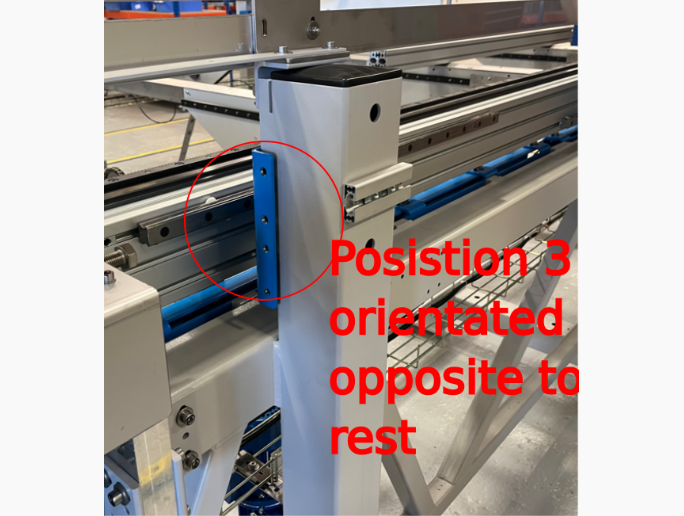
Pay attention to orientation of position 3
only apply light pressure to fasteners to hold in place brackets
Étape 5 - Fit bearings and finalise mounts
Attach B0000046 bearings 6 off to linear rails orientated as shown
Use M6 x 16 socket caps and M6 A form washers with adhesive and lightly fasten as shown , ensure mounting brackets are free to move to align to the bearing face .
Once all faces are in position, tighten all fasteners with adhesive and finalise
Étape 7 - Dowel in position
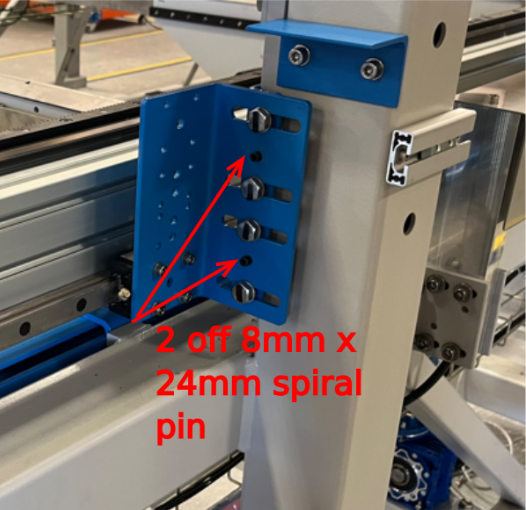
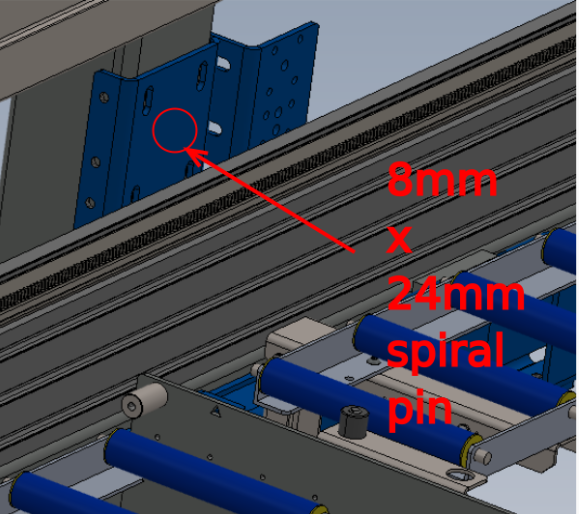
Brackets require fixing with 8mm x 24mm roll pins
Drill the indicated faces to secure alignment
All 5 bracket sets required pinning
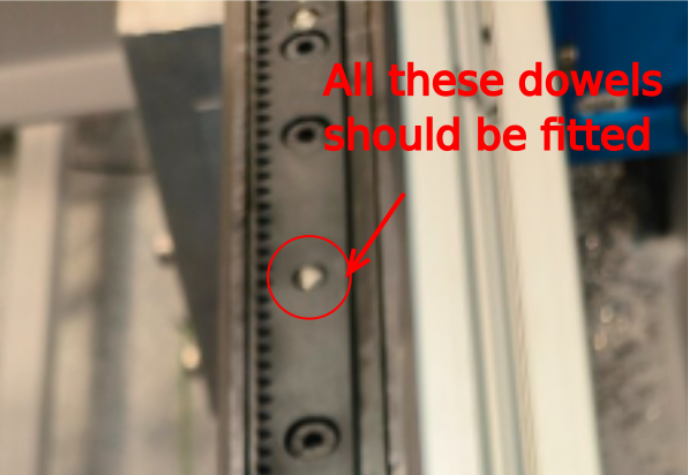
Étape 8 - Hepco dowels
Now alignment is complete, the finalising dowels supplied with the hepco rail can be fitted in the areas shown
Étape 9 - Remove setting jigs . grease bearings and fit blanking plugs
Setting jigs can now be removed that are supporting hepco rail in 5 positions
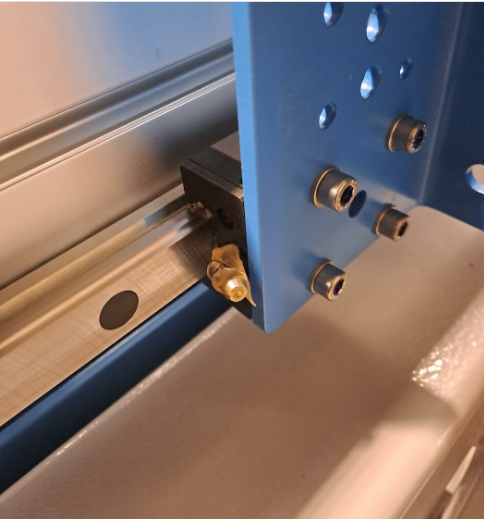
Fit B0000173 blanking plugs to linear rails. Ensure plugs are fitted flush to rail face, not below
Grease all linear bearings on hepco rail
Draft


 Français
 English
 Deutsch
 Español
 Italiano
 Português