| [version en cours de rédaction] | [version en cours de rédaction] |
m (Gareth Green a déplacé la page R0015095 Bench Assemble Transfer Sliders vers R0015281 Bench Assemble Transfer Sliders) |
|||
| Ligne 1 : | Ligne 1 : | ||
{{Tuto Details | {{Tuto Details | ||
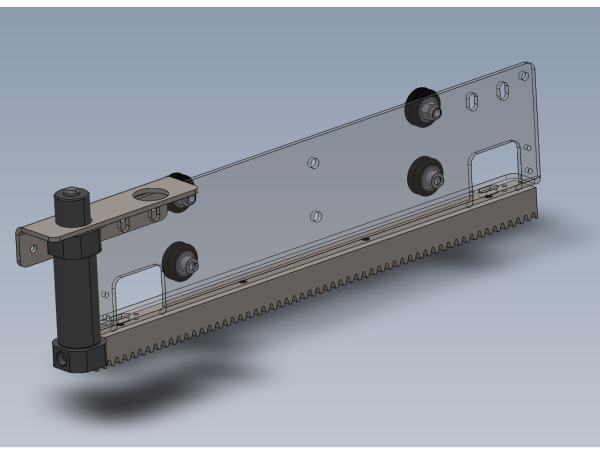
| + | |Main_Picture=R0015281_Bench_Assemble_Transfer_Sliders_Screenshot_2023-07-14_084652.png | ||
| + | |Main_Picture_annotation={"version":"2.4.6","objects":[{"type":"image","version":"2.4.6","originX":"left","originY":"top","left":-25,"top":7,"width":1113,"height":773,"fill":"rgb(0,0,0)","stroke":null,"strokeWidth":0,"strokeDashArray":null,"strokeLineCap":"butt","strokeDashOffset":0,"strokeLineJoin":"miter","strokeMiterLimit":4,"scaleX":0.57,"scaleY":0.57,"angle":0,"flipX":false,"flipY":false,"opacity":1,"shadow":null,"visible":true,"clipTo":null,"backgroundColor":"","fillRule":"nonzero","paintFirst":"fill","globalCompositeOperation":"source-over","transformMatrix":null,"skewX":0,"skewY":0,"crossOrigin":"","cropX":0,"cropY":0,"src":"https://stuga.dokit.app/images/9/96/R0015281_Bench_Assemble_Transfer_Sliders_Screenshot_2023-07-14_084652.png","filters":[]}],"height":450.1679731243001,"width":600} | ||
|Description=<translate>Instructions to bench assemble transfer sliders</translate> | |Description=<translate>Instructions to bench assemble transfer sliders</translate> | ||
|Categories=Production | |Categories=Production | ||
| Ligne 7 : | Ligne 9 : | ||
}} | }} | ||
{{Introduction | {{Introduction | ||
| − | |Introduction=<translate></translate> | + | |Introduction=<translate>'''<u>Tools Required</u>''' |
| + | |||
| + | |||
| + | Standard spanner set | ||
| + | |||
| + | Standard hex key set | ||
| + | |||
| + | |||
| + | '''<u>Parts Required</u>''' | ||
| + | |||
| + | |||
| + | D0015551 x 9 | ||
| + | |||
| + | D0015255 x 9 | ||
| + | |||
| + | D0015549 x 9 | ||
| + | |||
| + | P0001111 x 9 | ||
| + | |||
| + | P0000010 x 9 | ||
| + | |||
| + | B0001160 x 36 | ||
| + | |||
| + | B0001161 x 18 | ||
| + | |||
| + | B0001162 x 18</translate> | ||
}} | }} | ||
{{Materials}} | {{Materials}} | ||
{{EPI}} | {{EPI}} | ||
{{Tuto Step | {{Tuto Step | ||
| − | |Step_Title=<translate></translate> | + | |Step_Title=<translate>Unless otherwise stated</translate> |
| − | |Step_Content=<translate></translate> | + | |Step_Content=<translate>Use Loctite 243 on all fasteners |
| + | |||
| + | Use Loctite 570 on all threaded pneumatic connections | ||
| + | |||
| + | Pen mark all bolts when finalised</translate> | ||
| + | |Step_Picture_00=R0015086_Assemble_Pneumatics_on_to_electrical_cabinet_loctite_243.png | ||
}} | }} | ||
{{Tuto Step | {{Tuto Step | ||
| − | |Step_Title=<translate></translate> | + | |Step_Title=<translate>Attach cylinder plate to rack bracket</translate> |
| − | |Step_Content=<translate></translate> | + | |Step_Content=<translate>9 off |
| + | |||
| + | |||
| + | 1 Attach D0015550 to D0015551 as shown. Use 2 off M6 x 10 socket caps with A form washers | ||
| + | |||
| + | |||
| + | 2 Ensure bracket is positioned bottom slot as shown and faces marked are parallel</translate> | ||
| + | |Step_Picture_00=R0015281_Bench_Assemble_Transfer_Sliders_Screenshot_2023-07-14_085113.png | ||
| + | |Step_Picture_01=R0015281_Bench_Assemble_Transfer_Sliders_Screenshot_2023-07-14_085123.png | ||
}} | }} | ||
{{Tuto Step | {{Tuto Step | ||
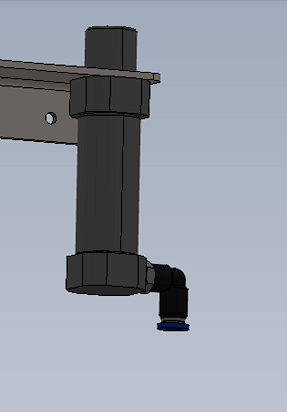
| − | |Step_Title=<translate></translate> | + | |Step_Title=<translate>Attach air fitting</translate> |
| − | |Step_Content=<translate></translate> | + | |Step_Content=<translate>9 off |
| + | |||
| + | |||
| + | Attach P0000010 elbow fitting to cylinder P0001111 as shown</translate> | ||
| + | |Step_Picture_00=R0015281_Bench_Assemble_Transfer_Sliders_Screenshot_2023-07-14_085257.png | ||
| + | |Step_Picture_01=R0015281_Bench_Assemble_Transfer_Sliders_Screenshot_2023-07-14_085305.png | ||
}} | }} | ||
{{Tuto Step | {{Tuto Step | ||
| − | |Step_Title=<translate></translate> | + | |Step_Title=<translate>Attach cylinder to bracket</translate> |
| − | |Step_Content=<translate></translate> | + | |Step_Content=<translate>9 off |
| + | |||
| + | |||
| + | Mount cylinder to bracket as shown. Loctite 243 should be used on cylinder locking nut</translate> | ||
| + | |Step_Picture_00=R0015281_Bench_Assemble_Transfer_Sliders_Screenshot_2023-07-14_085305.png | ||
}} | }} | ||
{{Tuto Step | {{Tuto Step | ||
| − | |Step_Title=<translate></translate> | + | |Step_Title=<translate>Attach drive rack</translate> |
| − | |Step_Content=<translate></translate> | + | |Step_Content=<translate>Attach drive rack D0015255 to assembly as shown. |
| + | |||
| + | Use m6 x 16 socket caps, M6 A form washers and M4 x 20 socket caps</translate> | ||
| + | |Step_Picture_00=R0015281_Bench_Assemble_Transfer_Sliders_Screenshot_2023-07-14_085832.png | ||
| + | |Step_Picture_01=R0015281_Bench_Assemble_Transfer_Sliders_Screenshot_2023-07-14_085917.png | ||
}} | }} | ||
{{Tuto Step | {{Tuto Step | ||
| − | |Step_Title=<translate></translate> | + | |Step_Title=<translate>Fit concentric Delrin wheels</translate> |
| − | |Step_Content=<translate></translate> | + | |Step_Content=<translate>2 off on each assembly |
| + | |||
| + | |||
| + | 9 off in total | ||
| + | |||
| + | |||
| + | Fit concentric wheels to assembly . | ||
| + | |||
| + | |||
| + | Assemble with in this order | ||
| + | |||
| + | |||
| + | M5 x 30 set bolt- M5 A form washer- Delrin wheel assembly B0001160- spacer B0001161 - Main assembly - A form washer- M5 Nyloc nut</translate> | ||
| + | |Step_Picture_00=R0015281_Bench_Assemble_Transfer_Sliders_Screenshot_2023-07-14_090500.png | ||
| + | |Step_Picture_01=R0015281_Bench_Assemble_Transfer_Sliders_Screenshot_2023-07-14_090509.png | ||
}} | }} | ||
{{Tuto Step | {{Tuto Step | ||
| − | |Step_Title=<translate></translate> | + | |Step_Title=<translate>Fit Eccentric wheels</translate> |
| − | |Step_Content=<translate> | + | |Step_Content=<translate>2 off on each assembly |
| − | + | ||
| − | + | 9 off in total | |
| − | + | ||
| − | + | 1 Check that part B0001162 sits flush into hole on rack mounting plate. It may be required to remove burrs from manufacture to achieve this | |
| − | + | ||
| − | + | 2 Attach delrin wheel in this order. | |
| − | + | ||
| − | + | M5 x 30 Set bolt-M5 A form washer-Delrin Wheel (B0001160) -Eccentric cam(B0001162)- Assembly - M5 A Form Washer- M5 Nyloc nut | |
| − | + | ||
| − | + | Do not add final tension to this wheel assembly as adjustment will be required at a later point</translate> | |
| − | + | |Step_Picture_00=R0015281_Bench_Assemble_Transfer_Sliders_Screenshot_2023-07-14_090559.png | |
| − | + | |Step_Picture_01=R0015281_Bench_Assemble_Transfer_Sliders_Screenshot_2023-07-14_090622.png | |
| − | |||
| − | |||
| − | | | ||
| − | | | ||
}} | }} | ||
{{Notes}} | {{Notes}} | ||
{{PageLang | {{PageLang | ||
| + | |Language=en | ||
|SourceLanguage=none | |SourceLanguage=none | ||
|IsTranslation=0 | |IsTranslation=0 | ||
| − | |||
}} | }} | ||
{{Tuto Status | {{Tuto Status | ||
|Complete=Draft | |Complete=Draft | ||
}} | }} | ||
Version du 14 juillet 2023 à 09:06
Instructions to bench assemble transfer sliders
Introduction
Tools Required
Standard spanner set
Standard hex key set
Parts Required
D0015551 x 9
D0015255 x 9
D0015549 x 9
P0001111 x 9
P0000010 x 9
B0001160 x 36
B0001161 x 18
B0001162 x 18Étape 1 - Unless otherwise stated
Use Loctite 243 on all fasteners
Use Loctite 570 on all threaded pneumatic connections
Pen mark all bolts when finalised
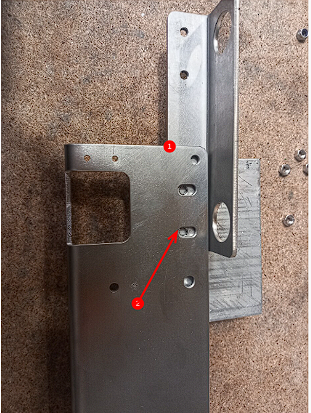
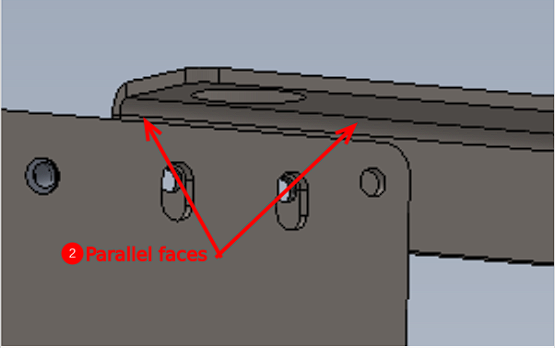
Étape 2 - Attach cylinder plate to rack bracket
9 off
1 Attach D0015550 to D0015551 as shown. Use 2 off M6 x 10 socket caps with A form washers
2 Ensure bracket is positioned bottom slot as shown and faces marked are parallel
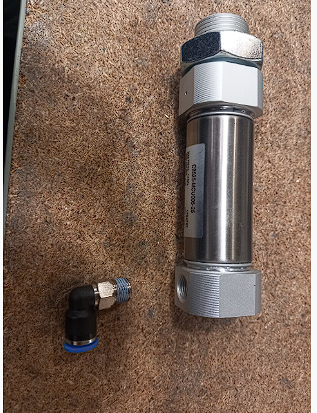
Étape 4 - Attach cylinder to bracket
9 off
Mount cylinder to bracket as shown. Loctite 243 should be used on cylinder locking nut
Étape 5 - Attach drive rack
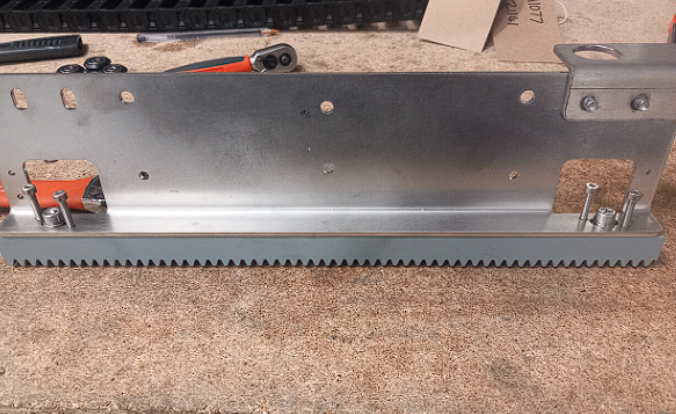
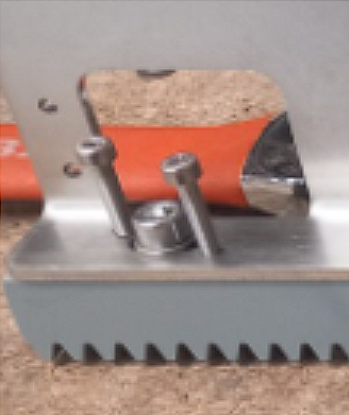
Attach drive rack D0015255 to assembly as shown.
Use m6 x 16 socket caps, M6 A form washers and M4 x 20 socket caps
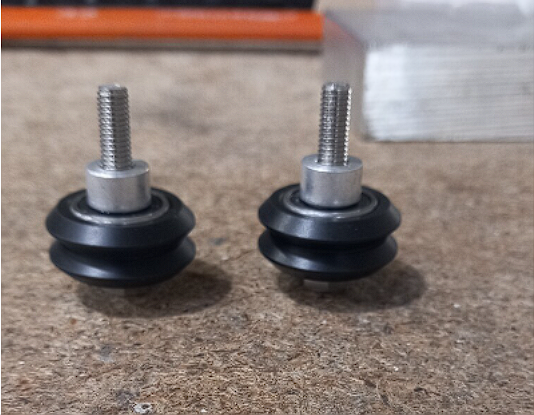
Étape 6 - Fit concentric Delrin wheels
2 off on each assembly
9 off in total
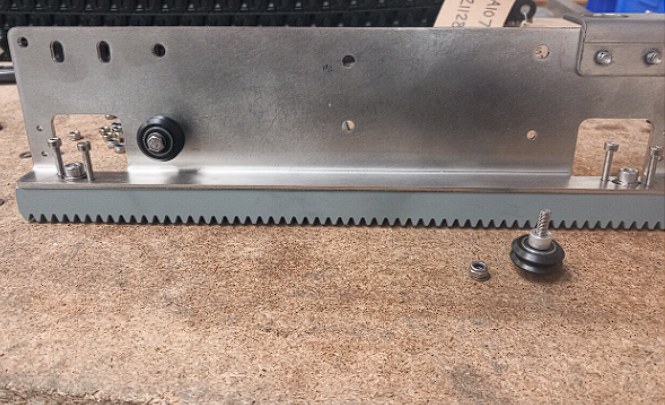
Fit concentric wheels to assembly .
Assemble with in this order
M5 x 30 set bolt- M5 A form washer- Delrin wheel assembly B0001160- spacer B0001161 - Main assembly - A form washer- M5 Nyloc nut
Étape 7 - Fit Eccentric wheels
2 off on each assembly
9 off in total
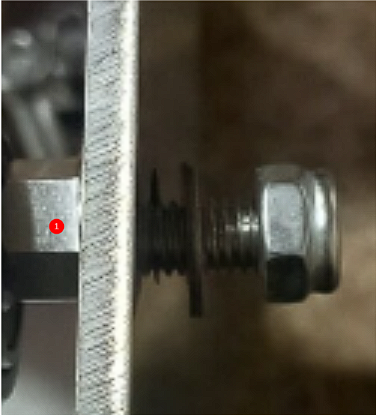
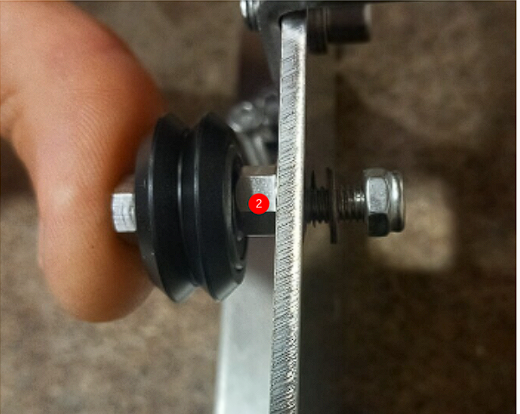
1 Check that part B0001162 sits flush into hole on rack mounting plate. It may be required to remove burrs from manufacture to achieve this
2 Attach delrin wheel in this order.
M5 x 30 Set bolt-M5 A form washer-Delrin Wheel (B0001160) -Eccentric cam(B0001162)- Assembly - M5 A Form Washer- M5 Nyloc nut
Do not add final tension to this wheel assembly as adjustment will be required at a later point
Draft

 Français
 English
 Deutsch
 Español
 Italiano
 Português