| [version en cours de rédaction] | [version en cours de rédaction] |
| Ligne 1 : | Ligne 1 : | ||
{{Tuto Details | {{Tuto Details | ||
|Main_Picture=VM_Upgrade_Hardware_VH-H-CradleHome.jpg | |Main_Picture=VM_Upgrade_Hardware_VH-H-CradleHome.jpg | ||
| − | |Description=<translate>Hardware Upgrade for Virtual Machine | + | |Description=<translate>Hardware Upgrade for Virtual Machine</translate> |
|Categories=Production | |Categories=Production | ||
|Difficulty=Medium | |Difficulty=Medium | ||
| Ligne 49 : | Ligne 49 : | ||
}} | }} | ||
{{Tuto Step | {{Tuto Step | ||
| − | |Step_Title=<translate> | + | |Step_Title=<translate>Adding Memory</translate> |
|Step_Content=<translate>#Pinch the handles on either side of the black fan housing and remove. | |Step_Content=<translate>#Pinch the handles on either side of the black fan housing and remove. | ||
| − | # | + | #Place the extra memory into the spare slot. |
| − | |||
#Reseat the fan</translate> | #Reseat the fan</translate> | ||
|Step_Picture_00=VM_Upgrade_Hardware_VH-H-ReadyForFan.jpg | |Step_Picture_00=VM_Upgrade_Hardware_VH-H-ReadyForFan.jpg | ||
Version actuelle datée du 28 février 2023 à 15:39
Hardware Upgrade for Virtual Machine


Difficulté
Moyen
Durée
20 minute(s)
Sommaire
- 1 Introduction
- 2 Étape 1 - Gain Access to the FE PC
- 3 Étape 2 - Unscrew rear retaining screw
- 4 Étape 3 - Slide top cover back a small distance
- 5 Étape 4 - Remove the top
- 6 Étape 5 - Add SSD
- 7 Étape 6 - Adding Memory
- 8 Étape 7 - Close the Case up
- 9 Étape 8 - Put the PC back into the machine
- 10 Étape 9 - Power up and Check
- 11 Commentaires
Introduction
The upgrade is to prep the machine ready for adding a Virtual Mahine (VM) to the setup.
Étape 1 - Gain Access to the FE PC
With the machine turned off , find the FE PC and remove it as much as you need to gain access to the top cover.
If you are upgrading the memory try and remove the PC to a flat surface.
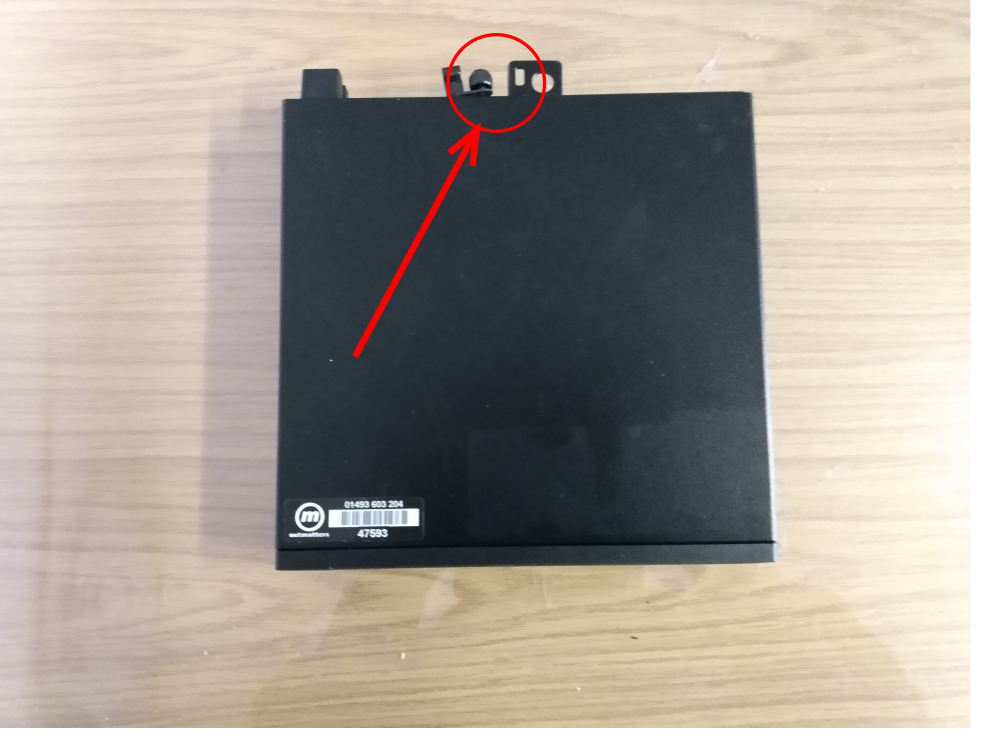
Étape 2 - Unscrew rear retaining screw
Étape 3 - Slide top cover back a small distance

Étape 4 - Remove the top
Étape 5 - Add SSD
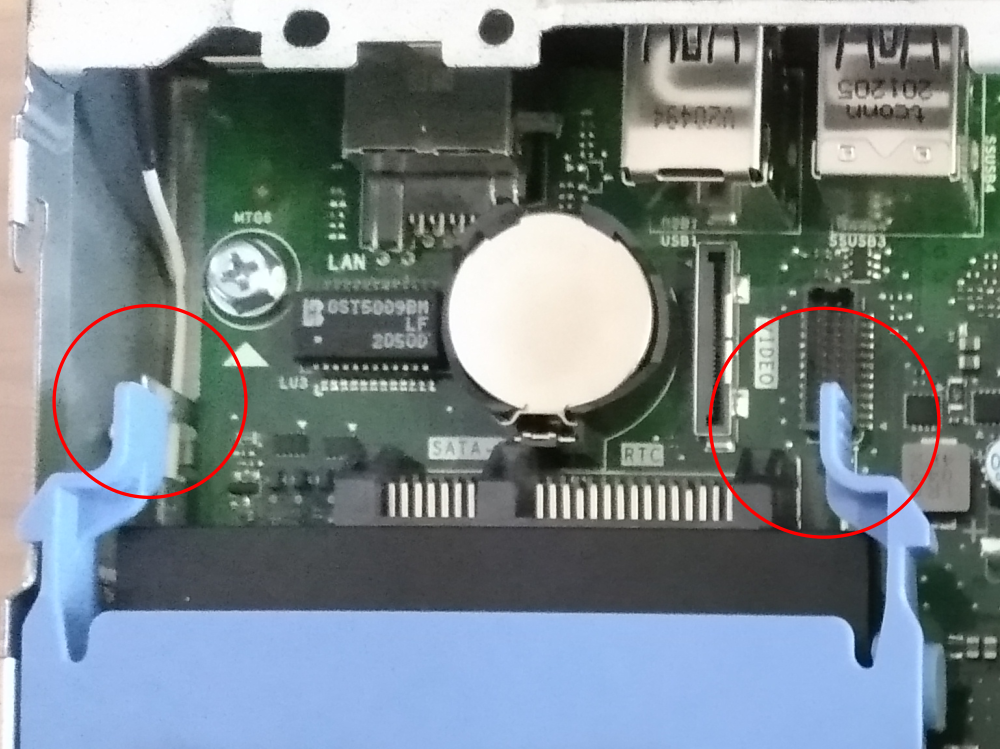
- Press the blue clips at the front of the disk cradle and slide towards the front of the PC.
- Lift cradle out and turn upside down.
- Place the SSD drive upside down in the cradle and locate the side lugs into the drive screw holes.
- Flip the cradle over and reverse the extraction process ensuring that the SATA edge connector slides into the female connector on the motherboard.


Étape 6 - Adding Memory
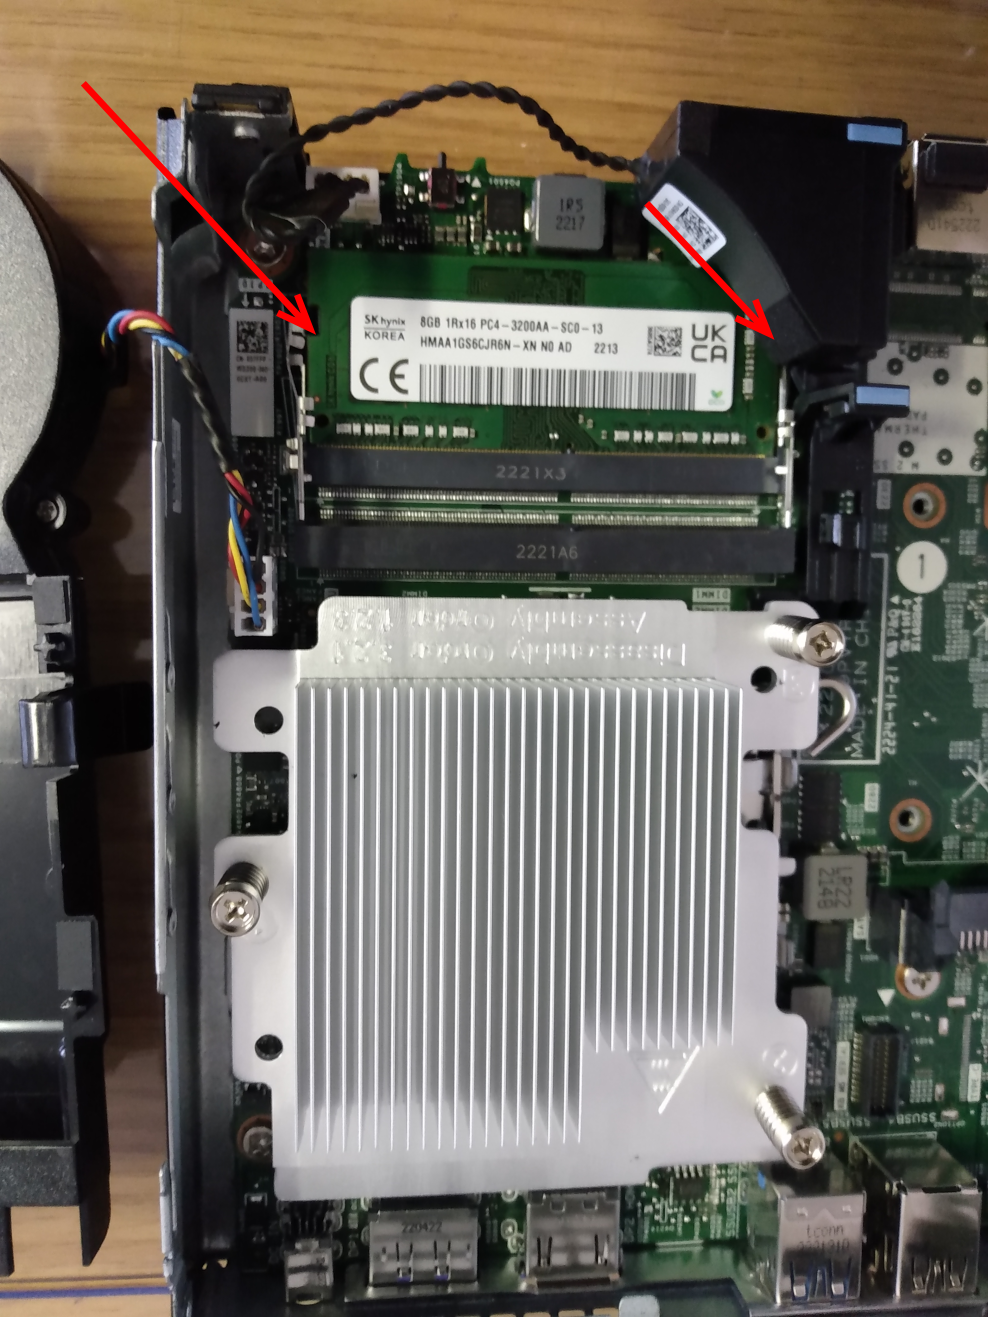
- Pinch the handles on either side of the black fan housing and remove.
- Place the extra memory into the spare slot.
- Reseat the fan


Étape 7 - Close the Case up
Étape 8 - Put the PC back into the machine
Étape 9 - Power up and Check
After powerup look at "my computer" and ensure that you have an extra Disk drive of 400+GB.
Draft
 Français
 English
 Deutsch
 Español
 Italiano
 Português