| [version en cours de rédaction] | [version en cours de rédaction] |
| Ligne 35 : | Ligne 35 : | ||
D0015461 Infeed Motor Mount x1 | D0015461 Infeed Motor Mount x1 | ||
| − | D0015462 Infeed Motor Platex1</translate> | + | D0015462 Infeed Motor Platex1 |
| + | |||
| + | F0000618 m10 x 70 set bolt</translate> | ||
}} | }} | ||
{{Materials}} | {{Materials}} | ||
| Ligne 67 : | Ligne 69 : | ||
{{Tuto Step | {{Tuto Step | ||
|Step_Title=<translate>Attach motor mount</translate> | |Step_Title=<translate>Attach motor mount</translate> | ||
| − | |Step_Content=<translate>Attach Infeed motor mount to frame using M10 x 70 set bolts and A form washers | + | |Step_Content=<translate>Attach Infeed motor mount to frame using F0000618 M10 x 70 set bolts and A form washers |
| Ligne 77 : | Ligne 79 : | ||
{{Tuto Step | {{Tuto Step | ||
|Step_Title=<translate>Attach torque converter</translate> | |Step_Title=<translate>Attach torque converter</translate> | ||
| − | |Step_Content=<translate>Fit B0000142 Key to drive shaft and position torque convertor</translate> | + | |Step_Content=<translate>Fit B0000142 Key to drive shaft and position torque convertor |
| + | |||
| + | |||
| + | Do not tension grubscrew at this point</translate> | ||
|Step_Picture_00=R0015263_Mount_drive_motor_for_load_shaft_Screenshot_2023-07-04_193515.png | |Step_Picture_00=R0015263_Mount_drive_motor_for_load_shaft_Screenshot_2023-07-04_193515.png | ||
}} | }} | ||
| Ligne 96 : | Ligne 101 : | ||
| − | 3 Finalise fasteners | + | 3 Finalise fasteners including torque converter grubscrew |
<br /></translate> | <br /></translate> | ||
| Ligne 106 : | Ligne 111 : | ||
{{Tuto Step | {{Tuto Step | ||
|Step_Title=<translate>Fit duplex chain</translate> | |Step_Title=<translate>Fit duplex chain</translate> | ||
| − | |Step_Content=<translate>Fit duplex chain to mounted parts of torque converter</translate> | + | |Step_Content=<translate>Fit duplex chain to mounted parts of torque converter |
| + | |||
| + | |||
| + | Ensure all parts are fitted including centre section</translate> | ||
|Step_Picture_00=R0015263_Mount_drive_motor_for_load_shaft_Screenshot_2023-07-05_080903.png | |Step_Picture_00=R0015263_Mount_drive_motor_for_load_shaft_Screenshot_2023-07-05_080903.png | ||
| + | |Step_Picture_01=R0015263_Mount_drive_motor_for_load_shaft_Screenshot_2023-11-09_123408.png | ||
| + | |Step_Picture_01_annotation={"version":"2.4.6","objects":[{"type":"image","version":"2.4.6","originX":"left","originY":"top","left":0,"top":0,"width":316,"height":444,"fill":"rgb(0,0,0)","stroke":null,"strokeWidth":0,"strokeDashArray":null,"strokeLineCap":"butt","strokeDashOffset":0,"strokeLineJoin":"miter","strokeMiterLimit":4,"scaleX":1.9,"scaleY":1.9,"angle":0,"flipX":false,"flipY":false,"opacity":1,"shadow":null,"visible":true,"clipTo":null,"backgroundColor":"","fillRule":"nonzero","paintFirst":"fill","globalCompositeOperation":"source-over","transformMatrix":null,"skewX":0,"skewY":0,"crossOrigin":"","cropX":0,"cropY":0,"src":"https://stuga.dokit.app/images/e/e6/R0015263_Mount_drive_motor_for_load_shaft_Screenshot_2023-11-09_123408.png","filters":[]},{"type":"wfellipse","version":"2.4.6","originX":"center","originY":"center","left":316.48,"top":351.53,"width":131.77,"height":131.77,"fill":"rgba(255,0,0,0)","stroke":"#FF0000","strokeWidth":2,"strokeDashArray":null,"strokeLineCap":"butt","strokeDashOffset":0,"strokeLineJoin":"miter","strokeMiterLimit":4,"scaleX":1,"scaleY":1,"angle":0,"flipX":false,"flipY":false,"opacity":1,"shadow":null,"visible":true,"clipTo":null,"backgroundColor":"","fillRule":"nonzero","paintFirst":"fill","globalCompositeOperation":"source-over","transformMatrix":null,"skewX":0,"skewY":0,"rx":65.88658163747665,"ry":65.88658163747665},{"type":"textbox","version":"2.4.6","originX":"center","originY":"center","left":317.01,"top":642.21,"width":63.37,"height":127.46,"fill":"#FF0000","stroke":"#FF0000","strokeWidth":1,"strokeDashArray":null,"strokeLineCap":"butt","strokeDashOffset":0,"strokeLineJoin":"miter","strokeMiterLimit":4,"scaleX":3.18,"scaleY":3.18,"angle":0,"flipX":false,"flipY":false,"opacity":1,"shadow":null,"visible":true,"clipTo":null,"backgroundColor":"","fillRule":"nonzero","paintFirst":"fill","globalCompositeOperation":"source-over","transformMatrix":null,"skewX":0,"skewY":0,"text":"Ensure centre section is fitted ","fontSize":20,"fontWeight":"normal","fontFamily":"sans-serif","fontStyle":"normal","lineHeight":1.16,"underline":false,"overline":false,"linethrough":false,"textAlign":"left","textBackgroundColor":"","charSpacing":0,"minWidth":20,"styles":{} }],"height":843,"width":600} | ||
}} | }} | ||
{{Tuto Step | {{Tuto Step | ||
Version du 9 novembre 2023 à 14:35
instructions to mount loading arms drive shaft motor


Difficulté
Moyen
Durée
1 heure(s)
Introduction
Tools Required
Standard Hex key set
Standard Spanner set
Long nose pliers
Parts Required
B0000041 Feather Key 5 x 5 x 18 Long x 1
B0000142 Feather key 5 x 5 x 25 long
B0000240 Geared Motor 0.18kW 18RPM Motovario x1
B0001100 Feather Key 8 x 7 x 30 Long x2
D0006714 Index Torque Limiter (B0189 / B0190) x1
D0015460 Infeed Motor Shaft (2018) x1
D0015461 Infeed Motor Mount x1
D0015462 Infeed Motor Platex1
F0000618 m10 x 70 set boltÉtape 1 - Unless otherwise stated
Use loctite 243 on all fasteners
Use Loctite 572 on all threaded pneumatic connections
Pen mark all bolts to show finalised

Étape 2 - Assemble Motor
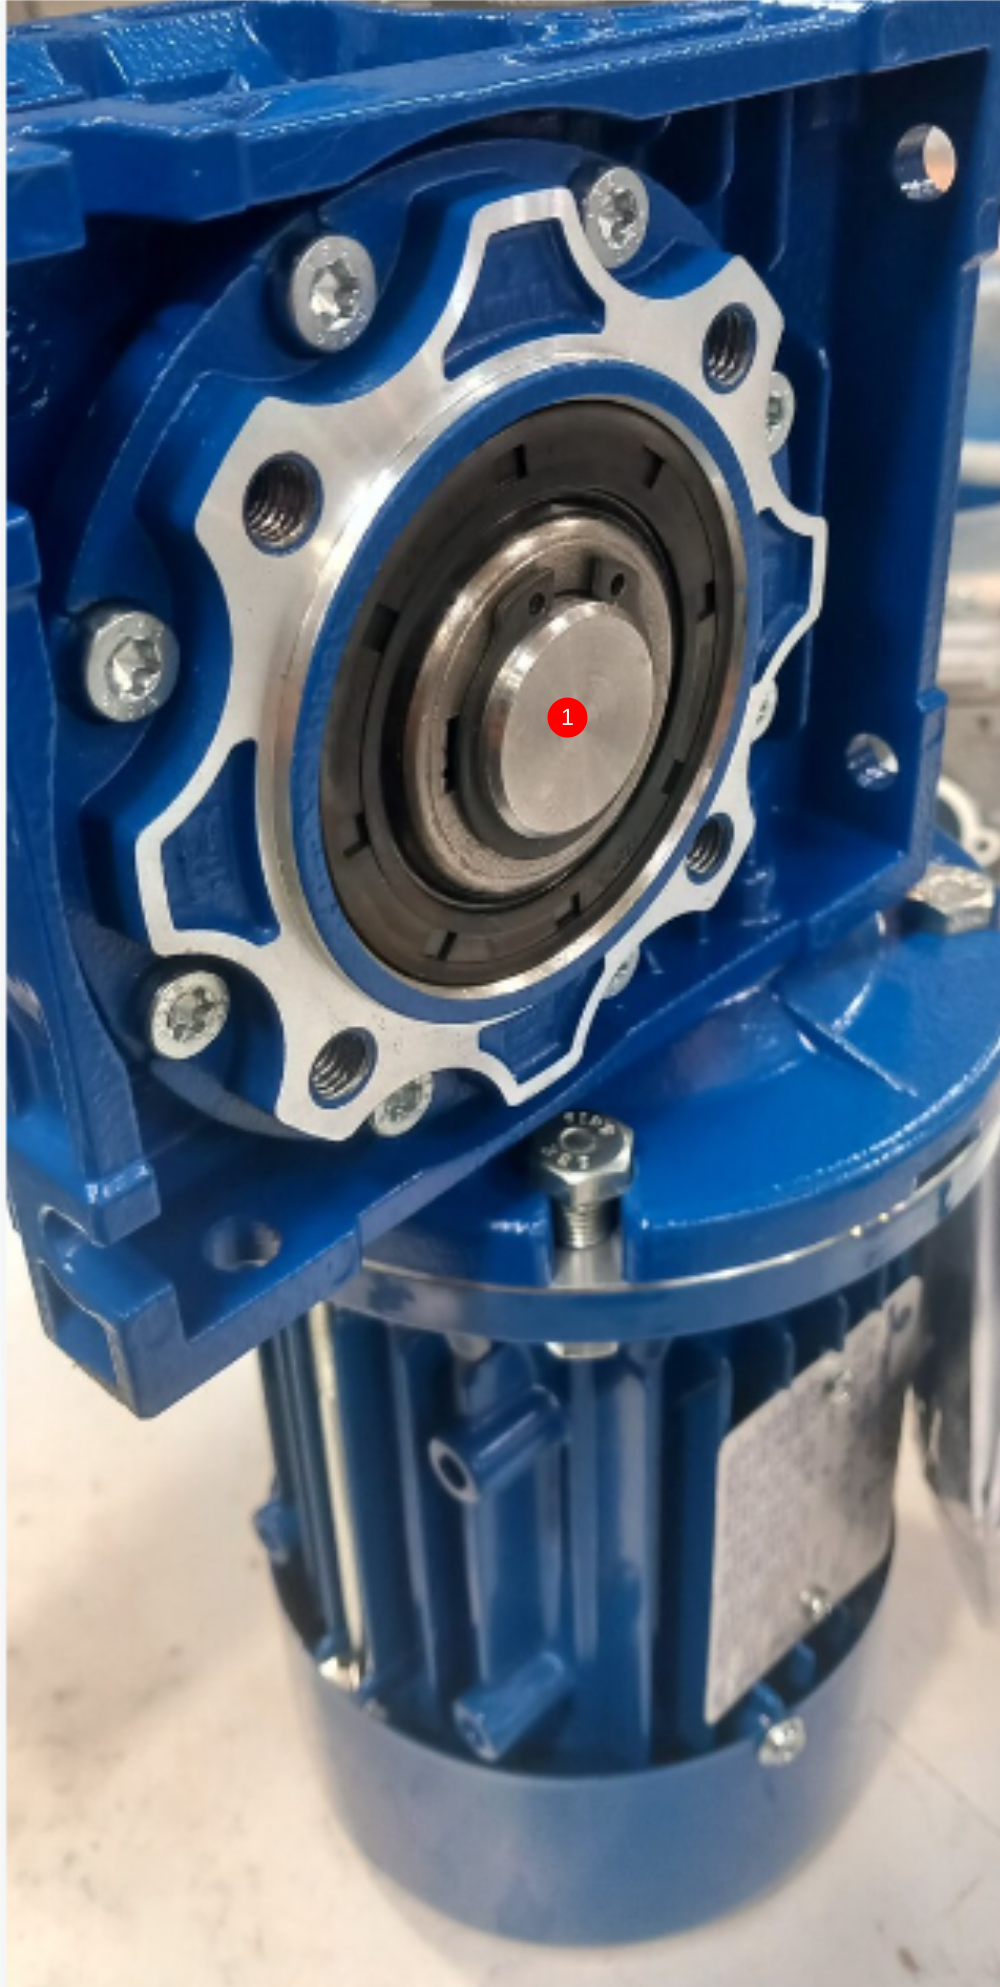
1 Fit2 off B0001100 keys to D0015460 shaft and fit and orientate as shown. Use 24mm external circlips to captivate shaft front and back
2 Attach D0015462 infeed motor plate using M8 x 20 socket caps 4 off and M8 A form washers. Orientate as shown
3 Fit B0000041 key to shaft. Separate torque converter D6714 by removing duplex chain and attach Fixed side of torque converter as shown. Captivate with15mm external Circlip

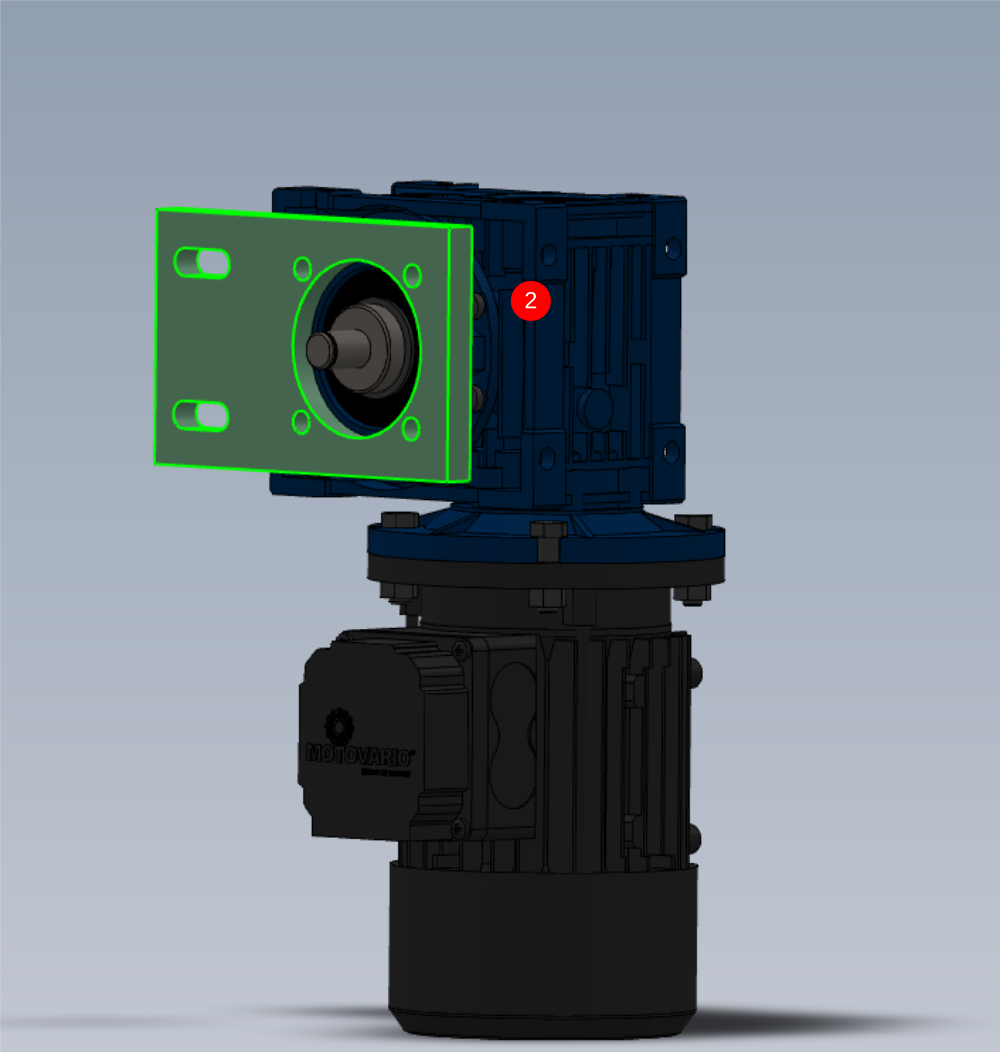
Étape 3 - Attach motor mount
Attach Infeed motor mount to frame using F0000618 M10 x 70 set bolts and A form washers
Ensure mount plate is mounted square to blue channel
Do not apply final tension as this will require adjusting

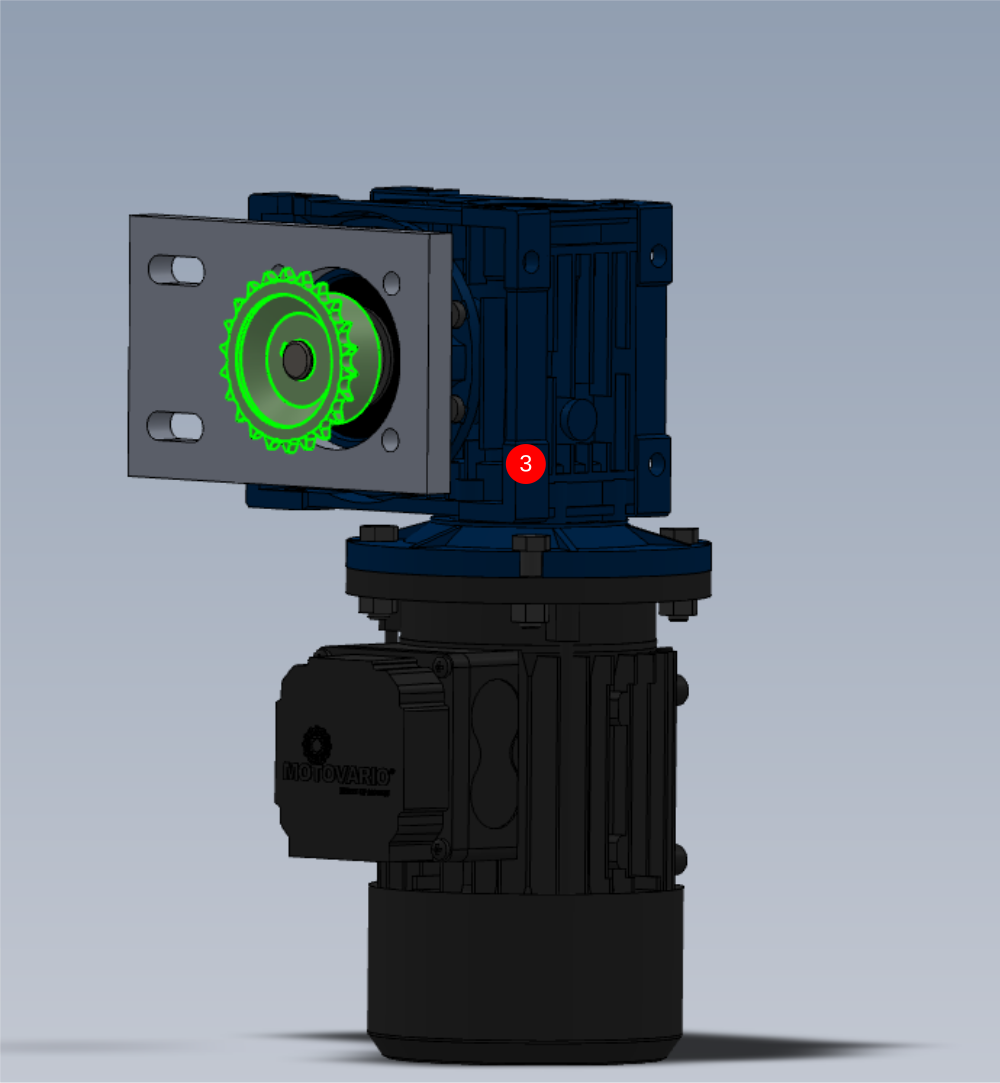
Étape 4 - Attach torque converter
Fit B0000142 Key to drive shaft and position torque convertor
Do not tension grubscrew at this point

Étape 5 - Attach motor
Attach motor assembly using M10 x 30 cap heads and A form washers

Étape 6 - Adjustment
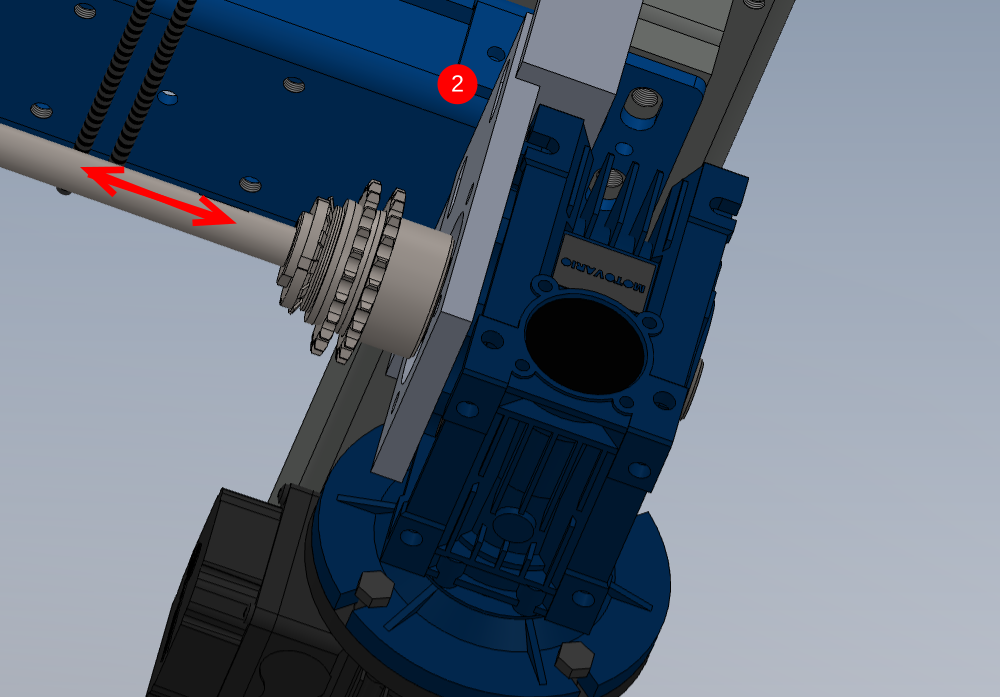
Adjust mounting parts to achieve the following
1 2 parts of torque converter line up and are parallel to each other
2 Shaft is in correct position (direction shown ) to allow correct fitment of torque converter
3 Finalise fasteners including torque converter grubscrew
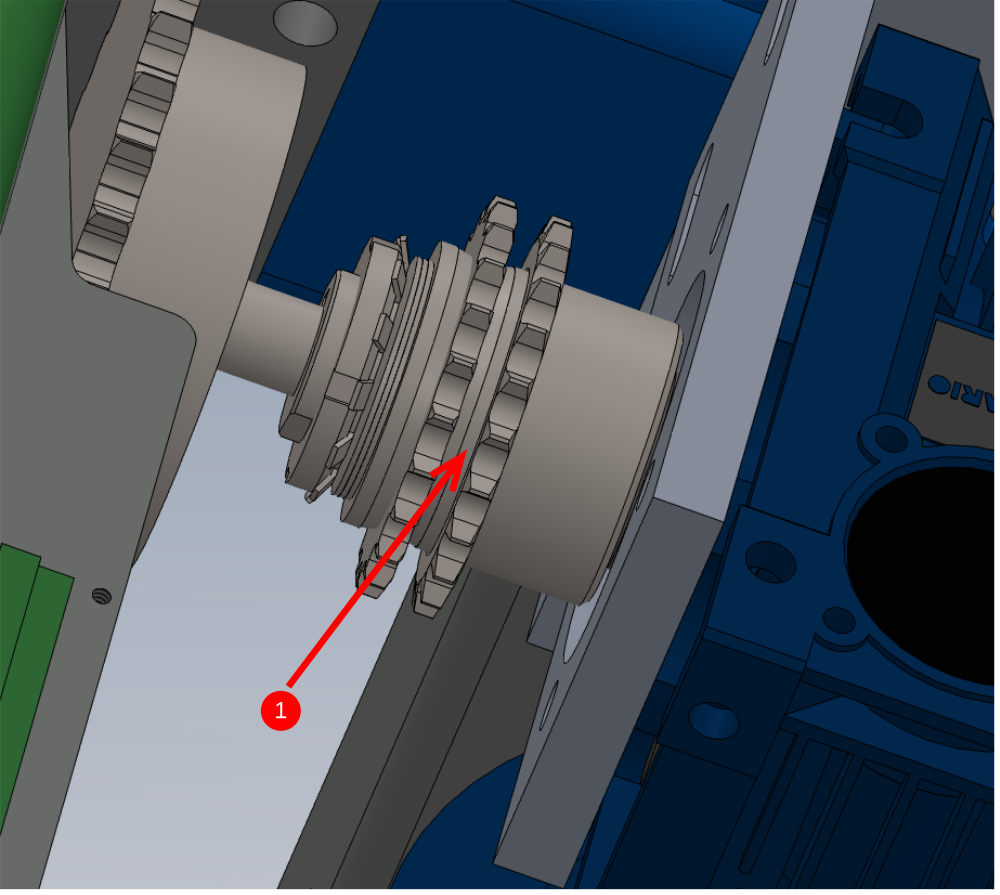
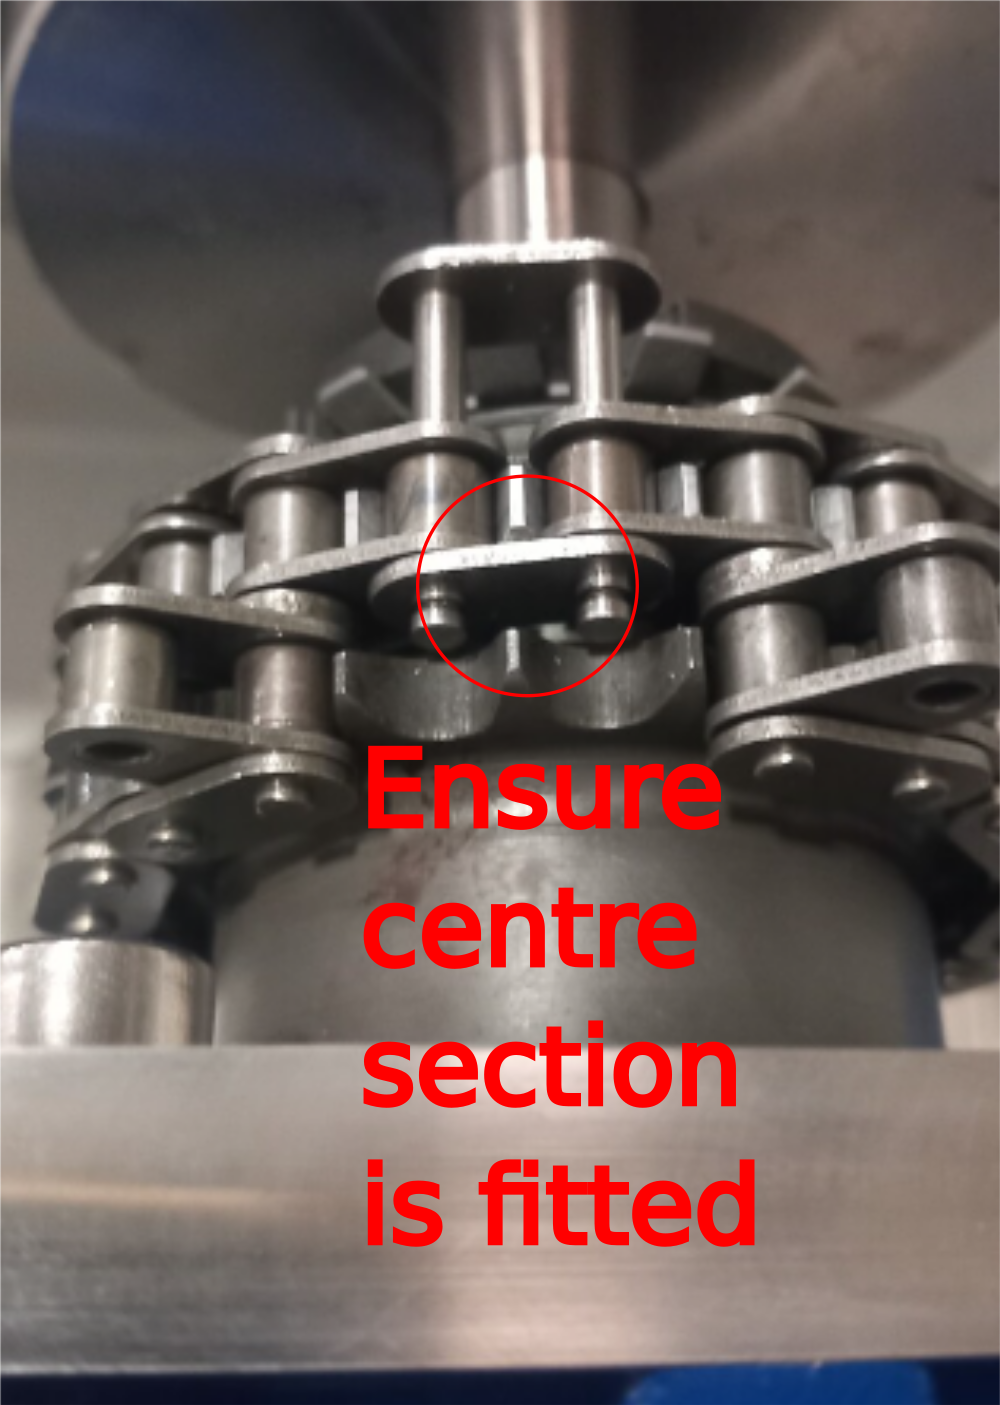
Étape 7 - Fit duplex chain
Fit duplex chain to mounted parts of torque converter
Ensure all parts are fitted including centre section

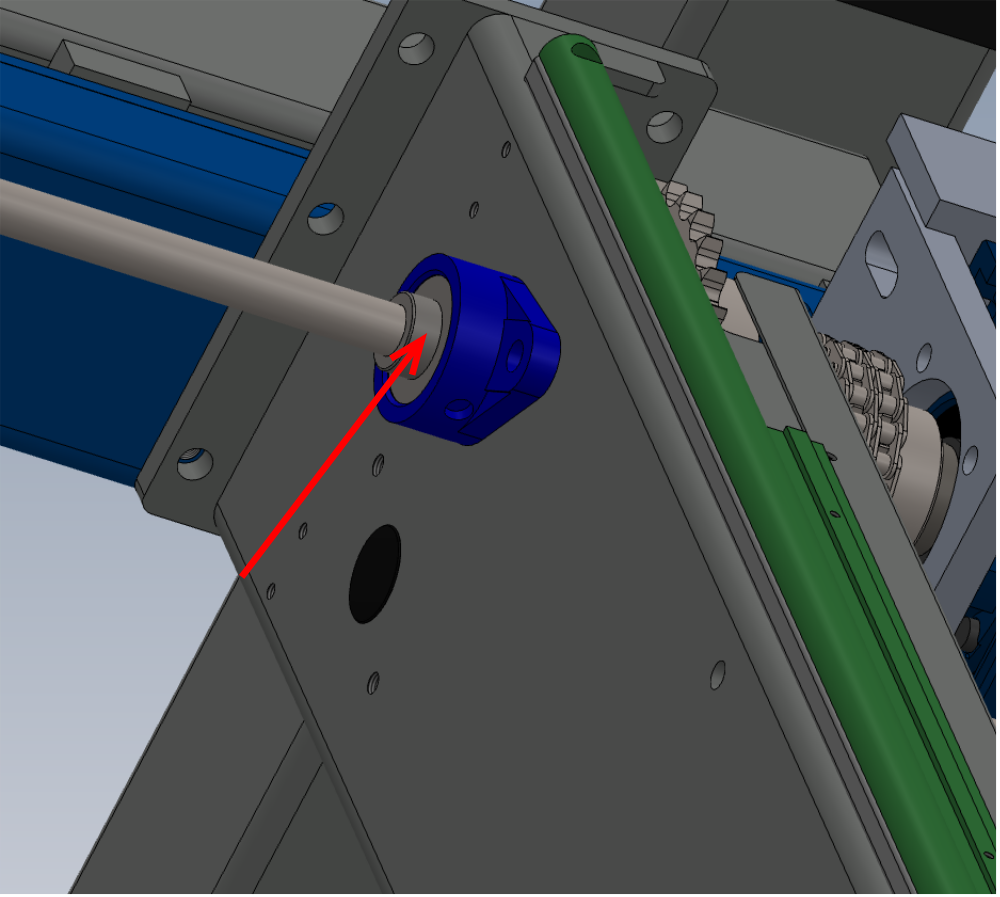
Étape 8 - Lock off Drive shafts
Apply adhesive and lock off all grubscrews in spherical bearings in all positions (9 off bearings )
Draft
 Français
 English
 Deutsch
 Español
 Italiano
 Português