| [version en cours de rédaction] | [version en cours de rédaction] |
m (Gareth Green a déplacé la page R0015086 Assemble Pneumatics on to electrical cabinet vers R0015350 Assemble Pneumatics on to electrical cabinet) |
m (Gareth Green a déplacé la page R0015350 Assemble Pneumatics on to electrical cabinet vers R0015356 Assemble Pneumatics on to electrical cabinet) |
(Aucune différence)
| |
Version du 14 juillet 2023 à 07:42
Instructions to mount pneumatic components
Sommaire
- 1 Introduction
- 2 Étape 1 - Unless otherwise stated
- 3 Étape 2 - Drill position for regulator bracket
- 4 Étape 3 - Drill position of Valve
- 5 Étape 4 - Drill position of valve base
- 6 Étape 5 - Assemble and mount regulator
- 7 Étape 6 - Assemble and mount Valve
- 8 Étape 7 - Assemble valve base and fit
- 9 Étape 8 - Mount trunking
- 10 Commentaires
Introduction
Tools Required
Standard hex keys
Standard spanner set
Standard drill set
Standard tapping set
Tape measure
Rule
PartsRequired
P0001069 x 1
P0001022 x 1
D0001933 x 1
P0001008 x 1
P0000010 x 3
P0001009 x 1
P0001102 x1
P0000009 x 1
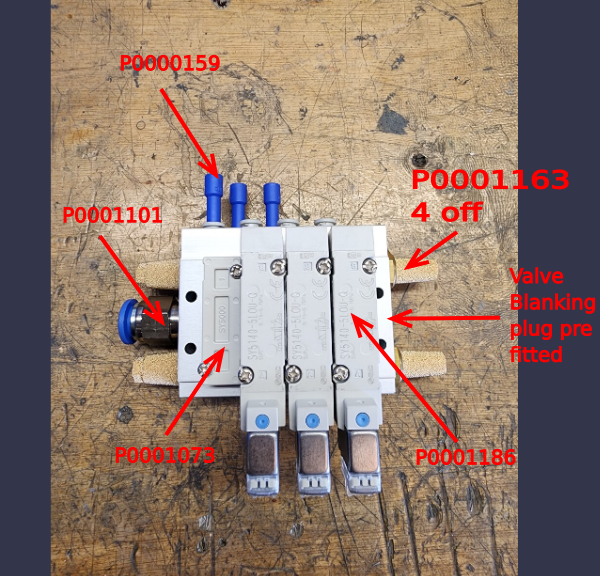
P0001163 x 4
P0001073 x 1
P0000159 x 3
P0001101 x 1Étape 1 - Unless otherwise stated
Use loctite 243 on all fasteners
Use Loctite 572 on all threaded pneumatic connections
Pen mark all bolts to show finalised
Étape 2 - Drill position for regulator bracket
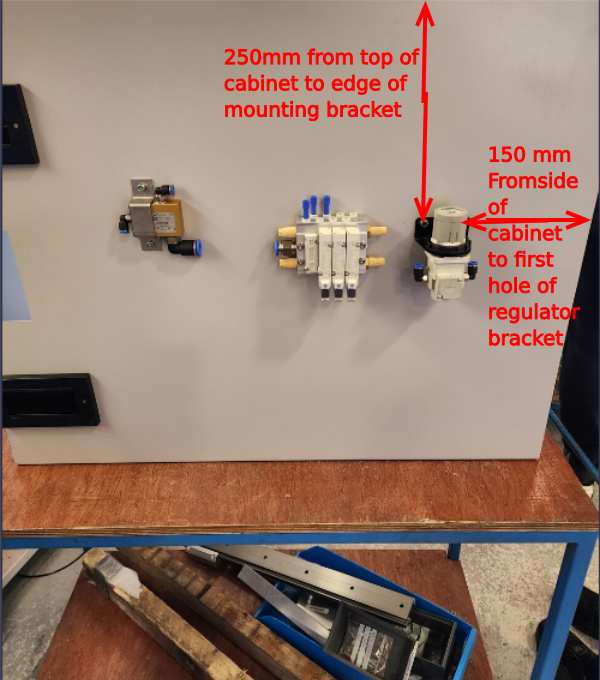
Use dimensions to fix regulator bbracket P0001022 to cabinet. Drill 2 off M5 tapped holes to suit regulator. Use m5 x 12 socket caps and heavy M5 washers
Étape 3 - Drill position of Valve
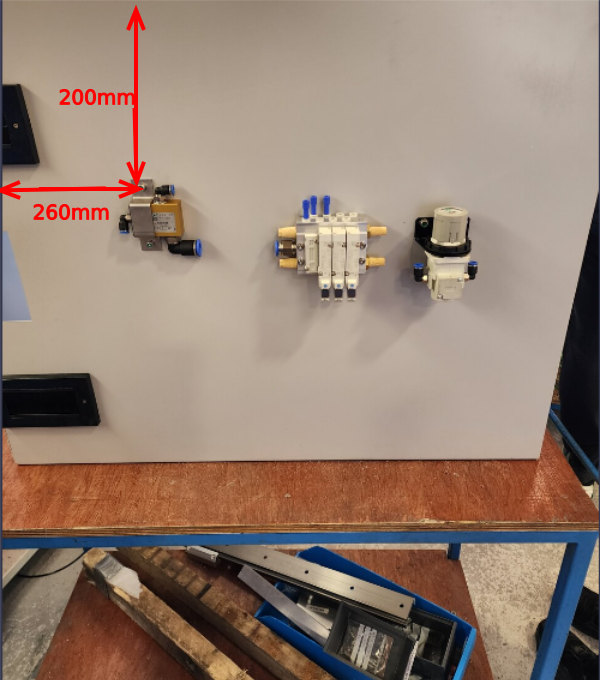
Mount valve bracket D0001933 to dimensions shown . Measurements are taken from edges of cabinet to first top mounting hole of bracket . Use valve bracket to mark second hole after first hole is drilled . Drill and tap M5
Étape 4 - Drill position of valve base
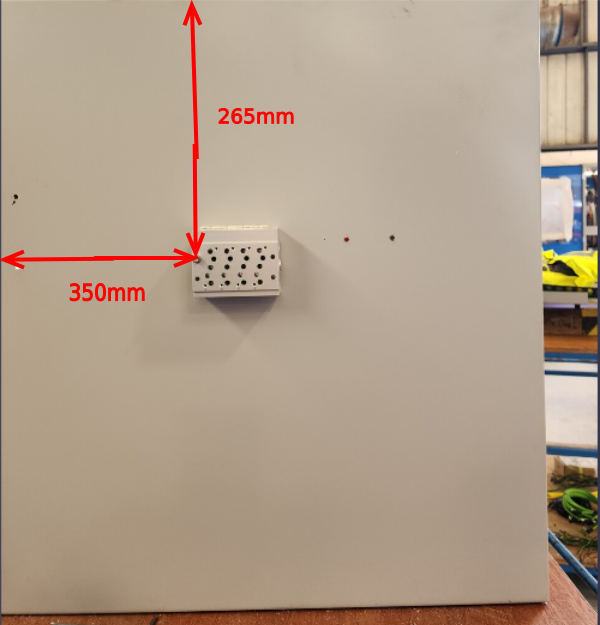
Drill valve bank base to dimensions shown. Measurements are taken from edge of cabinet to mounting hole indicated. Once first hole is drilled, use valve base as template to add 3 off remaining fixing points. Drill and tap M4
Étape 5 - Assemble and mount regulator
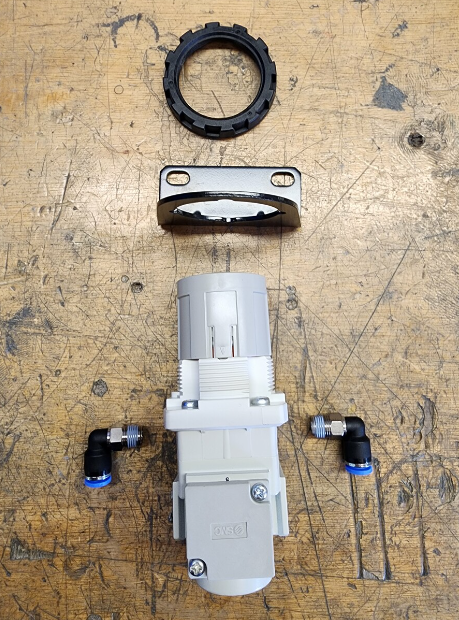
Assemble regulator P0001008 as shown. Use P0001009 panel nut and 2 off P0000010 fitting and mount to bracket on cabinet
Étape 6 - Assemble and mount Valve
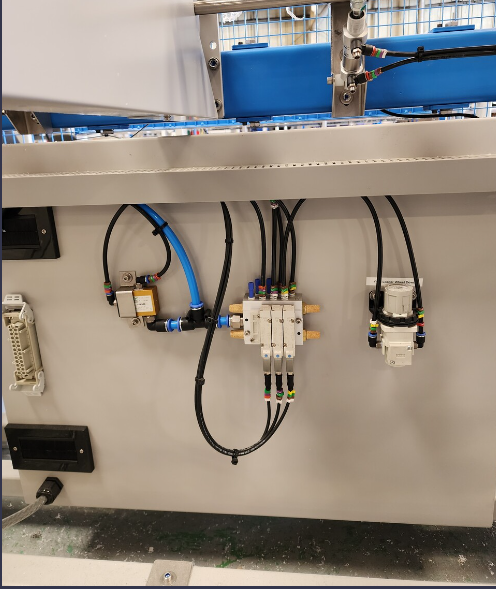
Assemble P0000458 valve with fittings shown. Mount to bracket on cabinet using M5 x 12 socket caps and M5 heavy washers
Étape 7 - Assemble valve base and fit
Assemble valve base P0001069 with fittings shown
Mount to cabinet using 4 off M4 x 40 socket caps and M4 A form washers
Étape 8 - Mount trunking
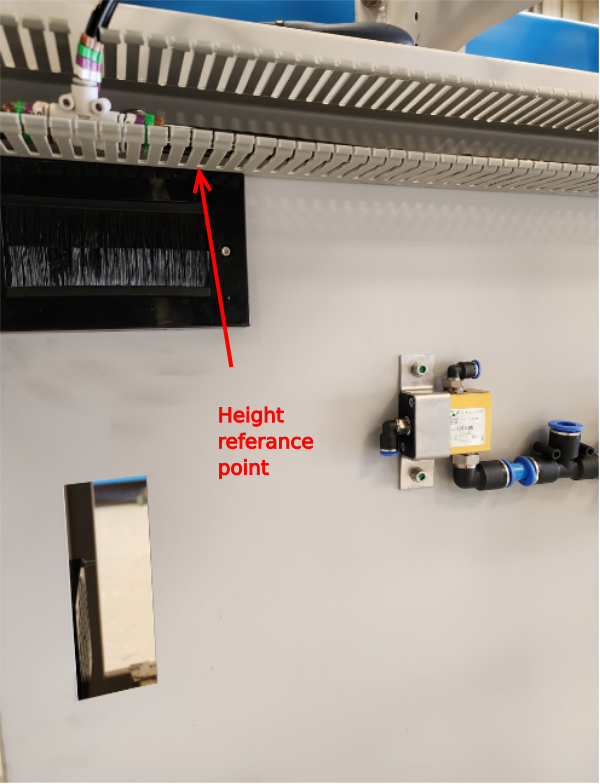
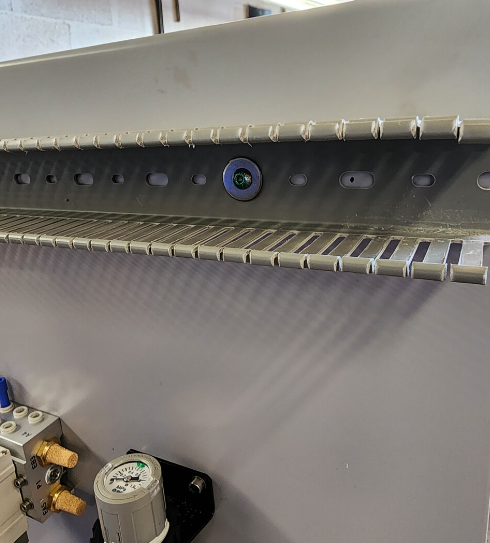
Cut 40 x 60 Trunking (p n/o required ) to length to suit cabinet width with no overhang . Position height wise referencing the cable access shroud
Drill and fix with m5 x 10 button heads and large A form washers .
Draft




 Français
 English
 Deutsch
 Español
 Italiano
 Português