| [version en cours de rédaction] | [version en cours de rédaction] |
(Page créée avec « {{Tuto Details |Description=<translate>Flowline Turret Upgrade</translate> |Difficulty=Easy |Duration=120 |Duration-type=minute(s) }} {{Introduction |Introduction=<transla... ») |
|||
| (2 révisions intermédiaires par le même utilisateur non affichées) | |||
| Ligne 12 : | Ligne 12 : | ||
{{Tuto Step | {{Tuto Step | ||
|Step_Title=<translate>Remove existing turret and associated parts</translate> | |Step_Title=<translate>Remove existing turret and associated parts</translate> | ||
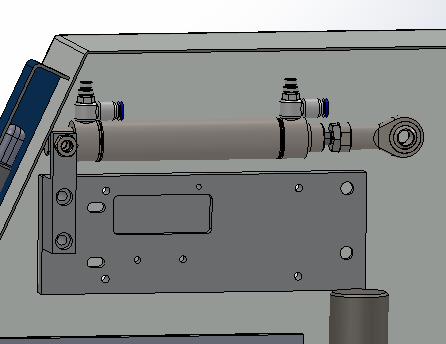
| − | |Step_Content=<translate></translate> | + | |Step_Content=<translate>Remove all parts from the existing turret, to leave just the mounting plate and the cylinder and fittings etc, as shown</translate> |
| + | |Step_Picture_00=Flowline_Turret_Upgrade_-_Somatec_Image.png | ||
| + | }} | ||
| + | {{Tuto Step | ||
| + | |Step_Title=<translate>Fit Sometec mount</translate> | ||
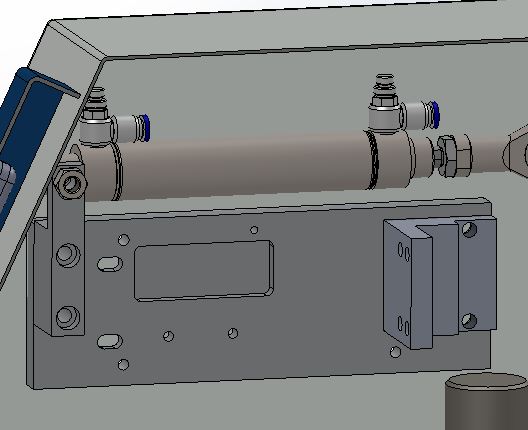
| + | |Step_Content=<translate>Fit the Somatec mount block (D0015715) with M8 bolts (you will need to remove the mounting plate from the hood to bolt in from behind.</translate> | ||
| + | |Step_Picture_00=Flowline_Turret_Upgrade_-_Somatec_Somatec_mount.JPG | ||
| + | }} | ||
| + | {{Tuto Step | ||
| + | |Step_Title=<translate>Fit Somatec turret</translate> | ||
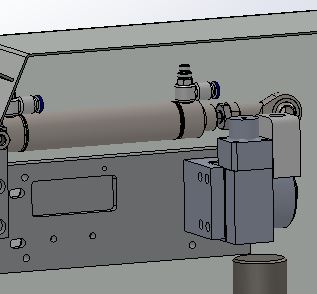
| + | |Step_Content=<translate>Fit Somatec turret with 3 off M6 bolts. | ||
| + | |||
| + | <br /></translate> | ||
| + | |Step_Picture_00=Flowline_Turret_Upgrade_-_Somatec_Somatec_mount_2.JPG | ||
| + | }} | ||
| + | {{Tuto Step | ||
| + | |Step_Title=<translate>Fit the new strike plate</translate> | ||
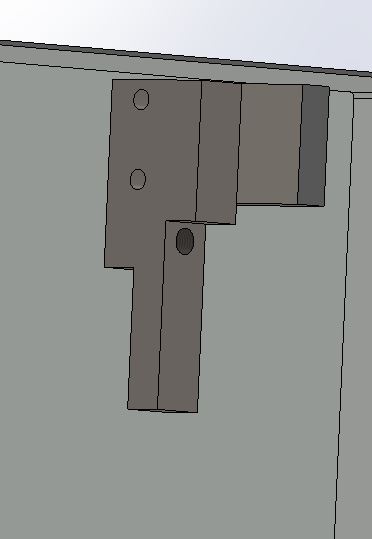
| + | |Step_Content=<translate>Fit new strike plate. It has the same mounting points etc as existing one, so all fittings can be reused</translate> | ||
| + | |Step_Picture_00=Flowline_Turret_Upgrade_-_Somatec_Somatec_mount_3.JPG | ||
| + | }} | ||
| + | {{Tuto Step | ||
| + | |Step_Title=<translate>Fit new bolts into rotating head of turret</translate> | ||
| + | |Step_Content=<translate>Install bolts into the turret head, according to required length. Ensure that they strike on the strike plate.</translate> | ||
| + | }} | ||
| + | {{Tuto Step | ||
| + | |Step_Title=<translate>Test rotation and feedback from IO screen</translate> | ||
| + | |Step_Content=<translate>The feedback should count up in binary for the position selected | ||
| + | <br /><syntaxhighlight> | ||
| + | Pos IxA IxB IxC | ||
| + | 1 1 0 0 | ||
| + | 2 0 1 0 | ||
| + | 3 1 1 0 | ||
| + | 4 0 0 1 | ||
| + | 5 1 0 1 | ||
| + | 6 0 1 1 | ||
| + | </syntaxhighlight><br /></translate> | ||
| + | }} | ||
| + | {{Tuto Step | ||
| + | |Step_Title=<translate>Label the turret bolts and capstan positions</translate> | ||
| + | |Step_Content=<translate>Using the IO screen, rotate to position 1. | ||
| + | |||
| + | #Using a pneumatic pipe marker, Label the "active" bolt with the number relating to the feedback position | ||
| + | #Using a permanent marker, label the capstan where it is clearly visible | ||
| + | |||
| + | |||
| + | Repeat for all 6 positions</translate> | ||
}} | }} | ||
{{Notes}} | {{Notes}} | ||
{{PageLang | {{PageLang | ||
| + | |Language=en | ||
|SourceLanguage=none | |SourceLanguage=none | ||
|IsTranslation=0 | |IsTranslation=0 | ||
| − | |||
}} | }} | ||
{{Tuto Status | {{Tuto Status | ||
|Complete=Draft | |Complete=Draft | ||
}} | }} | ||
Version actuelle datée du 29 septembre 2020 à 14:25
Flowline Turret Upgrade
Difficulté
Facile
Durée
120 minute(s)
Sommaire
- 1 Étape 1 - Remove existing turret and associated parts
- 2 Étape 2 - Fit Sometec mount
- 3 Étape 3 - Fit Somatec turret
- 4 Étape 4 - Fit the new strike plate
- 5 Étape 5 - Fit new bolts into rotating head of turret
- 6 Étape 6 - Test rotation and feedback from IO screen
- 7 Étape 7 - Label the turret bolts and capstan positions
- 8 Commentaires
Étape 1 - Remove existing turret and associated parts
Remove all parts from the existing turret, to leave just the mounting plate and the cylinder and fittings etc, as shown
Étape 2 - Fit Sometec mount
Fit the Somatec mount block (D0015715) with M8 bolts (you will need to remove the mounting plate from the hood to bolt in from behind.
Étape 4 - Fit the new strike plate
Fit new strike plate. It has the same mounting points etc as existing one, so all fittings can be reused
Étape 5 - Fit new bolts into rotating head of turret
Install bolts into the turret head, according to required length. Ensure that they strike on the strike plate.
Étape 6 - Test rotation and feedback from IO screen
The feedback should count up in binary for the position selected
Pos   IxA  IxB  IxC
 1     1    0    0
 2     0    1    0
 3     1    1    0
 4     0    0    1
 5     1    0    1
 6     0    1    1
Étape 7 - Label the turret bolts and capstan positions
Using the IO screen, rotate to position 1.
- Using a pneumatic pipe marker, Label the "active" bolt with the number relating to the feedback position
- Using a permanent marker, label the capstan where it is clearly visible
Repeat for all 6 positions
Draft


 Français
 English
 Deutsch
 Español
 Italiano
 Português