| [version en cours de rédaction] | [version en cours de rédaction] |
(Page créée avec « {{Tuto Details |Main_Picture=Convert_Autoflow_TC2_Project_to_TC3_TC3.jpg |Main_Picture_annotation={"version":"2.4.6","objects":[{"type":"image","version":"2.4.6","originX"... ») |
|||
| Ligne 50 : | Ligne 50 : | ||
}} | }} | ||
{{Tuto Step | {{Tuto Step | ||
| − | |Step_Title=<translate></translate> | + | |Step_Title=<translate>Ensure Sourcetree is installed on the camera PC</translate> |
| + | |Step_Content=<translate>Clone the tc3Multi repository to use in your new project | ||
| + | |||
| + | |||
| + | See Installing SourceTree Version Control</translate> | ||
| + | }} | ||
| + | {{Tuto Step | ||
| + | |Step_Title=<translate>Replace the old PLC code with the version control latest</translate> | ||
| + | |Step_Content=<translate># Delete the old PLC projects | ||
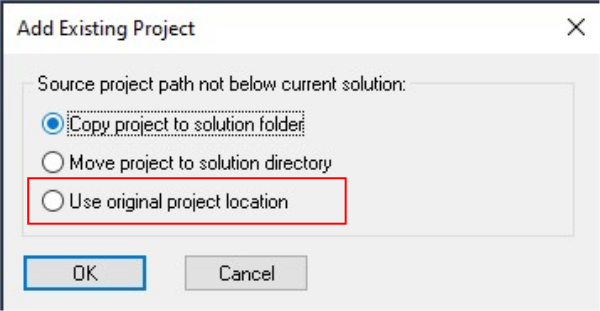
| + | # using Add existing item, add the PLC_Reset and tc3Multi PLC projects from c:\stuga\versionControl. Ensure Use Original Location is selected | ||
| + | # Build the solution to create the instances ready for linking</translate> | ||
| + | |Step_Picture_00=Create_a_TwinCAT_Project_from_Scratch_Annotation_2019-11-20_125956.jpg | ||
| + | |Step_Picture_00_annotation={"version":"2.4.6","objects":[{"type":"image","version":"2.4.6","originX":"left","originY":"top","left":0,"top":0,"width":357,"height":185,"fill":"rgb(0,0,0)","stroke":null,"strokeWidth":0,"strokeDashArray":null,"strokeLineCap":"butt","strokeDashOffset":0,"strokeLineJoin":"miter","strokeMiterLimit":4,"scaleX":1.68,"scaleY":1.68,"angle":0,"flipX":false,"flipY":false,"opacity":1,"shadow":null,"visible":true,"clipTo":null,"backgroundColor":"","fillRule":"nonzero","paintFirst":"fill","globalCompositeOperation":"source-over","transformMatrix":null,"skewX":0,"skewY":0,"crossOrigin":"","cropX":0,"cropY":0,"src":"https://stuga.dokit.app/images/7/79/Create_a_TwinCAT_Project_from_Scratch_Annotation_2019-11-20_125956.jpg","filters":[]},{"type":"wfrect","version":"2.4.6","originX":"center","originY":"center","left":186.94,"top":200.96,"width":317.44,"height":45.45,"fill":"rgba(255,0,0,0)","stroke":"#FF0000","strokeWidth":2,"strokeDashArray":null,"strokeLineCap":"butt","strokeDashOffset":0,"strokeLineJoin":"miter","strokeMiterLimit":4,"scaleX":1,"scaleY":1,"angle":0,"flipX":false,"flipY":false,"opacity":1,"shadow":null,"visible":true,"clipTo":null,"backgroundColor":"","fillRule":"nonzero","paintFirst":"fill","globalCompositeOperation":"source-over","transformMatrix":null,"skewX":0,"skewY":0,"rx":0,"ry":0}],"height":311,"width":600} | ||
| + | }} | ||
| + | {{Tuto Step | ||
| + | |Step_Title=<translate>Connect to the Beckhoff Backend PC</translate> | ||
| + | |Step_Content=<translate></translate> | ||
| + | }} | ||
| + | {{Tuto Step | ||
| + | |Step_Title=<translate>Update the EtherCAT Device Adaptor</translate> | ||
|Step_Content=<translate></translate> | |Step_Content=<translate></translate> | ||
| + | }} | ||
| + | {{Tuto Step | ||
| + | |Step_Title=<translate>Add the IO Links</translate> | ||
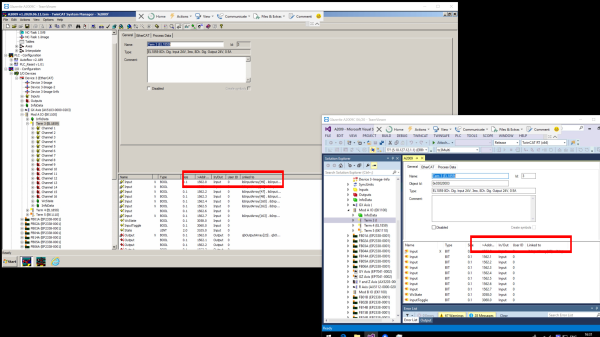
| + | |Step_Content=<translate>Copy all the links on all devices from the System Manager on the old Camera PC to the new project. | ||
| + | |||
| + | <br /></translate> | ||
| + | |Step_Picture_00=Convert_Autoflow_TC2_Project_to_TC3_Linking_TC2_TC3.jpg | ||
| + | |Step_Picture_00_annotation={"version":"2.4.6","objects":[{"type":"image","version":"2.4.6","originX":"left","originY":"top","left":0,"top":0,"width":3238,"height":1819,"fill":"rgb(0,0,0)","stroke":null,"strokeWidth":0,"strokeDashArray":null,"strokeLineCap":"butt","strokeDashOffset":0,"strokeLineJoin":"miter","strokeMiterLimit":4,"scaleX":0.19,"scaleY":0.19,"angle":0,"flipX":false,"flipY":false,"opacity":1,"shadow":null,"visible":true,"clipTo":null,"backgroundColor":"","fillRule":"nonzero","paintFirst":"fill","globalCompositeOperation":"source-over","transformMatrix":null,"skewX":0,"skewY":0,"crossOrigin":"","cropX":0,"cropY":0,"src":"https://stuga.dokit.app/images/3/31/Convert_Autoflow_TC2_Project_to_TC3_Linking_TC2_TC3.jpg","filters":[]},{"type":"wfrect","version":"2.4.6","originX":"center","originY":"center","left":233,"top":179.19,"width":100,"height":9.15,"fill":"rgba(255,0,0,0)","stroke":"#FF0000","strokeWidth":1.65,"strokeDashArray":null,"strokeLineCap":"butt","strokeDashOffset":0,"strokeLineJoin":"miter","strokeMiterLimit":4,"scaleX":1,"scaleY":1.64,"angle":0,"flipX":false,"flipY":false,"opacity":1,"shadow":null,"visible":true,"clipTo":null,"backgroundColor":"","fillRule":"nonzero","paintFirst":"fill","globalCompositeOperation":"source-over","transformMatrix":null,"skewX":0,"skewY":0,"rx":0,"ry":0},{"type":"wfrect","version":"2.4.6","originX":"center","originY":"center","left":521,"top":244.19,"width":100,"height":9.15,"fill":"rgba(255,0,0,0)","stroke":"#FF0000","strokeWidth":1.65,"strokeDashArray":null,"strokeLineCap":"butt","strokeDashOffset":0,"strokeLineJoin":"miter","strokeMiterLimit":4,"scaleX":1,"scaleY":1.64,"angle":0,"flipX":false,"flipY":false,"opacity":1,"shadow":null,"visible":true,"clipTo":null,"backgroundColor":"","fillRule":"nonzero","paintFirst":"fill","globalCompositeOperation":"source-over","transformMatrix":null,"skewX":0,"skewY":0,"rx":0,"ry":0}],"height":337,"width":600} | ||
}} | }} | ||
{{Notes}} | {{Notes}} | ||
{{PageLang | {{PageLang | ||
| + | |Language=en | ||
|SourceLanguage=none | |SourceLanguage=none | ||
|IsTranslation=0 | |IsTranslation=0 | ||
| − | |||
}} | }} | ||
{{Tuto Status | {{Tuto Status | ||
|Complete=Draft | |Complete=Draft | ||
}} | }} | ||
Version du 16 juin 2020 à 17:14
How to convert a TwinCAT2 project on an older Autoflow to TwinCAT3. This needs to be done when updating to Windows 10
Difficulté
Difficile
Durée
2 heure(s)
Sommaire
- 1 Introduction
- 2 Étape 1 - Get connected to the Camera PC of the machine to be updated
- 3 Étape 2 - Get a backup of the original TSM file
- 4 Étape 3 - Get copy of current PLC and Reset project
- 5 Étape 4 - Convert the TC2 project to TC3
- 6 Étape 5 - Ensure Sourcetree is installed on the camera PC
- 7 Étape 6 - Replace the old PLC code with the version control latest
- 8 Étape 7 - Connect to the Beckhoff Backend PC
- 9 Étape 8 - Update the EtherCAT Device Adaptor
- 10 Étape 9 - Add the IO Links
- 11 Commentaires
Introduction
The Beckhoff system provides a system for upgrading to TC3 from a TC2 project. This tutorial goes through the steps required to ensure the links and setup of the original TC2 project are copied through to TC3.
Étape 1 - Get connected to the Camera PC of the machine to be updated
You will need to get a backup of the TC2 project from this machine, and use it to set up all the correct IO links in the TC3 project
Étape 2 - Get a backup of the original TSM file
- Dial in to Camera PC
- Open System manager
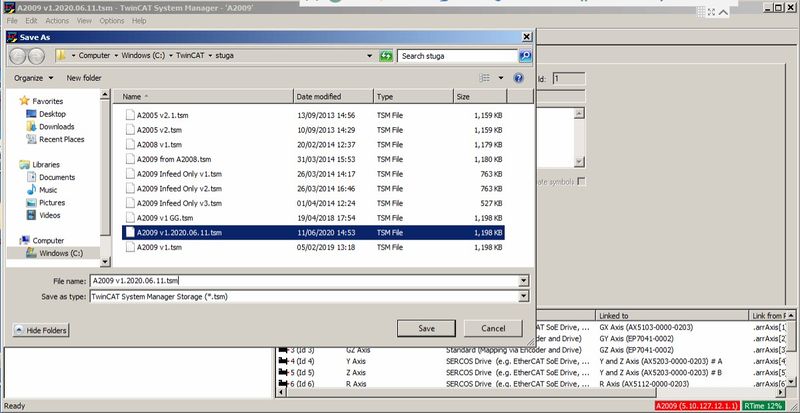
- File->Save As
- Rename it to [build number].[todays date]
- Copy to c:\twinCAT\stuga\ on the "New" camera PC
Étape 3 - Get copy of current PLC and Reset project
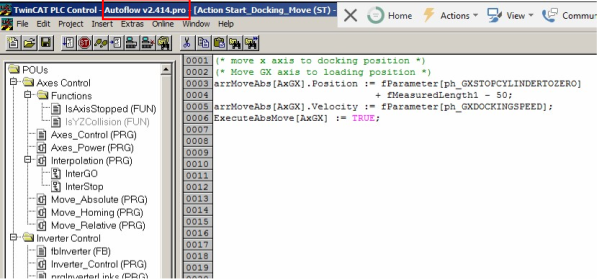
- Open the PLC Control program on the camera PC
- Note the version of software currently running (.pro)
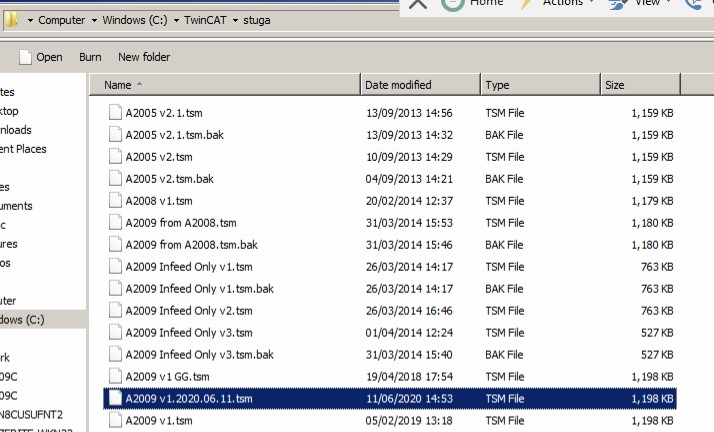
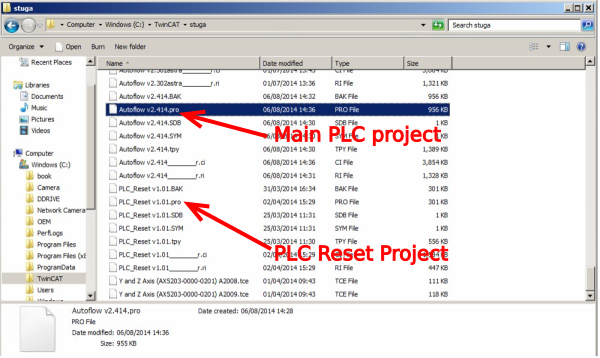
- Find the .pro file in c:\TwinCAT\Stuga\
- Copy to c:\twinCAT\stuga\ on the "New" camera PC
- Also copy the latest PLC Reset project
Étape 4 - Convert the TC2 project to TC3
- Open Visual Studio
- Create a new TC3 project called [BuildNo] in c:\TwinCAT\Stuga\
- Make sure "Create Directory..." is Unticked
- Click Cancel on the two windows asking to convert the PLC project
- Ignore or cancel any warnings about libraries (this part will be replaced later
- Once created, you will have a copy of all the devices and boxes in the project
Étape 5 - Ensure Sourcetree is installed on the camera PC
Clone the tc3Multi repository to use in your new project
See Installing SourceTree Version Control
Étape 6 - Replace the old PLC code with the version control latest
- Delete the old PLC projects
- using Add existing item, add the PLC_Reset and tc3Multi PLC projects from c:\stuga\versionControl. Ensure Use Original Location is selected
- Build the solution to create the instances ready for linking
Étape 7 - Connect to the Beckhoff Backend PC
Étape 8 - Update the EtherCAT Device Adaptor
Étape 9 - Add the IO Links
Copy all the links on all devices from the System Manager on the old Camera PC to the new project.
Draft
 Français
 English
 Deutsch
 Español
 Italiano
 Português