|
|
| (14 révisions intermédiaires par le même utilisateur non affichées) |
| Ligne 5 : |
Ligne 5 : |
| | |Categories=Production | | |Categories=Production |
| | |Difficulty=Medium | | |Difficulty=Medium |
| − | |Duration=3 | + | |Duration=8 |
| | |Duration-type=hour(s) | | |Duration-type=hour(s) |
| | }} | | }} |
| | {{Introduction | | {{Introduction |
| − | |Introduction=<translate><u>'''Tools Required'''</u> | + | |Introduction=<translate>19/09/2025 |
| | | | |
| | | | |
| − | Standard spanner set
| + | Moved to Confluance |
| | | | |
| − | Standard hex key set
| |
| | | | |
| − | | + | Click [https://stuga-ltd.atlassian.net/wiki/external/MjM0NmI0YzNjOGFhNGVlNGJmMmVjODc0MjIzODFmZTY Here]</translate> |
| − | <u>'''Parts Required'''</u>
| |
| − | | |
| − | | |
| − | R0015288 Bench Assemble Transfer slid units and cylinder rails
| |
| − | | |
| − | R0015093 Bench Assemble Transfer Beam</translate>
| |
| | }} | | }} |
| | {{Materials}} | | {{Materials}} |
| | {{EPI}} | | {{EPI}} |
| | {{Tuto Step | | {{Tuto Step |
| − | |Step_Title=<translate>Unless otherwise stated</translate> | + | |Step_Title=<translate></translate> |
| − | |Step_Content=<translate>Use Loctite 243 on all fasteners | + | |Step_Content=<translate></translate> |
| − | | |
| − | Use Loctite 572 on all threaded pneumatic connection
| |
| − | | |
| − | Pen mark all fasteners to show finalised</translate>
| |
| − | |Step_Picture_00=R0015086_Assemble_Pneumatics_on_to_electrical_cabinet_loctite_243.png
| |
| − | }}
| |
| − | {{Tuto Step
| |
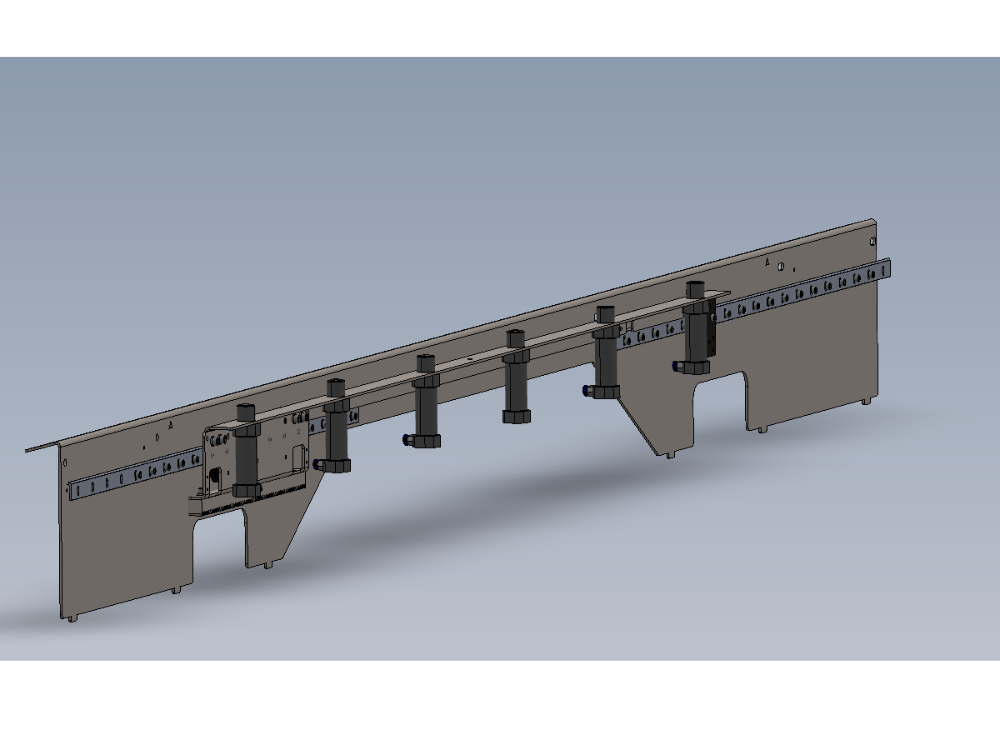
| − | |Step_Title=<translate>Position pre built cylinder rails</translate>
| |
| − | |Step_Content=<translate>Position Cylinder rail onto transfer beam as shown</translate>
| |
| − | |Step_Picture_00=R0015292_Install_Cylinder_Rails_and_Align_Screenshot_2023-10-30_082627.png
| |
| − | }}
| |
| − | {{Tuto Step
| |
| − | |Step_Title=<translate>Adjust delrin wheels front</translate>
| |
| − | |Step_Content=<translate>Adjust delrin wheels on section shown
| |
| − | | |
| − | | |
| − | Ensure to use [[Setting Delrin Transfer Table Wheel Tension]] To set delrin wheels correctly
| |
| − | | |
| − | <br />{{Warning|...Ensure M5 locking nuts are correctly tensioned when set}}<br /></translate>
| |
| − | |Step_Picture_00=R0015292_Install_Cylinder_Rails_and_Align_Screenshot_2023-10-30_082956.png
| |
| − | }}
| |
| − | {{Tuto Step
| |
| − | |Step_Title=<translate>Adjust Delrin wheels Rear</translate>
| |
| − | |Step_Content=<translate>Adjust delrin wheels on section shown
| |
| − | | |
| − | | |
| − | Ensure to use [[Spécial:AjouterDonnées/Tutorial/Setting Delrin Transfer Table Wheel Tension|Setting Delrin Transfer Table Wheel Tension]] To set delrin wheels correctly
| |
| − | | |
| − | <br />{{Warning|......Ensure M5 locking nuts are correctly tensioned when set}}<br /></translate>
| |
| − | |Step_Picture_00=R0015292_Install_Cylinder_Rails_and_Align_Screenshot_2023-10-30_083259.png
| |
| − | }}
| |
| − | {{Tuto Step
| |
| − | |Step_Title=<translate>Check all fasteners</translate>
| |
| − | |Step_Content=<translate>Check all fasteners are correctly tensioned
| |
| − | | |
| − | | |
| − | Ensure all delrin wheels are correctly set and all fasteners on delrin wheels are tensioned to final tension</translate>
| |
| − | |Step_Picture_00=R0000711_Rotary_Base_Assembly_quality-assurance-testing.png
| |
| − | }}
| |
| − | {{Tuto Step
| |
| − | |Step_Title=<translate>Check movement</translate>
| |
| − | |Step_Content=<translate>Ensure cylinder rail is free moving along transfer beam</translate>
| |
| − | |Step_Picture_00=R0000711_Rotary_Base_Assembly_quality-assurance-testing.png
| |
| − | }}
| |
| − | {{Tuto Step
| |
| − | |Step_Title=<translate>Add locking bolt</translate>
| |
| − | |Step_Content=<translate>Add locking bolt to hold cylinder rail in position</translate>
| |
| − | |Step_Picture_00=R0015292_Install_Cylinder_Rails_and_Align_Screenshot_2023-10-30_082627.png
| |
| | }} | | }} |
| | {{Notes}} | | {{Notes}} |

 Français
 English
 Deutsch
 Español
 Italiano
 Português