| [version en cours de rédaction] | [version en cours de rédaction] |
m (Gareth Green a déplacé la page Pneumatic module Test R0015075B vers R0015268 Pneumatic module Test) |
|||
| (Une révision intermédiaire par le même utilisateur non affichée) | |||
| Ligne 1 : | Ligne 1 : | ||
{{Tuto Details | {{Tuto Details | ||
| + | |Main_Picture=R0015268_Pneumatic_module_Test_Screenshot_2023-07-05_113657.png | ||
| + | |Main_Picture_annotation={"version":"2.4.6","objects":[{"type":"image","version":"2.4.6","originX":"left","originY":"top","left":-1,"top":-39,"width":500,"height":399,"fill":"rgb(0,0,0)","stroke":null,"strokeWidth":0,"strokeDashArray":null,"strokeLineCap":"butt","strokeDashOffset":0,"strokeLineJoin":"miter","strokeMiterLimit":4,"scaleX":1.25,"scaleY":1.25,"angle":0,"flipX":false,"flipY":false,"opacity":1,"shadow":null,"visible":true,"clipTo":null,"backgroundColor":"","fillRule":"nonzero","paintFirst":"fill","globalCompositeOperation":"source-over","transformMatrix":null,"skewX":0,"skewY":0,"crossOrigin":"","cropX":0,"cropY":0,"src":"https://stuga.dokit.app/images/4/4c/R0015268_Pneumatic_module_Test_Screenshot_2023-07-05_113657.png","filters":[]}],"height":449.8360655737705,"width":600} | ||
|Description=<translate>Instructions for performing pneumatic test on completed module</translate> | |Description=<translate>Instructions for performing pneumatic test on completed module</translate> | ||
|Categories=Production | |Categories=Production | ||
| Ligne 7 : | Ligne 9 : | ||
}} | }} | ||
{{Introduction | {{Introduction | ||
| − | |Introduction=<translate></translate> | + | |Introduction=<translate>'''<u>Tools Required</u>''' |
| + | |||
| + | |||
| + | '''<u>Parts Required</u>''' | ||
| + | |||
| + | D0015513 Arm brace x 2 | ||
| + | |||
| + | D0015514 Arm brace x 1 </translate> | ||
}} | }} | ||
{{Materials}} | {{Materials}} | ||
{{EPI}} | {{EPI}} | ||
{{Tuto Step | {{Tuto Step | ||
| − | |Step_Title=<translate></translate> | + | |Step_Title=<translate>Prepare area for testing</translate> |
| − | |Step_Content=<translate> | + | |Step_Content=<translate>Ensure area is clear and free from personnel</translate> |
| − | |||
| − | |||
| − | |||
| − | |||
}} | }} | ||
{{Tuto Step | {{Tuto Step | ||
| − | |Step_Title=<translate></translate> | + | |Step_Title=<translate>Connect mains air supply</translate> |
| − | |Step_Content=<translate></translate> | + | |Step_Content=<translate>Connect mains air supply and check for any leaks present is components natural state</translate> |
}} | }} | ||
{{Tuto Step | {{Tuto Step | ||
| − | |Step_Title=<translate></translate> | + | |Step_Title=<translate>check home positions</translate> |
| − | |Step_Content=<translate></translate> | + | |Step_Content=<translate>Check home positions are correct in natural state |
| + | |||
| + | |||
| + | Loader wheel Y154 should be up away from roller beds in home position | ||
| + | |||
| + | |||
| + | Roller beds Y157 should be in the up position in home position | ||
| + | |||
| + | |||
| + | Blowers Y375 should be switched off in the home position</translate> | ||
}} | }} | ||
{{Tuto Step | {{Tuto Step | ||
| − | |Step_Title=<translate></translate> | + | |Step_Title=<translate>Test Y154 output</translate> |
| − | |Step_Content=<translate></translate> | + | |Step_Content=<translate>On valve bank, manually fire Y154 output. |
| + | |||
| + | |||
| + | Check for air leaks when output is fired | ||
| + | |||
| + | |||
| + | Check regulator shows pressure when fired by increasing pressure with adjusted .Once confirmed correct operation, a djust regulator to 1 bar or 0.1 mpa</translate> | ||
}} | }} | ||
{{Tuto Step | {{Tuto Step | ||
| − | |Step_Title=<translate></translate> | + | |Step_Title=<translate>Test Y157 Output</translate> |
| − | |Step_Content=<translate></translate> | + | |Step_Content=<translate>On valve bank, manually fire valve Y157 roller lift output |
| + | |||
| + | |||
| + | All rollers should drop down into position. When fired, check there are no air leaks present in the active position</translate> | ||
}} | }} | ||
{{Tuto Step | {{Tuto Step | ||
| − | |Step_Title=<translate></translate> | + | |Step_Title=<translate>Test Y375 Output</translate> |
| − | |Step_Content=<translate></translate> | + | |Step_Content=<translate>Manually fire Y357 output Check each blowers flow regulator can adjust flow rate when turned . Once confirmed , fully close flow regulator and wind out 2 turns</translate> |
}} | }} | ||
{{Tuto Step | {{Tuto Step | ||
| − | |Step_Title=<translate></translate> | + | |Step_Title=<translate>Disconnect air supply</translate> |
|Step_Content=<translate></translate> | |Step_Content=<translate></translate> | ||
}} | }} | ||
{{Tuto Step | {{Tuto Step | ||
| − | |Step_Title=<translate></translate> | + | |Step_Title=<translate>Fit brace 1</translate> |
| − | |Step_Content=<translate></translate> | + | |Step_Content=<translate>Fit D0015513 at load motor end of frame . |
| + | |||
| + | Use M8 x 35 socket caps, M8 motor plate washers and M8 nyloc nuts .</translate> | ||
| + | |Step_Picture_00=R0015268_Pneumatic_module_Test_Screenshot_2023-12-11_111307.png | ||
| + | |Step_Picture_01=R0015266B_mount_completed_assemblies_photorequired.png | ||
}} | }} | ||
{{Tuto Step | {{Tuto Step | ||
| − | |Step_Title=<translate></translate> | + | |Step_Title=<translate>Fit brace 2</translate> |
| − | |Step_Content=<translate></translate> | + | |Step_Content=<translate>fit second brace D00155122</translate> |
| + | |Step_Picture_00=R0015268_Pneumatic_module_Test_Screenshot_2023-12-11_111413.png | ||
| + | |Step_Picture_01=R0015266B_mount_completed_assemblies_photorequired.png | ||
}} | }} | ||
{{Tuto Step | {{Tuto Step | ||
| − | |Step_Title=<translate></translate> | + | |Step_Title=<translate>Fit brace 3</translate> |
| − | |Step_Content=<translate> | + | |Step_Content=<translate>Fit D0015514 at final position . Add M8 motor plate washer as spacer as shown</translate> |
| − | + | |Step_Picture_00=R0015268_Pneumatic_module_Test_Screenshot_2023-12-11_111845.png | |
| − | + | |Step_Picture_01=R0015268_Pneumatic_module_Test_Screenshot_2023-12-11_111852.png | |
| − | + | |Step_Picture_02=R0015266B_mount_completed_assemblies_photorequired.png | |
| − | |||
| − | |||
| − | |||
| − | |||
| − | | | ||
| − | |||
| − | |||
| − | | | ||
| − | | | ||
}} | }} | ||
{{Notes}} | {{Notes}} | ||
{{PageLang | {{PageLang | ||
| + | |Language=en | ||
|SourceLanguage=none | |SourceLanguage=none | ||
|IsTranslation=0 | |IsTranslation=0 | ||
| − | |||
}} | }} | ||
{{Tuto Status | {{Tuto Status | ||
|Complete=Draft | |Complete=Draft | ||
}} | }} | ||
Version actuelle datée du 11 décembre 2023 à 12:19
Instructions for performing pneumatic test on completed module
Sommaire
- 1 Introduction
- 2 Étape 1 - Prepare area for testing
- 3 Étape 2 - Connect mains air supply
- 4 Étape 3 - check home positions
- 5 Étape 4 - Test Y154 output
- 6 Étape 5 - Test Y157 Output
- 7 Étape 6 - Test Y375 Output
- 8 Étape 7 - Disconnect air supply
- 9 Étape 8 - Fit brace 1
- 10 Étape 9 - Fit brace 2
- 11 Étape 10 - Fit brace 3
- 12 Commentaires
Introduction
Tools Required
Parts Required
D0015513 Arm brace x 2
D0015514 Arm brace x 1Étape 1 - Prepare area for testing
Ensure area is clear and free from personnel
Étape 2 - Connect mains air supply
Connect mains air supply and check for any leaks present is components natural state
Étape 3 - check home positions
Check home positions are correct in natural state
Loader wheel Y154 should be up away from roller beds in home position
Roller beds Y157 should be in the up position in home position
Blowers Y375 should be switched off in the home position
Étape 4 - Test Y154 output
On valve bank, manually fire Y154 output.
Check for air leaks when output is fired
Check regulator shows pressure when fired by increasing pressure with adjusted .Once confirmed correct operation, a djust regulator to 1 bar or 0.1 mpa
Étape 5 - Test Y157 Output
On valve bank, manually fire valve Y157 roller lift output
All rollers should drop down into position. When fired, check there are no air leaks present in the active position
Étape 6 - Test Y375 Output
Manually fire Y357 output Check each blowers flow regulator can adjust flow rate when turned . Once confirmed , fully close flow regulator and wind out 2 turns
Étape 7 - Disconnect air supply
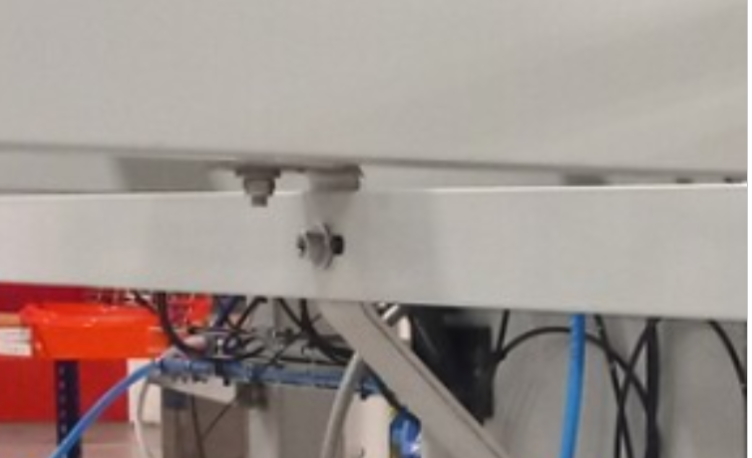
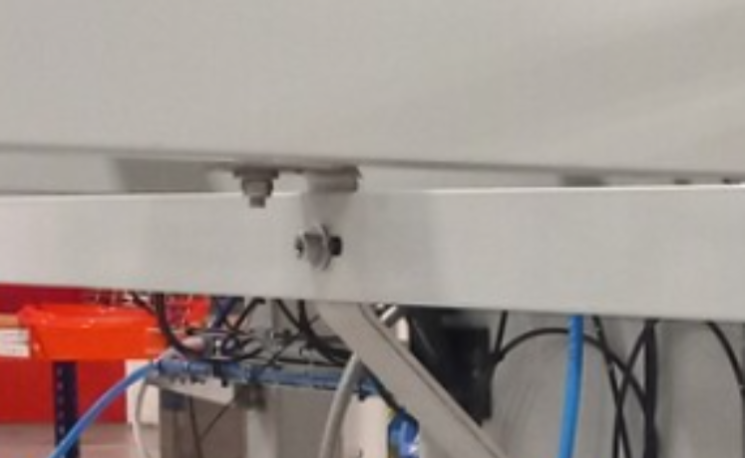
Étape 8 - Fit brace 1
Fit D0015513 at load motor end of frame .
Use M8 x 35 socket caps, M8 motor plate washers and M8 nyloc nuts .
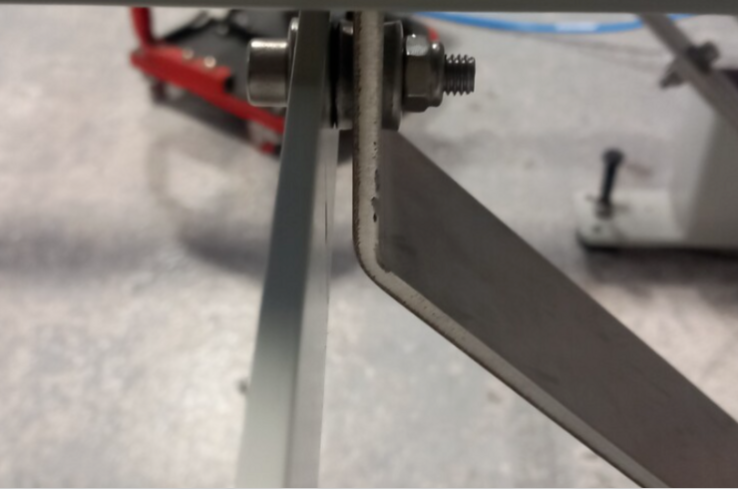
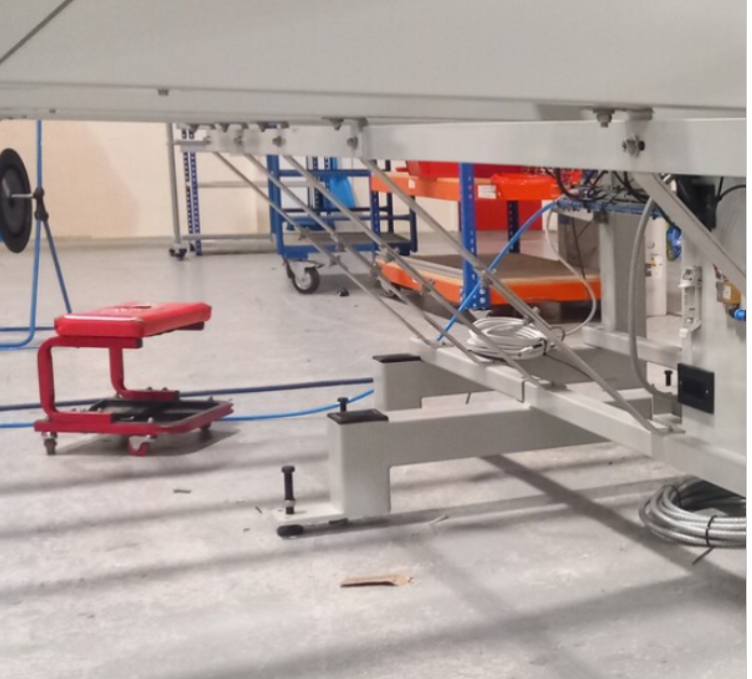
Étape 10 - Fit brace 3
Fit D0015514 at final position . Add M8 motor plate washer as spacer as shown
Draft


 Français
 English
 Deutsch
 Español
 Italiano
 Português