This is a step-by-step instruction manual for adding new profiles on an Autocut Saw

Difficulté
Facile
Durée
5 minute(s)
Étape 1 - Check Profile Dimensions
Firstly, we need to make sure that the profile will physically go through the machine, open the top gaurd door. Ideally, you will have a 1 metre offcut of the profile - work out the best way for the profile to go through the machine. Push the profile through the machine by hand to ensure no catching areas etc.
Étape 2 - Check if Centralising Mode Needed
Place the offcut in the machine, just under the saw top clamp. Now using the IO menu we are going to determine whether this profile wants to be cut normally or centralised and whether we require Z support blocks or not.
Through the winSaw software press '[F6] Service' - we need to make sure we can clamp the profile with no issues. We will clamp the profile like we would when cutting normally. Press '[Y6] Side Clamp' and '[Y32] Saw Clamp'. If the profile clamps ok, goes through without catching anything and does not tip - this profile is ready to be added to the machine.
Étape 3 - Set Z Support (if required)
If the profile did tip over: If tipped over it is most likely a 'Z' shaped profile - this means it will require an additional support, a small support block that comes out from the backfence to prevent the profile tipping.
We have a turret system which allows up to 4 different rebate settings.
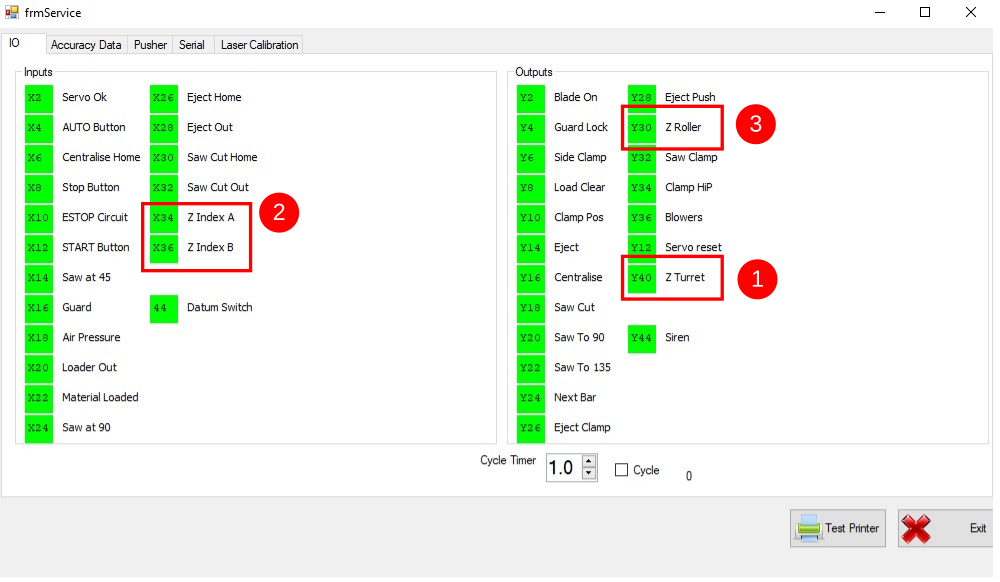
Bring the Y40 Z turret to position number 1. This is done by turning the output (1) on (red) then off again (green) - this will move the Z turret system one position, use this table below to work out what position you are on:
| Position | X34 Z Index A | X36 Z Index B |
|---|---|---|
| 1 | Off | Off |
| 2 | On | Off |
| 3 | Off | On |
| 4 | On | On |
Use the Y30 Z support output (3) to fire the Z support blocks from the rear.
Test your profile on each one in turn, find one that is suitable and note the support number (1-4). If none are suitable - you can adjust an unused one
Étape 4 - Adjusting an unused Z Support
adjust the Z supports by winding the top bolt in/out on
the Z turret. Once a Z turret position is determined, this profile is ready to be added to the machine.
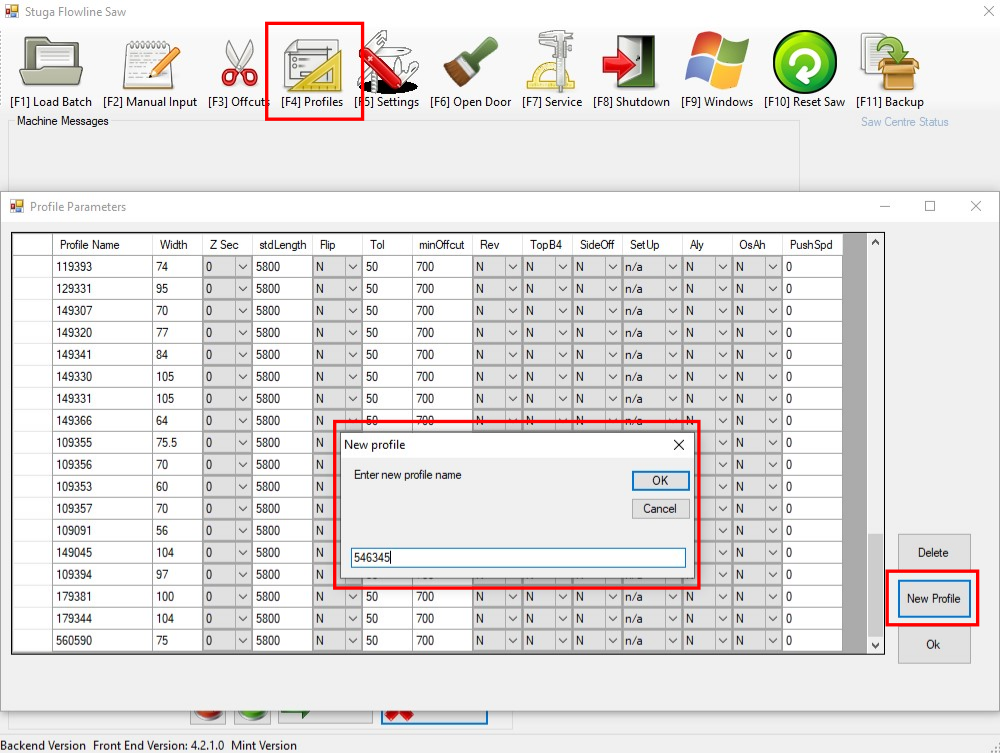
Étape 5 - Add Profile
- '[F4] Profiles' and press 'New Profile', type in the profile code and press ok
- Scroll to the bottom to find your added profile
- Enter the width of the profile, and the Z Support number from the Z axis tests (if required)
If you want the profile to be "centralised" when clamping, add the name of the profile to a new line in the file names "Central.saw"
Draft
 Français
 English
 Deutsch
 Español
 Italiano
 Português